2haohr as an Identity Source
# Overview
IDaaS supports importing user and organizational information into the IDaaS platform through various identity source channels. This article explains how to configure the 2haohr identity source in the IDaaS platform to synchronize organizational and user data.
# Prerequisites
- Have administrator privileges for the 2haohr Open Platform.
- Have administrator privileges for the IDaaS Enterprise Center platform.
# Configuration Process

# Steps
# Obtain Parameters from 2haohr
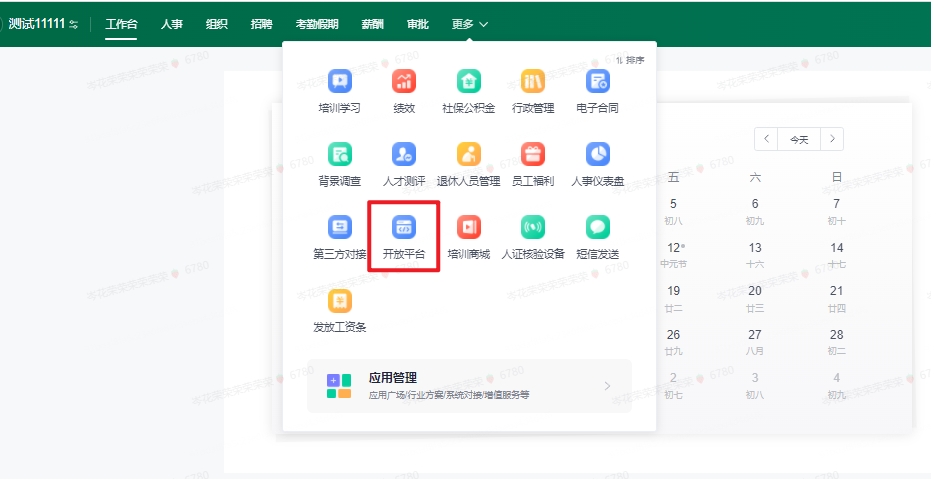
Log in to the 2haohr Enterprise Center (opens new window) and enter the Open Platform.
On the Open Platform page, obtain the corpID and corpSecret.

# Configure 2haohr Identity Source in IDaaS
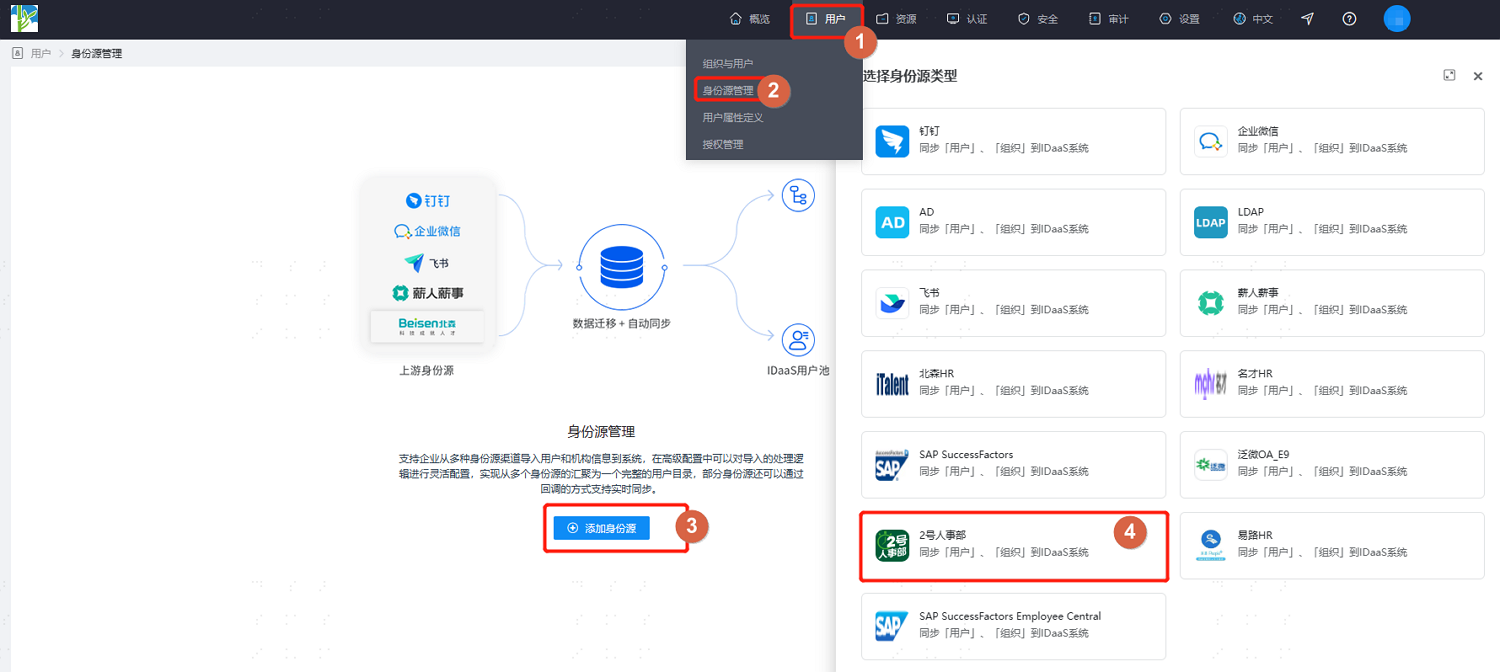
Log in to the IDaaS Enterprise Center platform. In the top navigation bar, select "Users > Identity Source Management," click "Add Identity Source," and choose the "2haohr" identity source.
Customize the identity source name. Fill in the Enterprise ID and Enterprise Secret as prompted by the interface. After configuration, click "OK" to save.
Navigate to the details page of the newly added identity source to view and update the "Basic Configuration" of the 2haohr identity source, including connection parameters and synchronization mechanisms.

Switch to the "Advanced Configuration" tab. It is recommended to keep the default settings or fill them in according to actual needs.
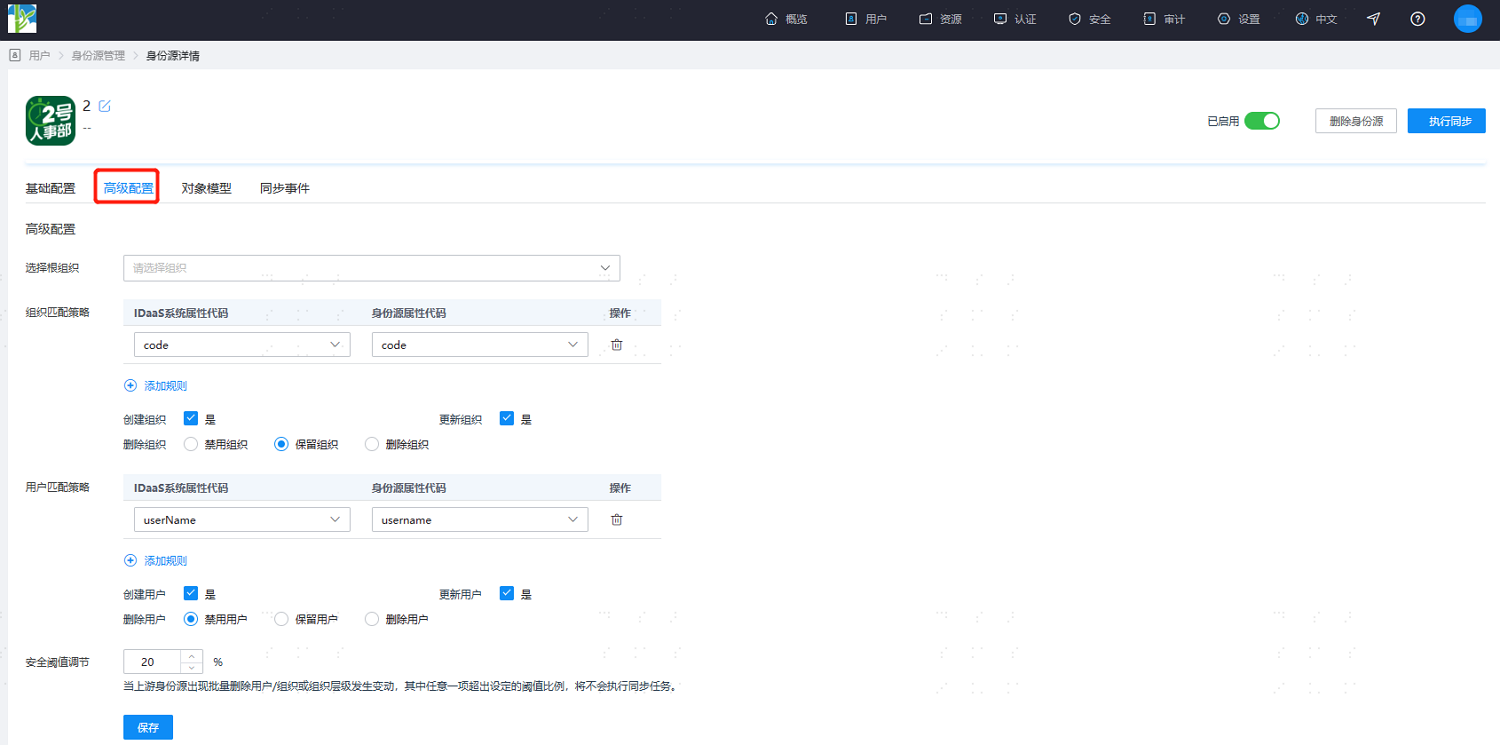
Parameter Description Select Root Org Select an organizational node in IDaaS to serve as the root node for the synchronized 2haohr organizations. Org Matching Strategy By default, the organization code in IDaaS is associated with the institution code in 2haohr. Create Organization Default is Yes. Update Organization Default is Yes. Delete Organization Default is to retain the organization (i.e., if an organization is deleted in 2haohr, it is retained in IDaaS). Also supports disabling or deleting the organization. User Matching Strategy By default, the user's mobile number and username in IDaaS are associated with the user's mobile number and username in 2haohr. Create User Default is Yes. Update User Default is Yes. Delete User Default is to disable the user (i.e., if a user is deleted in 2haohr, the user is disabled in IDaaS). Also supports retaining or deleting the user. Security Threshold Adjustment Set the maximum threshold percentage for changes such as user deletion, organization deletion, or organizational hierarchy changes in the upstream identity source.
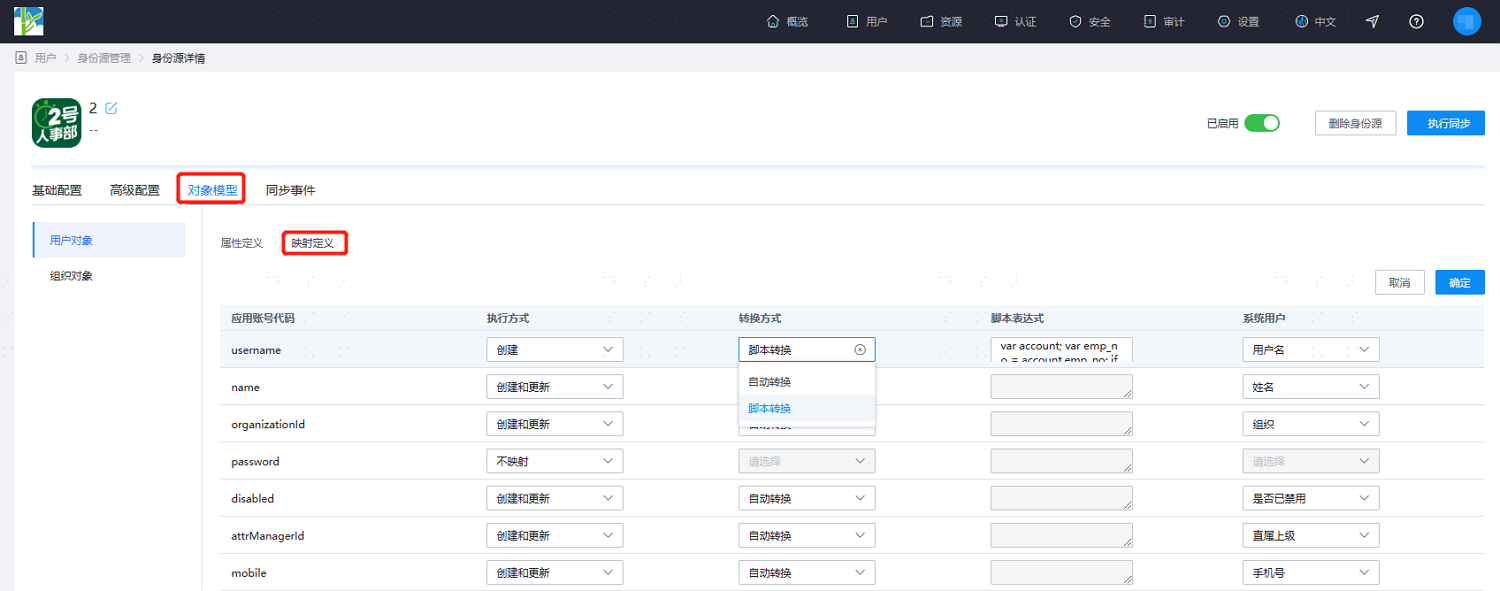
Threshold = (Difference between platform recovered data and this recovery's data / Recovered data) * 100%. When the upstream identity source application disables/deletes data exceeding the set threshold, the platform will not perform disable/delete operations upon receiving the instruction.After configuration, switch to the "Object Model" tab and select "Mapping Definition." Configure the mapping relationship between the attributes of organizations and users in 2haohr and the attributes of organizations and users in IDaaS according to the actual project requirements.
The object model supports mapping the attributes of users and organizations from the 2haohr identity source to the attributes of users and organizations in IDaaS. After configuration, user and organization attributes are retrieved from 2haohr to the corresponding attributes in IDaaS.
- Execution Mode: Set under which circumstances the attribute needs to be mapped.
- No Mapping: This attribute will not be synchronized to IDaaS.
- Create: The attribute is synchronized only during creation.
- Update: The attribute is synchronized only during updates.
- Create and Update: The attribute is synchronized during both creation and updates.
- Conversion Mode: Set the method for attribute mapping.
- Automatic Conversion: The value from the identity source is synchronized as-is.
- Script Conversion: Use this method to transform values from the identity source if they do not meet the required format. Refer to Script Mapping Method.
- Execution Mode: Set under which circumstances the attribute needs to be mapped.
After configuration is complete, click "Execute Synchronization" to immediately perform the synchronization operation.
If the synchronization mechanism in the basic configuration is set to scheduled synchronization, manual execution of synchronization tasks is not required here.
After execution is complete, switch to the "Synchronization Events" page to view all synchronization tasks for this identity source. Click "Details" under the "Operation" column of a synchronization task to view the import results, or go to the "Users > Users and Organizations" page to view the imported data.