User-Based Authorization
# Overview
This chapter will guide you on how to authorize users, which includes granting users access accounts to application systems and granting operation or data permissions within those application systems to the accounts. Authorizing application permissions for users can be done by operating within the application as an application administrator, or by operating within the user management as a user administrator.
# Prerequisites
- Have administrator permissions for the IDaaS Enterprise Center platform.
- Have already created an application and enabled the authorization model.
# Application Administrator Authorizing Users
# Accessing the User-Based Authorization Interface
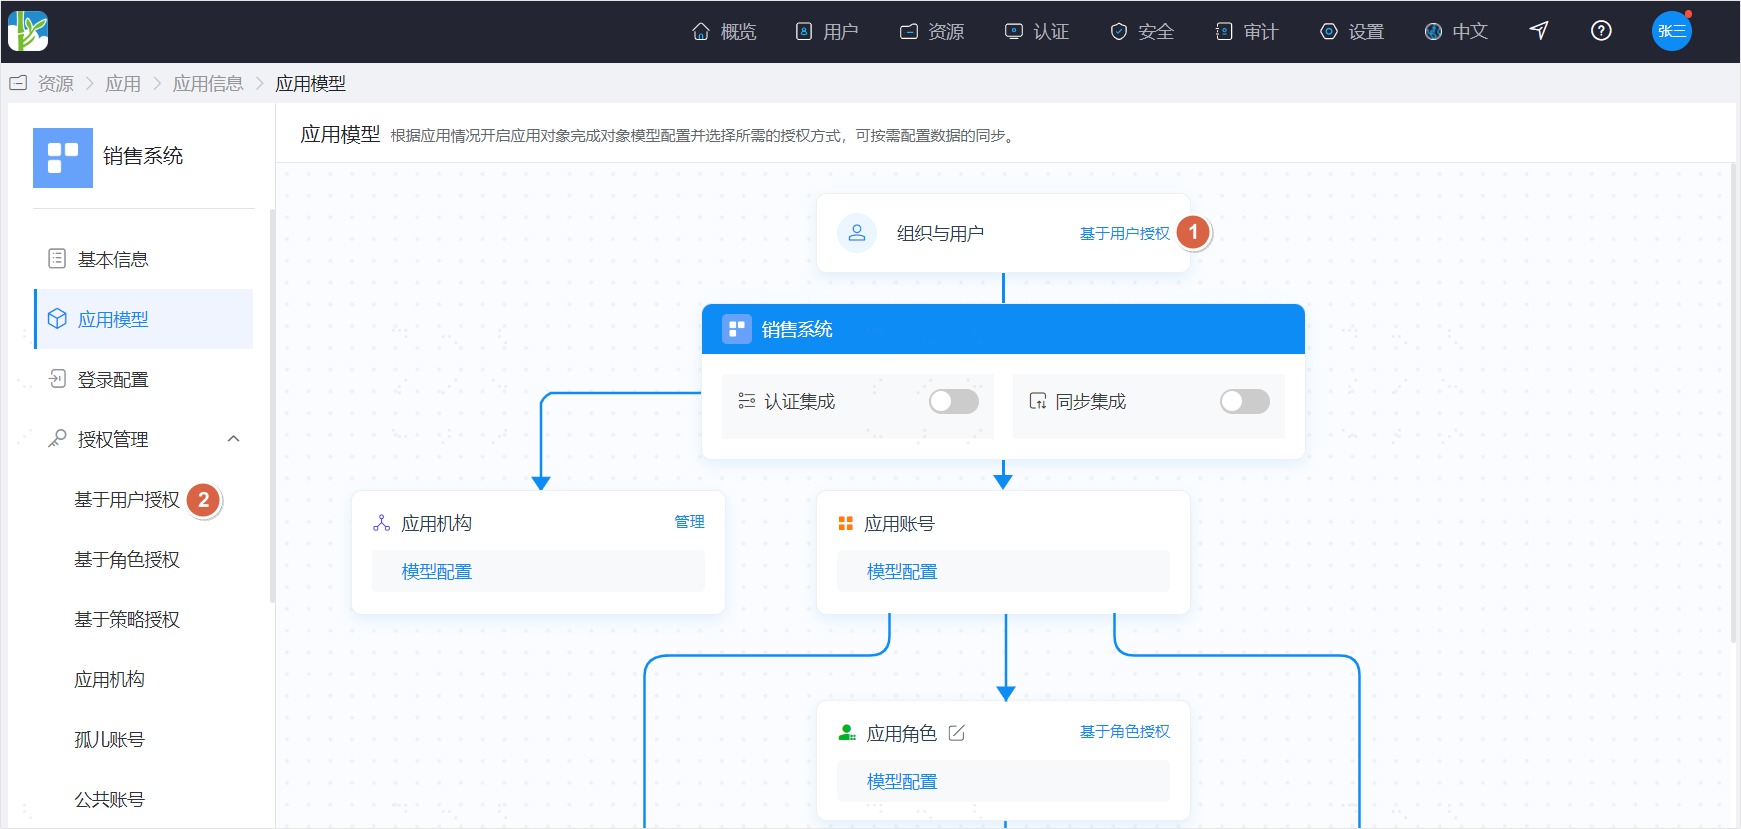
First, enter the application details page. There are two ways to open the user-based authorization page:
- Click the "User-Based Authorization" operation on the organization and users section within the application model.
- Open "Authorization Management" from the left navigation menu and click "User-Based Authorization".
# Adding Application Authorization
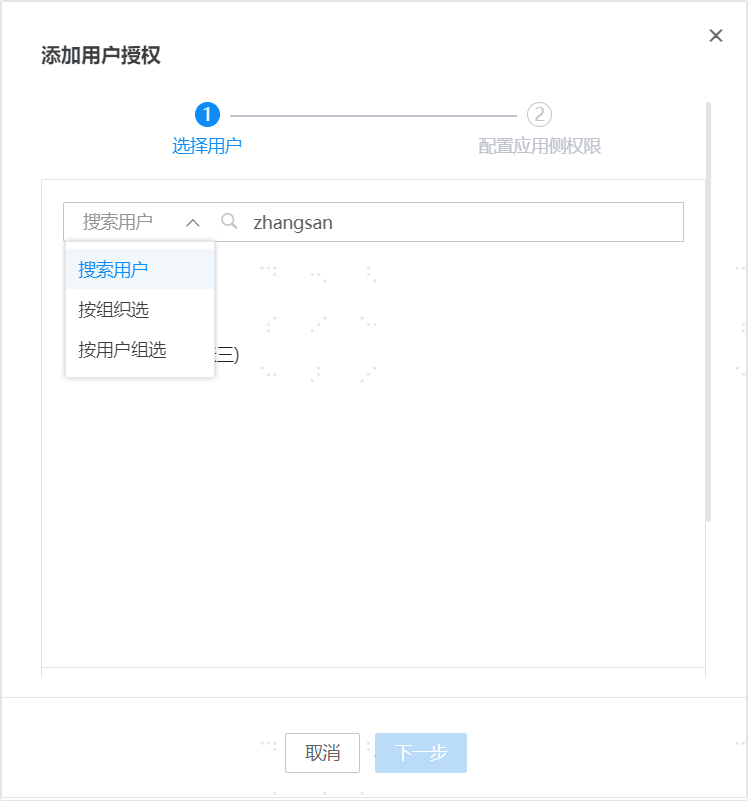
Click the "Add User Authorization" operation at the top of the User-Based Authorization page to open the addition page. Adding authorization is divided into two steps:
- Select the user(s) to be authorized.
- Search for users: Search by username/name/mobile number/email.
- Select by organization: Batch select users according to the organizational structure.
- Select by user group: Batch select users according to user groups.
- The three selection methods can be used simultaneously.
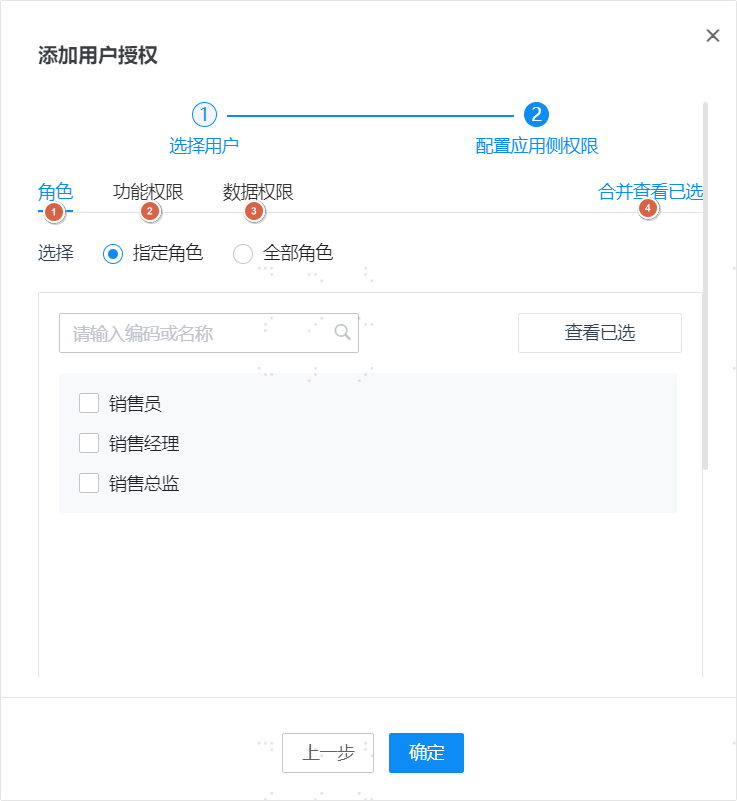
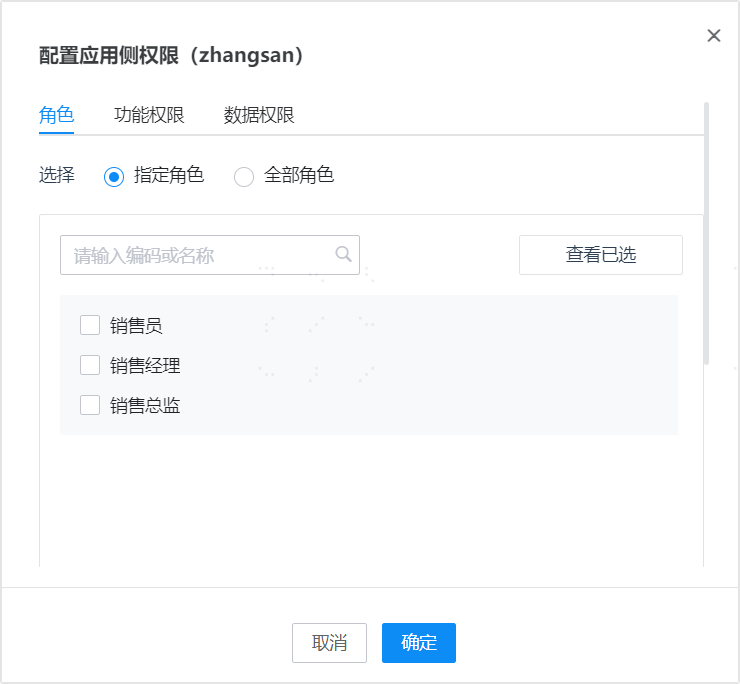
- Configure application-side permissions for the user(s).
- Roles: Assign roles to users when the RBAC (Role-Based Access Control) model is enabled.
- Functional permissions: Assign functional permissions to users when the ACL (Access Control List) model is enabled and functional permissions are activated.
- Data permissions: Assign data permissions to users when the ACL model is enabled and data permissions are activated.
- Merge and view selected: When multiple models are enabled simultaneously, you can check all functional/data permissions a user ultimately possesses via "Merge and View Selected".
Additionally, through the "Permission Copy" operation at the top of the page, you can quickly copy one user's permissions to another user.
# Modifying Application Authorization
After assigning permissions to a user, if adjustments are needed, you can click "Application-Side Permissions" in the operation column of the compliant account list to modify them.
# User Administrator Authorizing Users
# Accessing the User Authorization Page
Find "Users - Organization and Users" in the top menu. After entering the page, click "Application Authorization" in the operation column on the right side of the user list.
# Adding Application Authorization
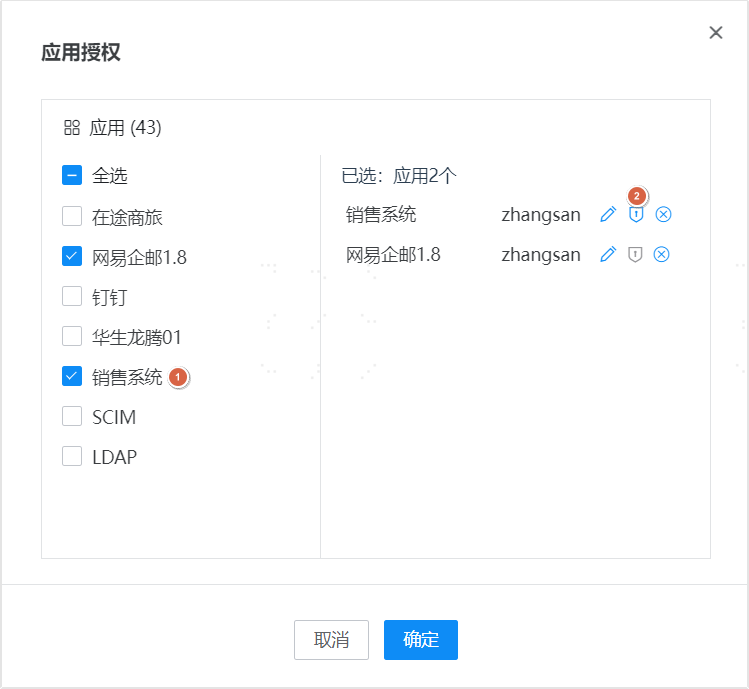
- Click "Add Application Authorization" on the page to open the authorization addition page. The left side of the page displays applications for which the user is not authorized.
- Authorizing a user is divided into two steps:
- Select the application(s) to be authorized. Multiple applications can be selected at once. The user will generate an application account in each authorized application. The right side of the page allows editing/authorization operations for each application's account.
- Click the "Authorize" operation to enter the "Configure Application-Side Permissions" page, where you can assign the user's permissions within the current application.
# Modifying User Permissions
After assigning permissions to a user, if adjustments are needed, you can click "Application-Side Permissions" in the operation column of the authorized application list to modify them.