Configuring the WeCom Approval Engine
# Overview
This chapter introduces the configuration process for the WeCom engine.
# Prerequisites
Have administrator permissions in the WeCom backend.
Have administrator permissions in the IDaaS Enterprise Center platform.
# Steps
# Configuring the WeCom Approval Engine in the IDaaS Platform
Log in to the IDaaS Enterprise Center platform, select "Settings > Approval Flow Settings > Enable WeCom Approval Flow" from the top navigation bar.
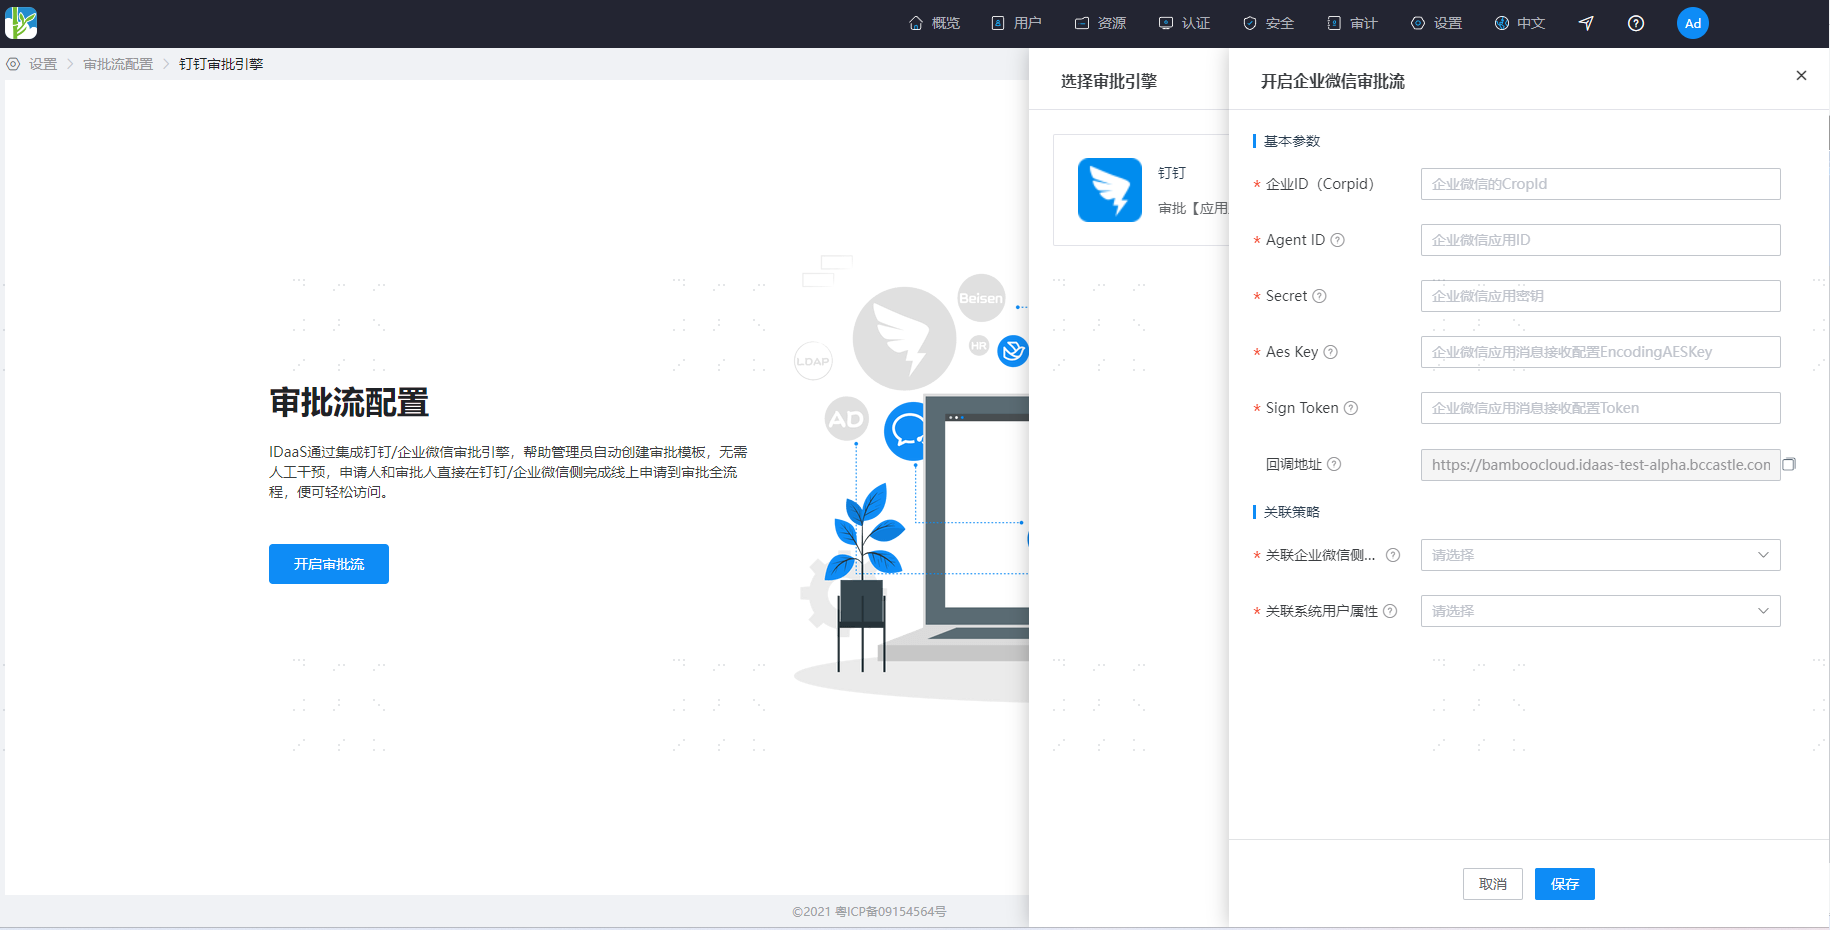
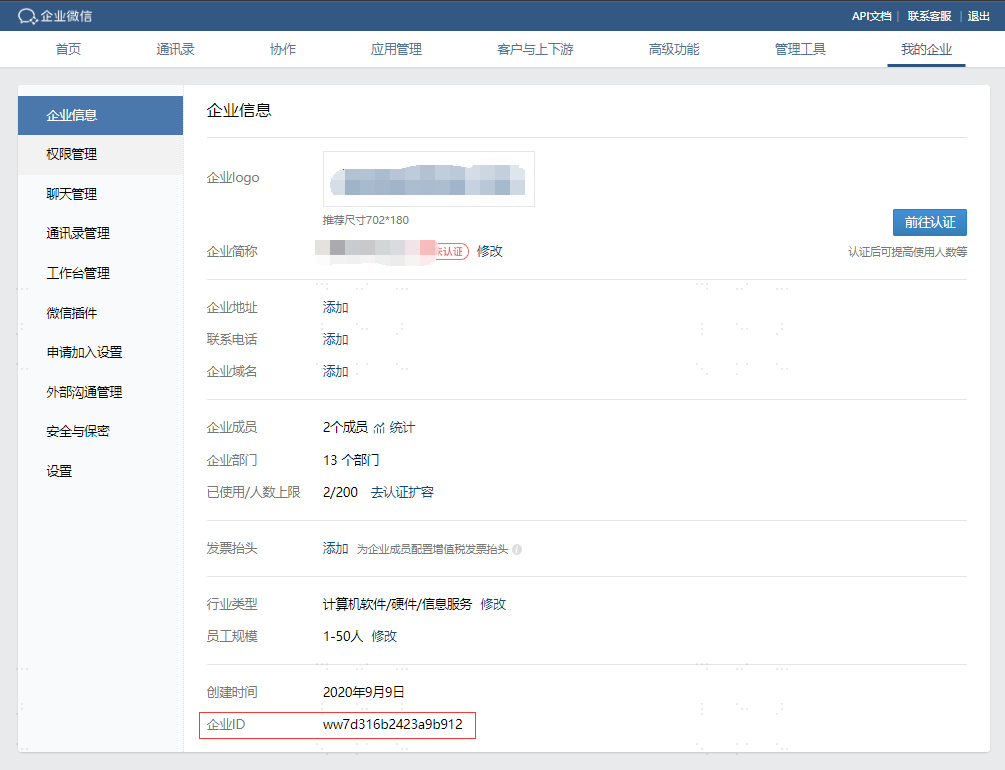
- Corporate ID (CorpId): Log in to the WeCom Management Backend (opens new window), and obtain the WeCom Corporate ID at the bottom of the "My Company > Company Information" page.
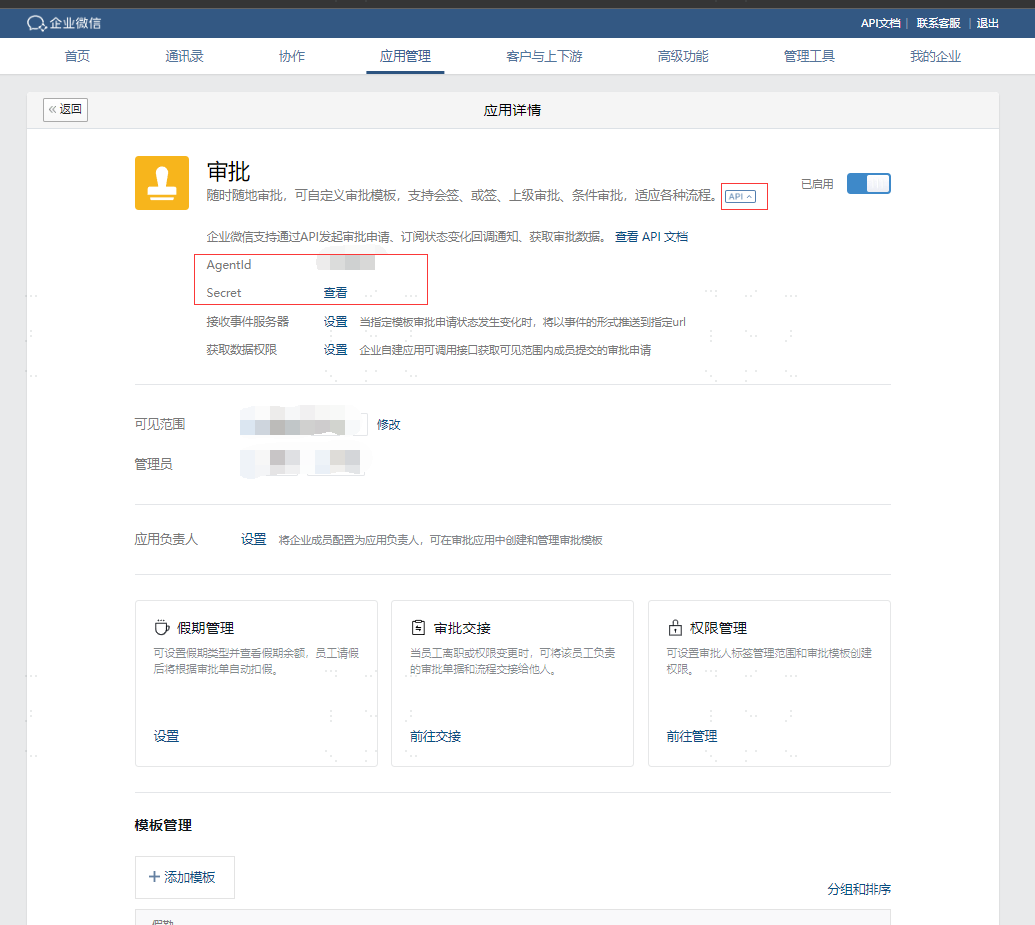
- Agent ID, Secret: The application ID for the WeCom "Approval" app. In the WeCom Management Backend "Application Management > Applications > Approval" application details page, click "API" to display the Agent ID and secret parameters. The Secret parameter needs to be viewed within the WeCom client.
- Aes Key, Sign Token: In the WeCom "Approval" application details page, click "Receive Event Server Settings" to enter the callback address configuration interface. Click the "Randomly Generate" button next to the "Token" and "EncodingAESKey" parameters to generate the corresponding parameters.
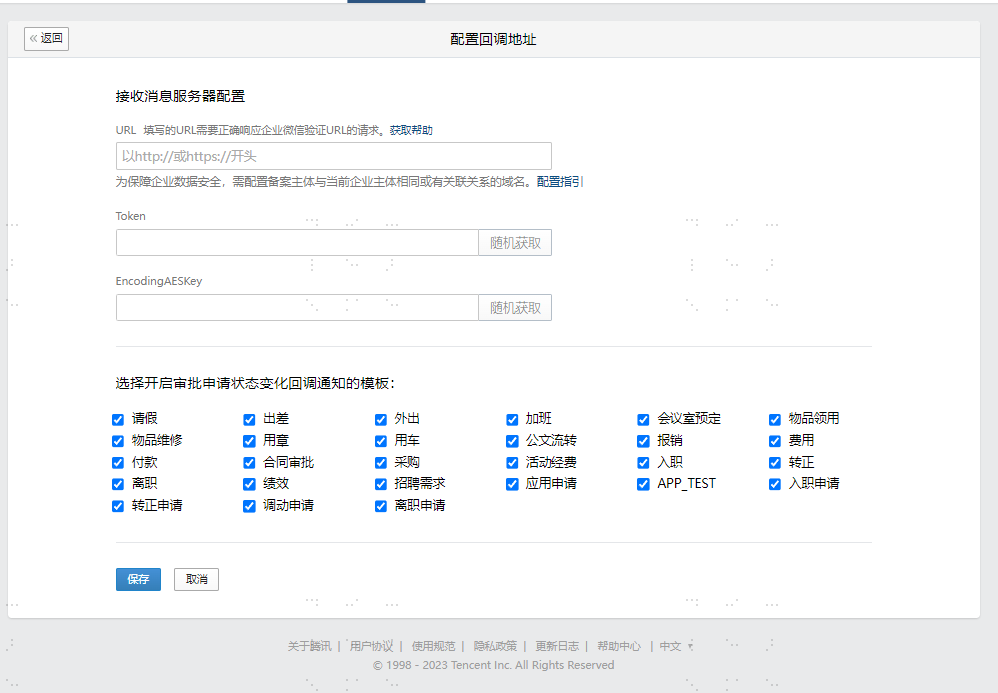
- Callback Address: The address where IDaaS receives WeCom approval callback notifications. It needs to be configured in the URL address of the "Receive Message Server Configuration" for the WeCom "Approval" application. This parameter must be configured in the WeCom Management Backend only after completing the IDaaS configuration.
Associated WeCom Side Attribute: The user field on the WeCom side when associating IDaaS users with WeCom. Only
userIdcan be configured.Associated System User Attribute: The user field on the IDaaS side when associating IDaaS users with WeCom. Administrators need to pre-configure the WeCom user ID into this field of the IDaaS user. This can be done by ensuring consistency with the WeCom user ID during import or user creation. The WeCom user ID can be obtained from the account field in the "Contacts > Member Details" page of the WeCom Management Backend.
# Configuring the Callback Address in WeCom
- Log in to the WeCom Management Backend (opens new window). Navigate to "Application Management > Applications > Approval Application > API > Receive Event Server" to enter the callback address configuration interface. The callback address is displayed in the general configuration of the IDaaS WeCom approval settings and can be directly copied and pasted into WeCom, then saved.