Managing Application-Side Roles, Permissions, and Resources
# Overview
Application-side role, permission, and resource management belong to the deep integration between the application and IDaaS. The IDaaS platform provides an application-side permission function module, establishing a set of role, permission, and resource models originally defined by the application system within the platform-integrated applications. When users authenticated through IDaaS log in and carry role or permission information back to the application system, the application system can display resources or functions accessible to the user based on this information.
- The implementation of this feature involves the development and modification of the application system.
- After editing the configuration information under "Application-Side Permissions," switching to other permission models is not supported. That is, if you selected "Role-Based Application Permission Management" and have already configured application roles, you are not allowed to change it to "Role, Permission, and Resource-Based Application Permission Management," and vice versa.
# Prerequisites
- Have administrator privileges for the IDaaS Enterprise Center platform.
- The application has been integrated into the IDaaS platform.
# Steps
# Role-Based Application Permission Management
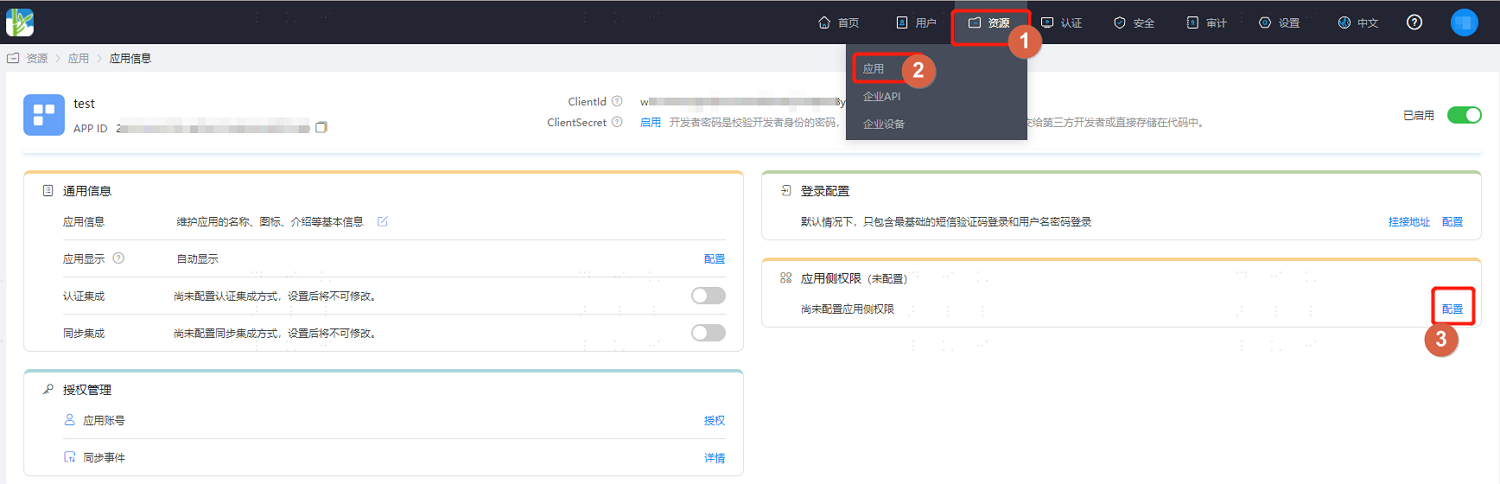
Log in to the IDaaS Enterprise Center platform, select "Resources > Applications" in the top navigation bar, enter the information page of the application to be managed, and click "Configure" after "Application-Side Permissions."
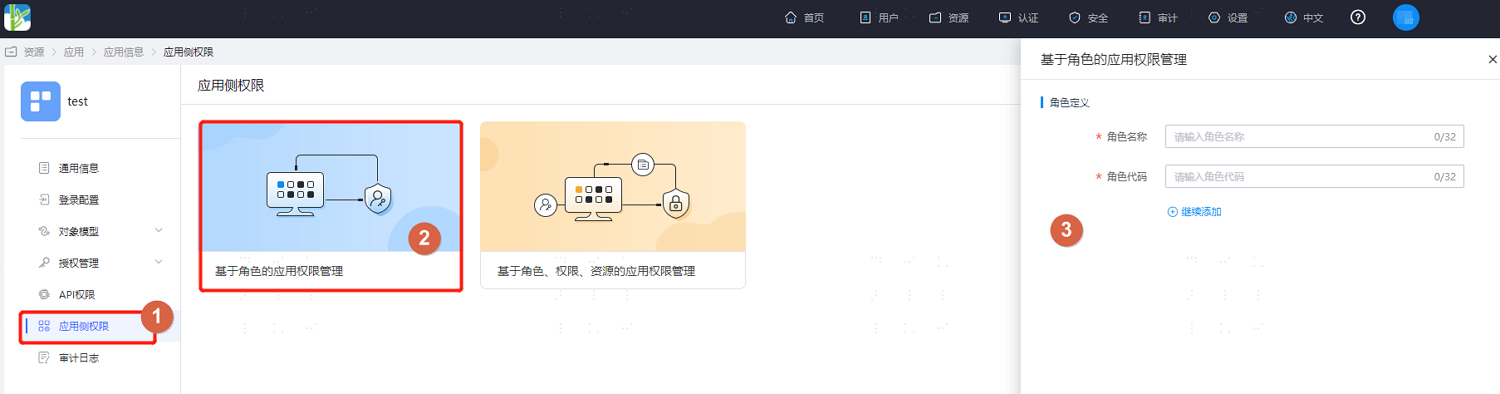
Enter the Application-Side Permissions page, select "Role-Based Application Permission Management," define application roles, and support adding multiple roles.
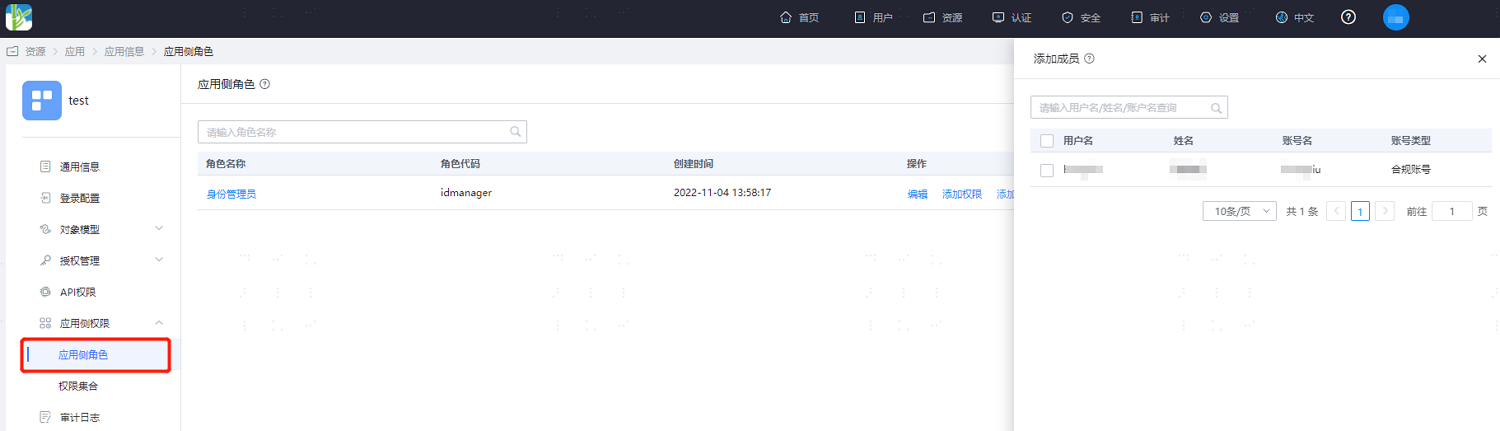
After the roles are defined, the page displays all roles on the application side. Click "Add Members" under the "Actions" column of a role to assign accounts already authorized for this application to the selected role.

It is supported to configure multiple roles for an application account, but enabling one-to-many between accounts and roles is irreversible. Once enabled, multiple roles can be configured for one account.
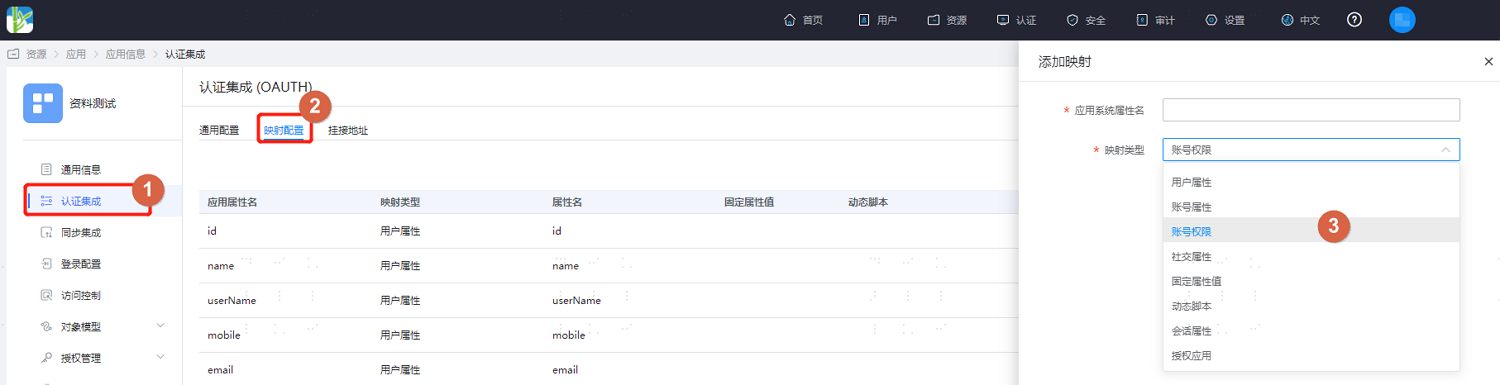
Switch to the "Authentication Integration" tab, select "Mapping Configuration," click "Add Mapping," customize the application system attribute name, and select "Account Permissions" for the mapping type.
Click "Test," enter an account already authorized for this application, and view the attribute list after testing.
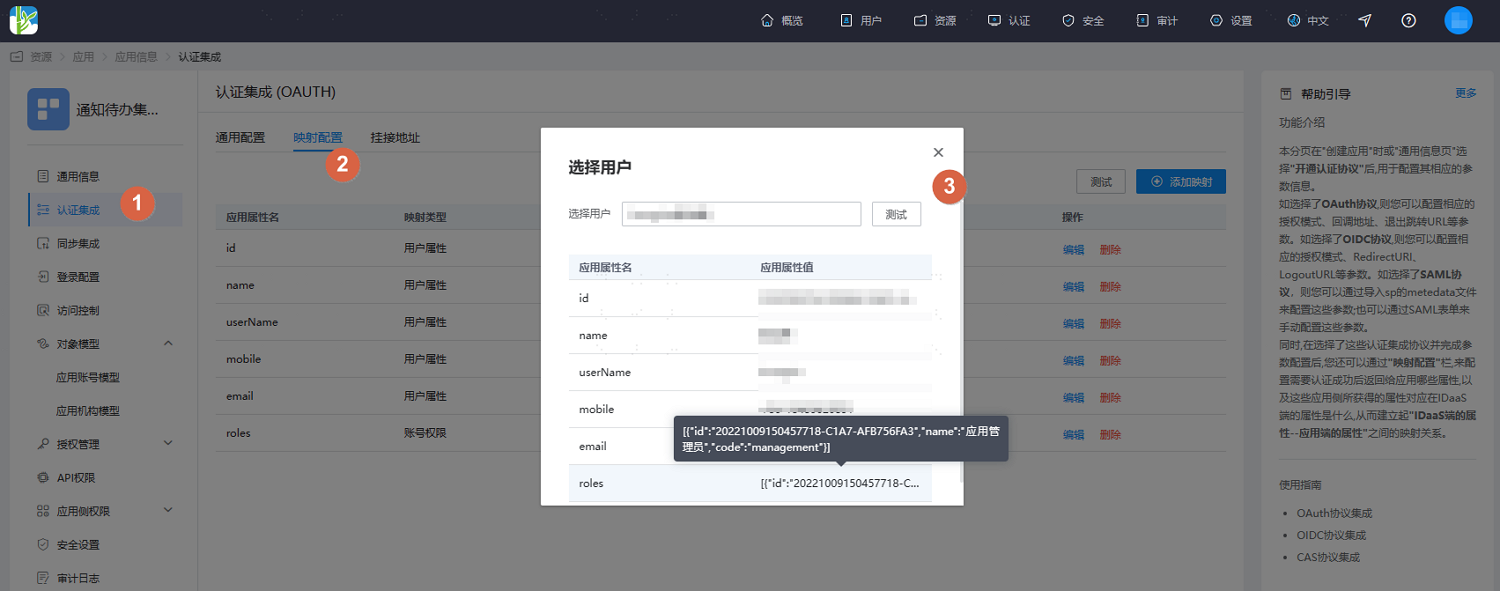
- The application system controls the display of the account's corresponding role permissions based on the attribute value returned by the IDaaS platform in the
roles(custom attribute) field. If the account is not assigned an application role, this attribute value will be empty here. - The attribute names, role codes, etc., for the data need to be agreed upon in advance by the application side.
- The application system controls the display of the account's corresponding role permissions based on the attribute value returned by the IDaaS platform in the
# Role, Permission, and Resource-Based Application Permission Management
Log in to the IDaaS Enterprise Center platform, select "Resources > Applications" in the top navigation bar, enter the information page of the application to be managed, and click "Configure" after "Application-Side Permissions."
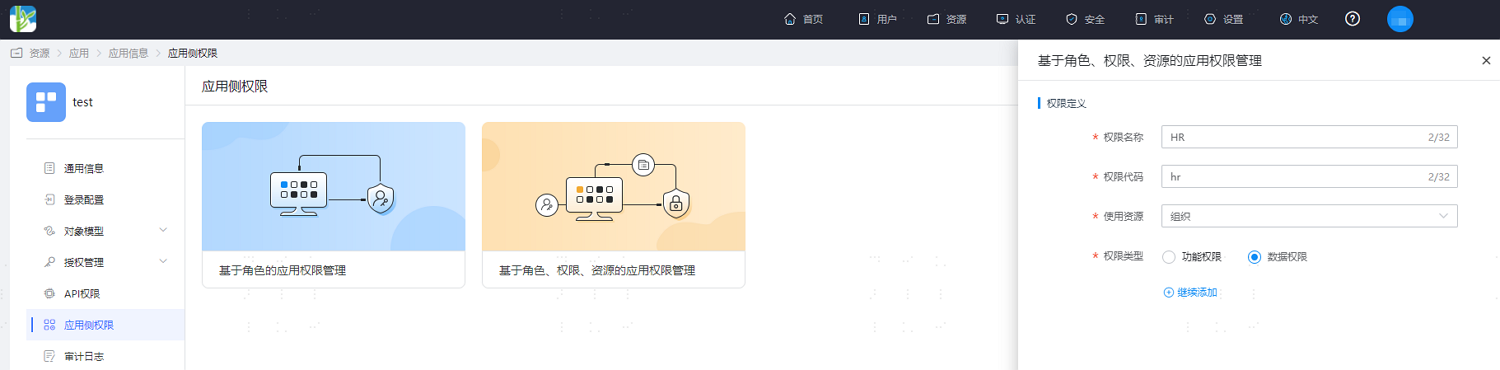
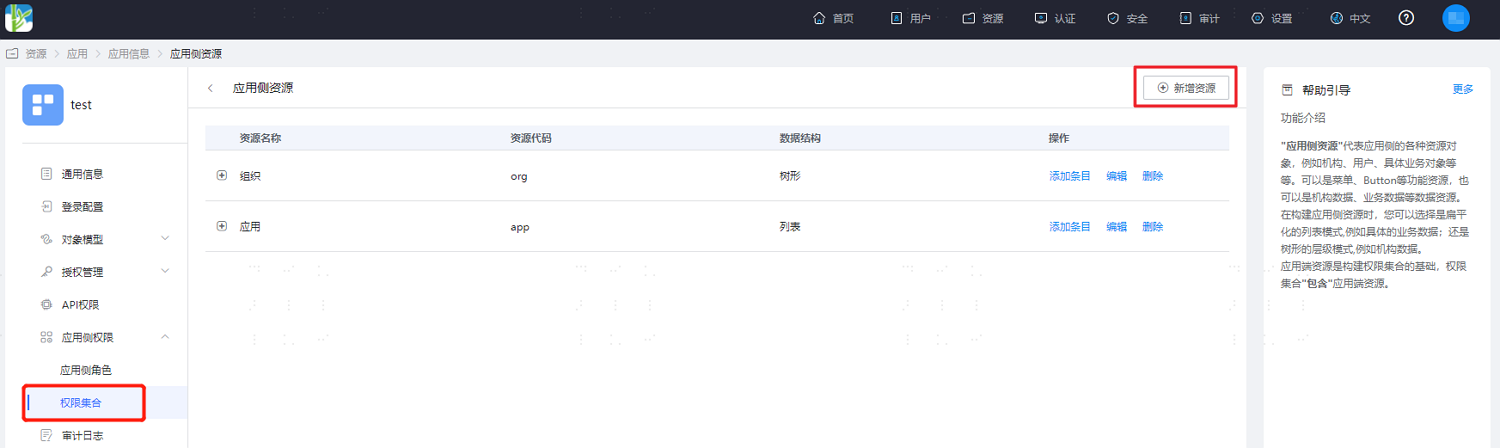
Enter the Application-Side Permissions page, select "Role, Permission, and Resource-Based Application Permission Management," define application resources, and support adding multiple resources.

After defining the resources, click "Next" to define corresponding permission information for the newly added application resources mentioned above.
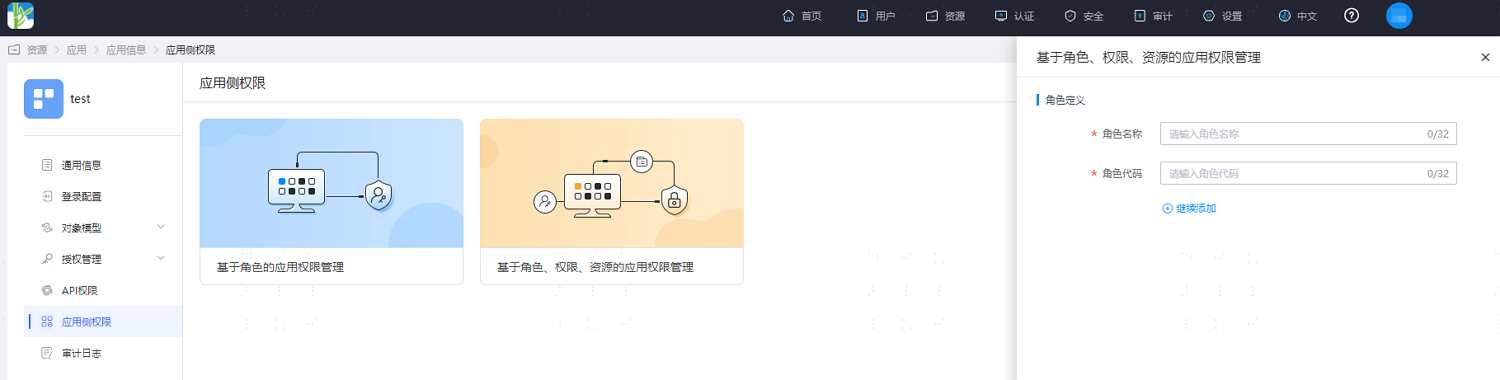
After defining the resources, click "Next" to define application roles, supporting the addition of multiple roles.
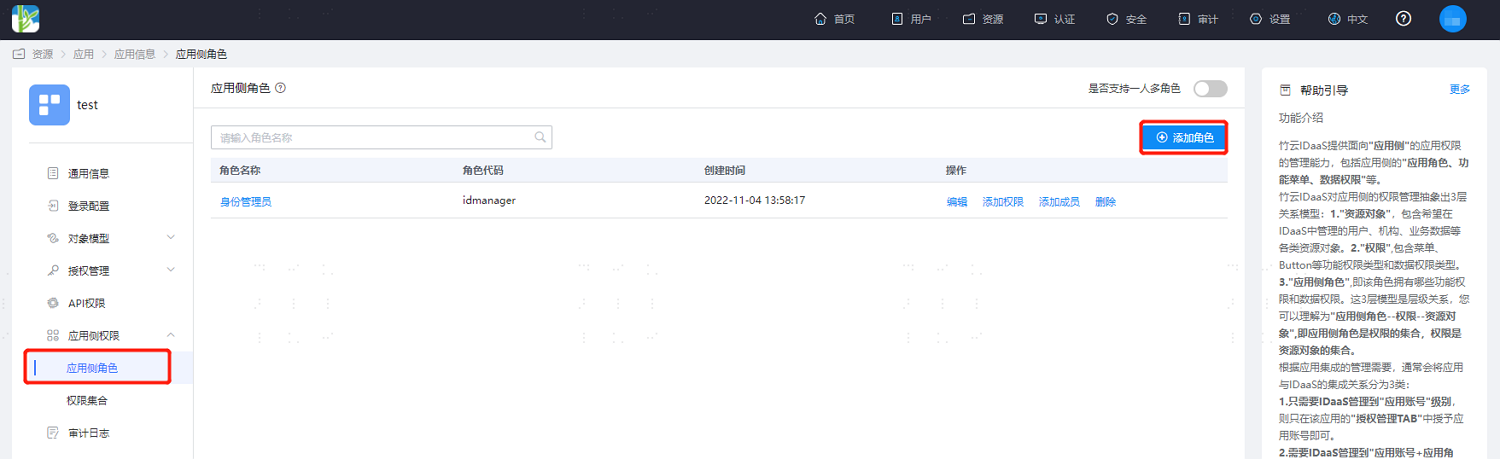
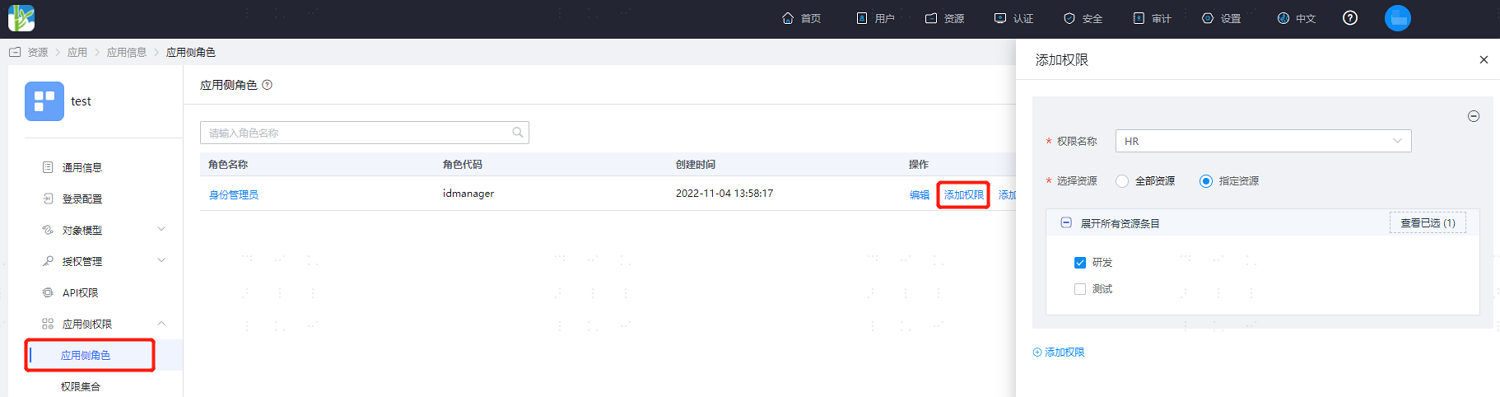
After the initial definition is completed, click "Application-Side Roles" under Application-Side Permissions to continue adding application roles, assigning application permissions to roles, and assigning accounts already authorized for this application to roles.
It is supported to configure multiple roles for an application account, but enabling multiple roles per person is irreversible. Once enabled, multiple roles can be configured for one account.
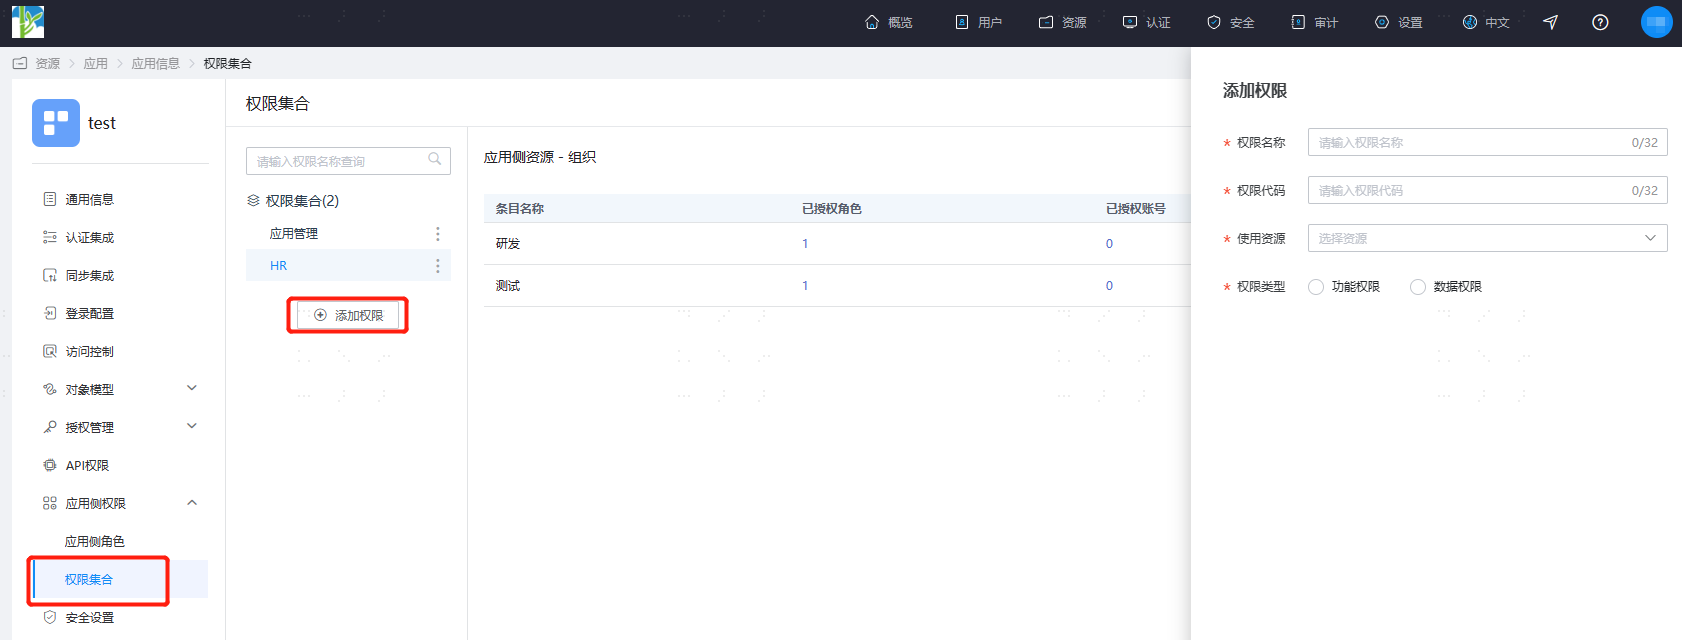
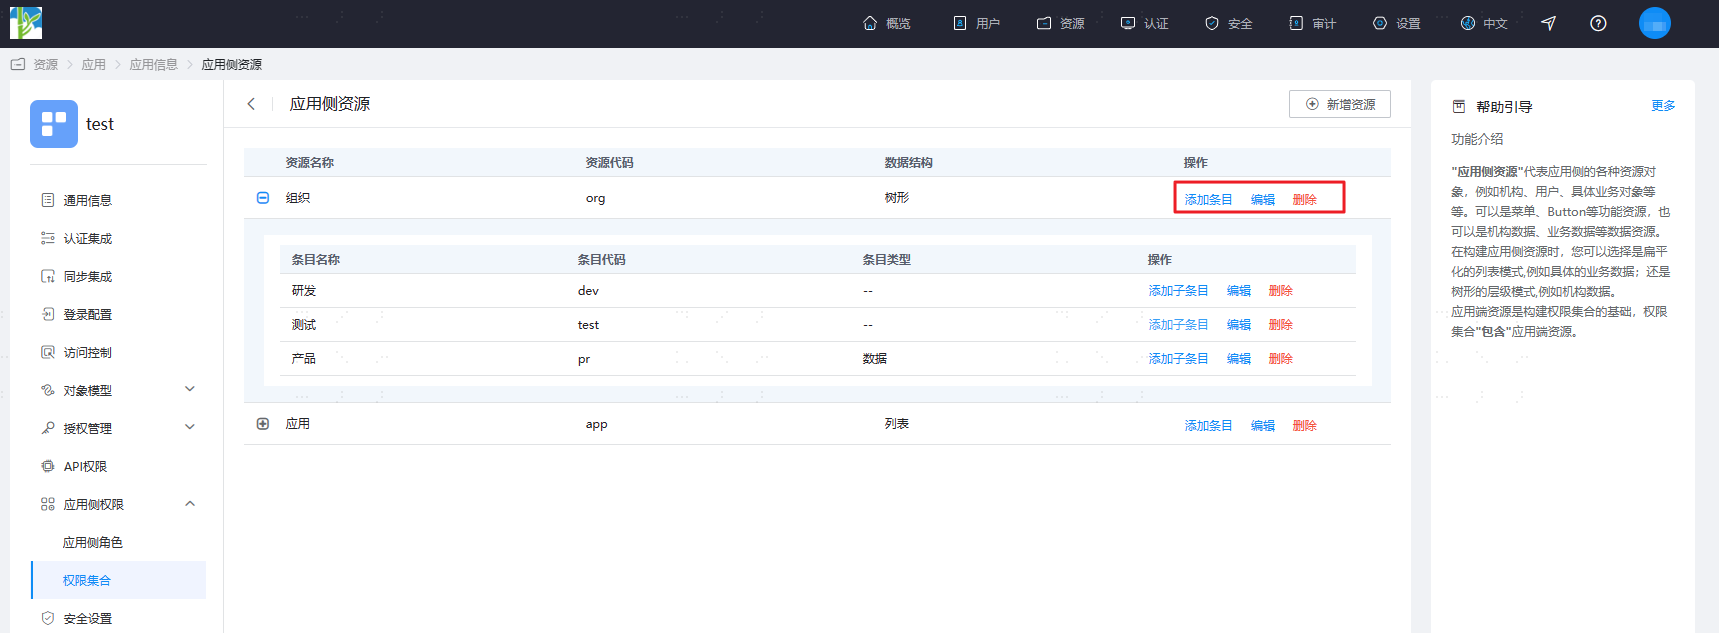
Under Application-Side Permissions, click "Permission Sets." The left side displays the application's permission collection, supporting the continued addition of permissions. Select a permission on the left, and the right side displays all items under that permission.
On the permission set page, click "Resource Management" to continue adding resources.
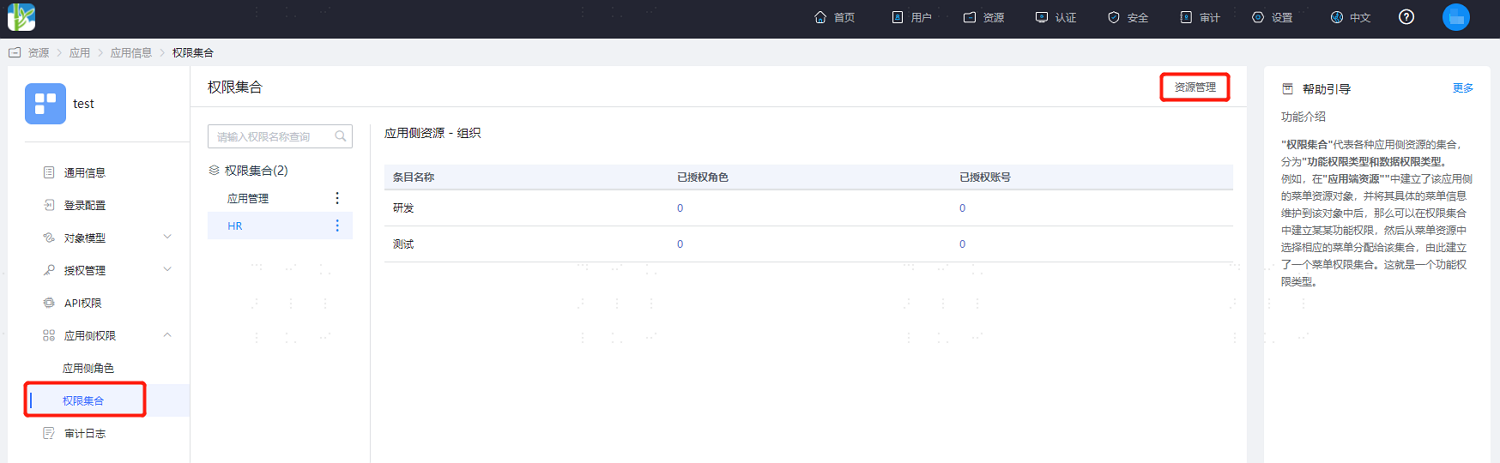
- In the left dropdown, select each permission to display all entry details for that permission, including name, code, and type. You can adjust the display order of each data column, and also add new entries for the selected permission, as well as update or delete existing entries.
- Switch to the "Authentication Integration" tab, select "Mapping Configuration", click "Add Mapping", customize the application system attribute name, and select "Account Permission" as the mapping type.

Click "Test", enter an account that has been authorized for this application, and view the attribute list after testing.
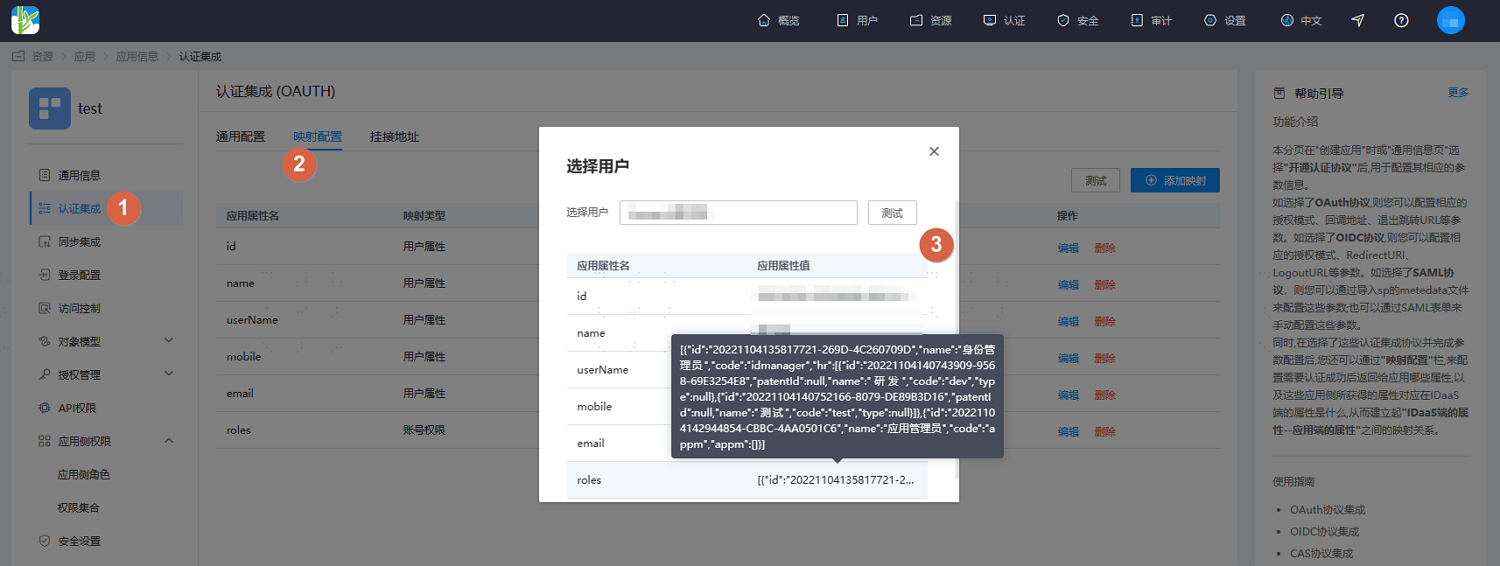
The application system controls the display of corresponding account permissions based on the IDaaS platform's returned
roles(custom attribute) value. The content of the returned attribute value is determined by the resources, permissions, and roles already assigned to the account. If the account has not been assigned an application role, the attribute value here will be empty.The attribute names, role codes, and other data need to be agreed upon in advance with the application side.