ZenTao Single Sign-On
# Description
This article describes two methods for configuring IDaaS to achieve single sign-on (SSO) with ZenTao:
Password-free login to ZenTao. Starting from ZenTao version 11.5.1, a feature for password-free login to ZenTao via third-party applications has been added. Reference Documentation (opens new window)
ZenTao CAS Plugin Plugin Address (opens new window). The plugin supports ZenTao Open Source versions 12.4, 12.53, and Enterprise version 4.1.3.
For Enterprise Edition plugin installation, choose the source code installation method. After downloading and extracting the plugin zip package, copy the files from the plugin's config and module directories to the corresponding directories in your ZenTao installation directory. After adding the plugin this way, it will not be visible in the plugin management backend, but it will not affect its functionality.
# Password-free Login Configuration
# ZenTao Configuration
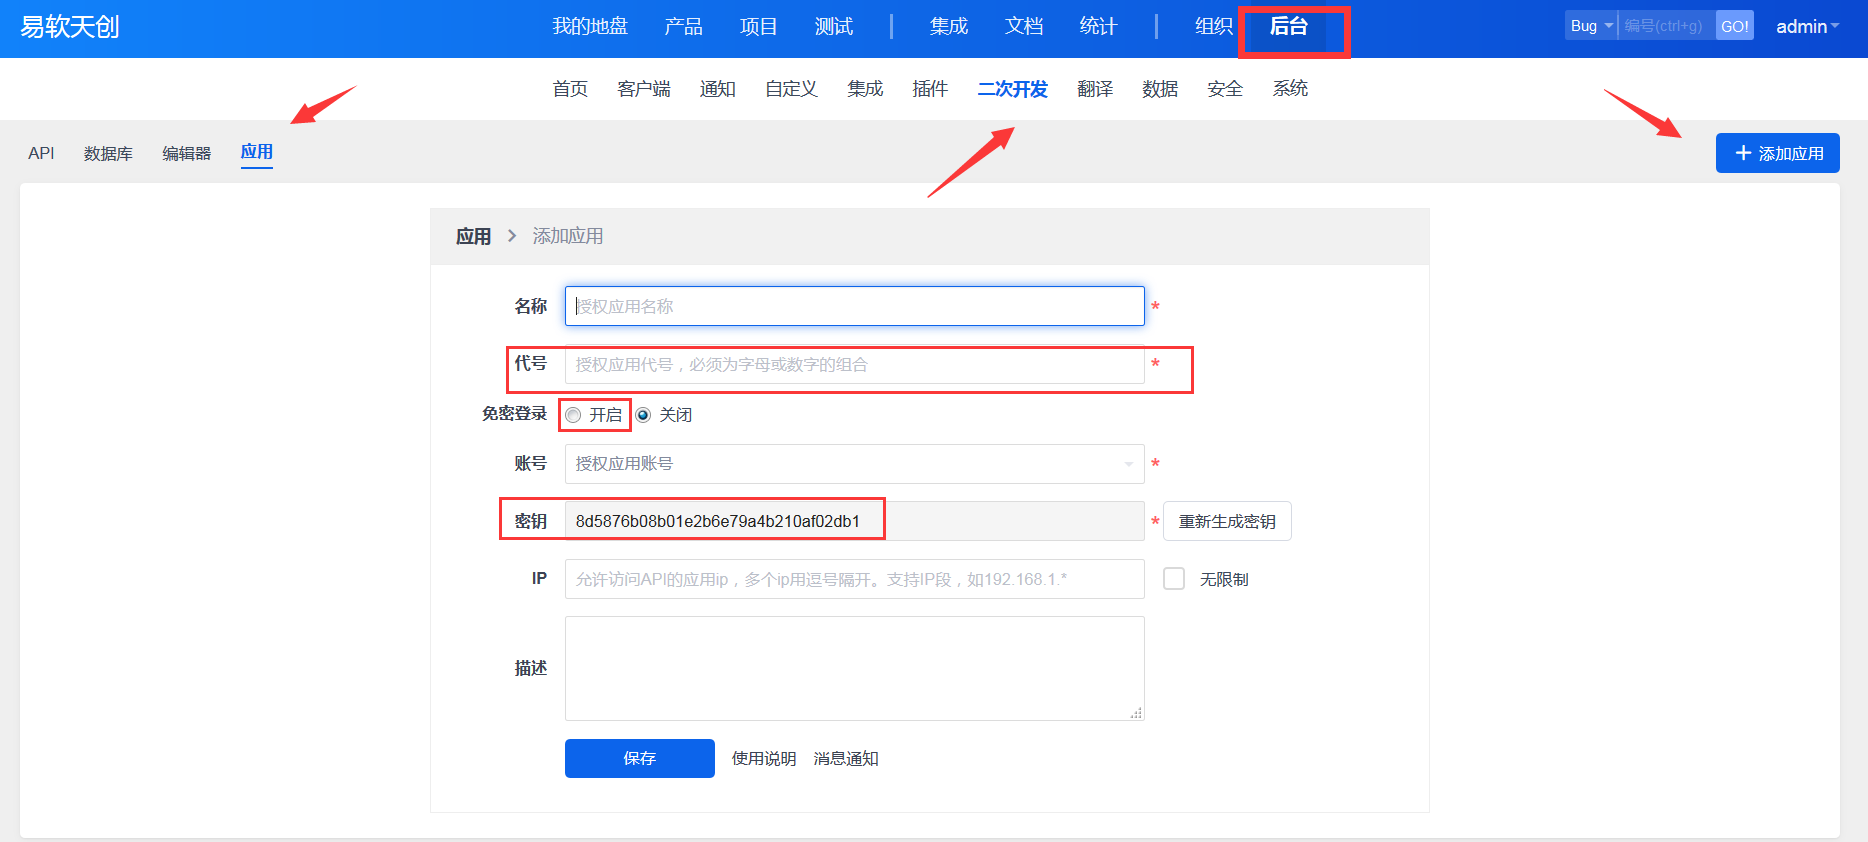
Administrator logs into the ZenTao backend - Secondary Development - Applications, and adds an application.
# IDaaS Configuration
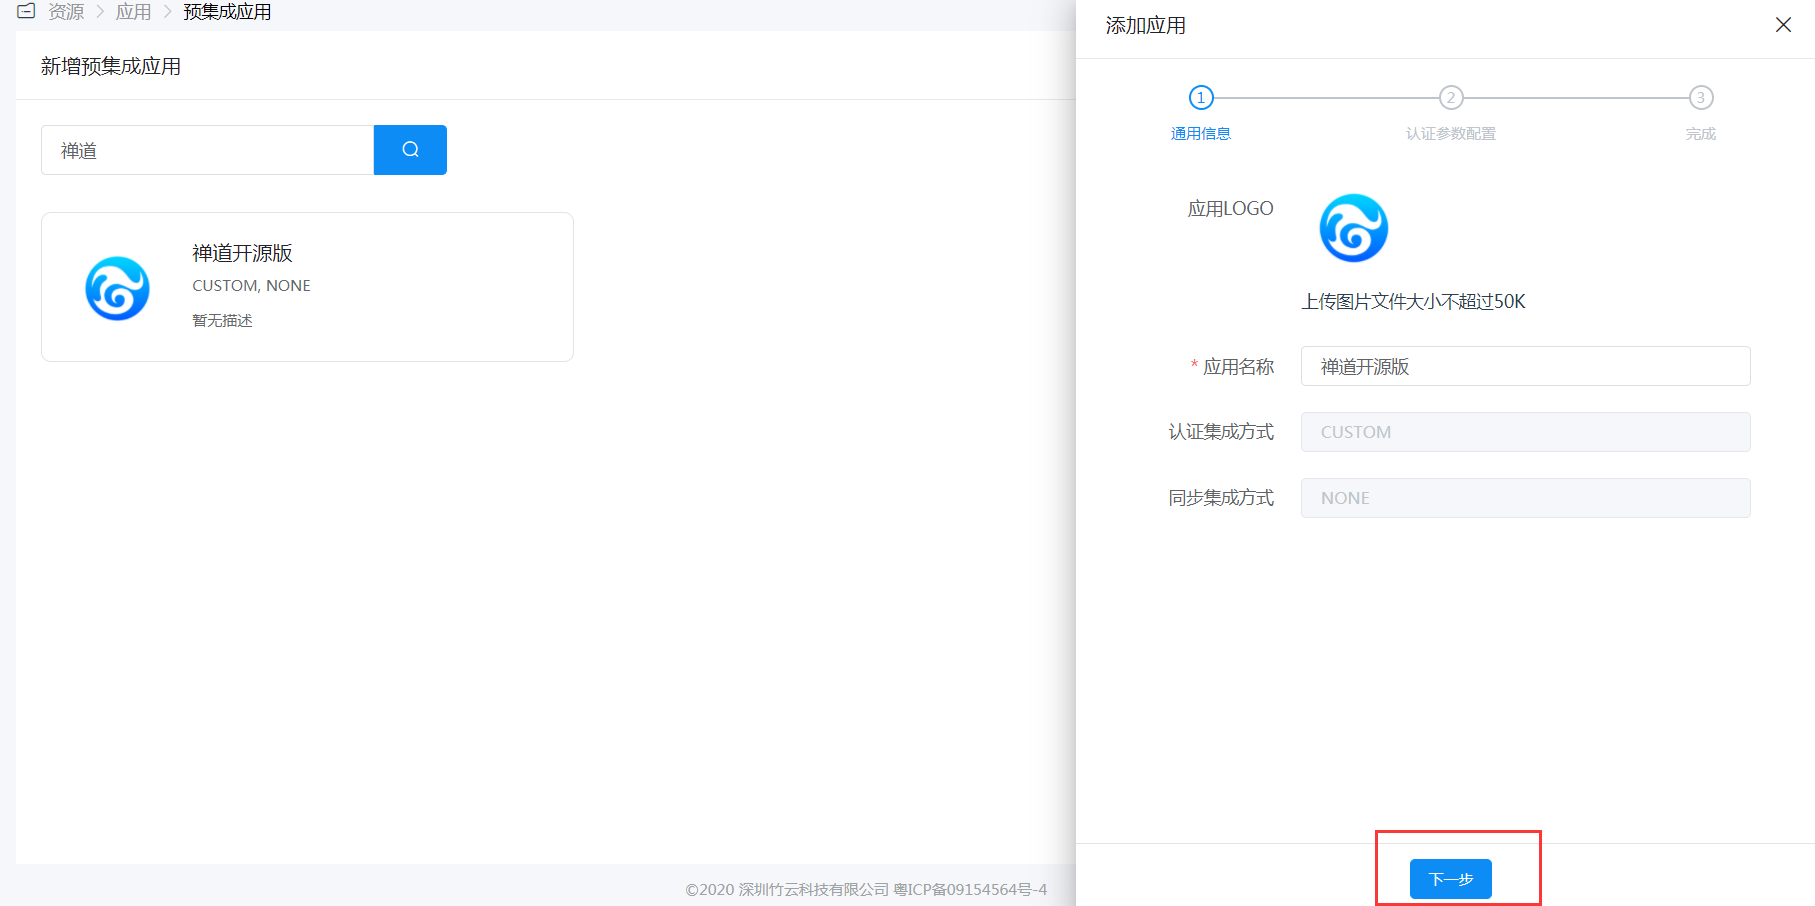
Add the pre-integrated application for ZenTao Open Source Edition.

Configure authentication parameters. Parameter descriptions are as follows:
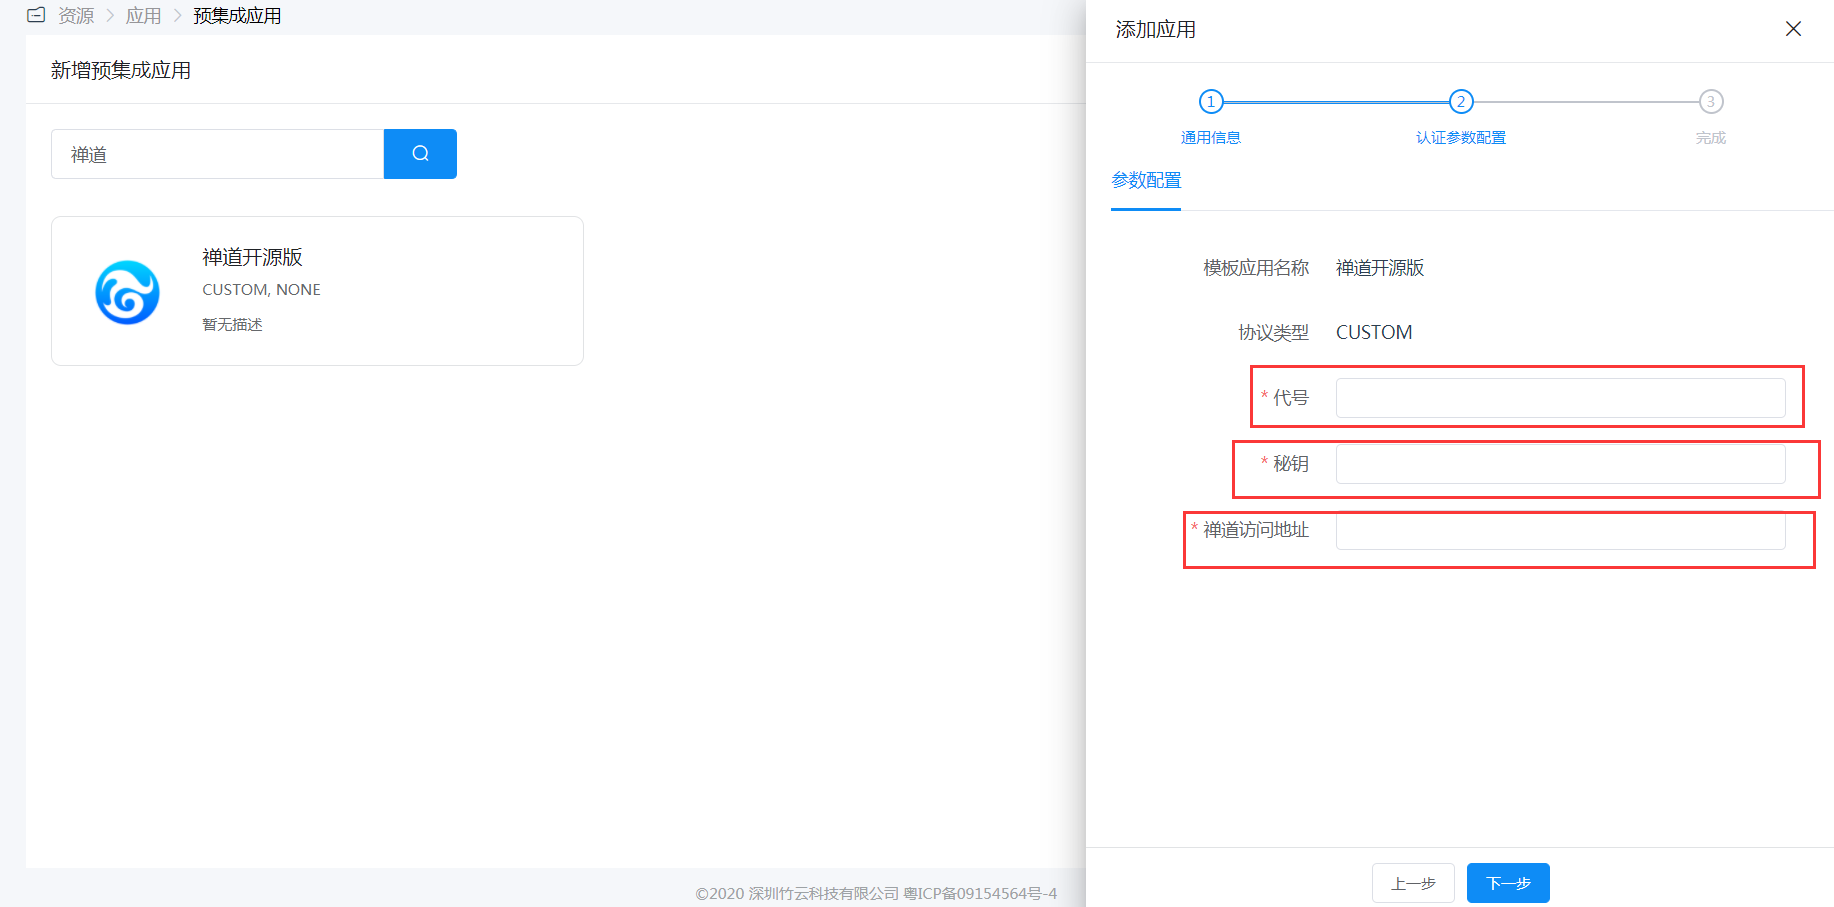
Name Description Code The code filled in when adding the application in the ZenTao backend Secret Key The secret key generated when adding the application in the ZenTao backend ZenTao Access Address The access URL for ZenTao, request format: http://www.zentao.net Authorize user accounts, corresponding to ZenTao login usernames. After authorization, users can click the ZenTao application logo in the User Center to SSO into the application.

# Login Verification
Authorized users can click the ZenTao application logo in the User Center to SSO into the application.
# ZenTao CAS Plugin
# ZenTao Configuration
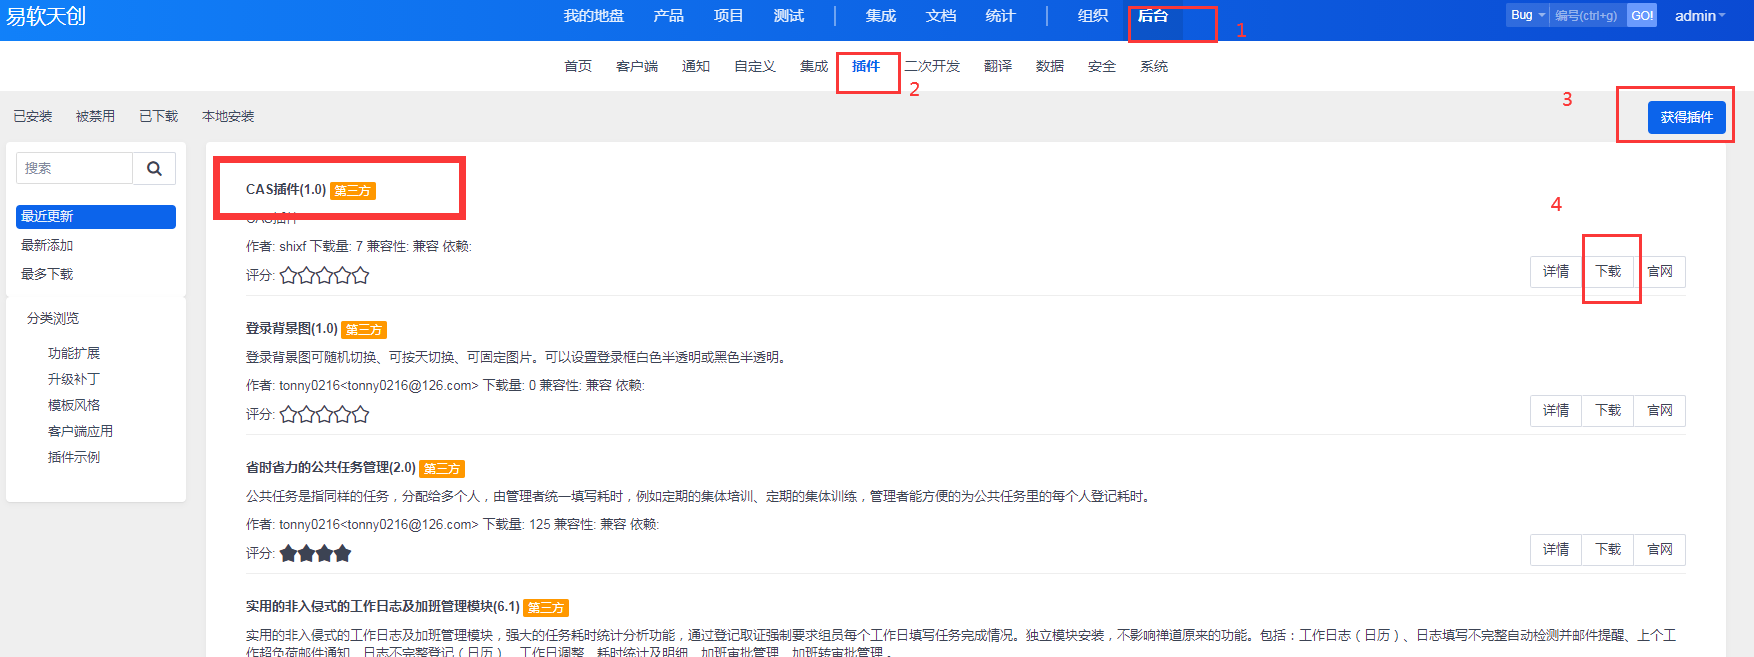
Administrator logs into the ZenTao backend - Plugins, and obtains the plugin.
After plugin installation, modify the configuration file
config/ext/cas.php.$filter->cas->tokenlogin->get['ticket'] = 'reg::any'; // cas login page $config->cas->loginUrl = 'https://{IDaaS Tenant Domain}.bccastle.com/api/v1/cas/login'; // cas ticket validation address $config->cas->authUrl = 'https://{IDaaS Tenant Domain}.bccastle.com/api/v1/cas/serviceValidate'; // cas login callback address, modify `www.xxx.com` to the specific ZenTao address. $config->cas->serviceUrl = 'http://www.xxx.com/cas-tokenlogin.html';1
2
3
4
5
6
7
8
9
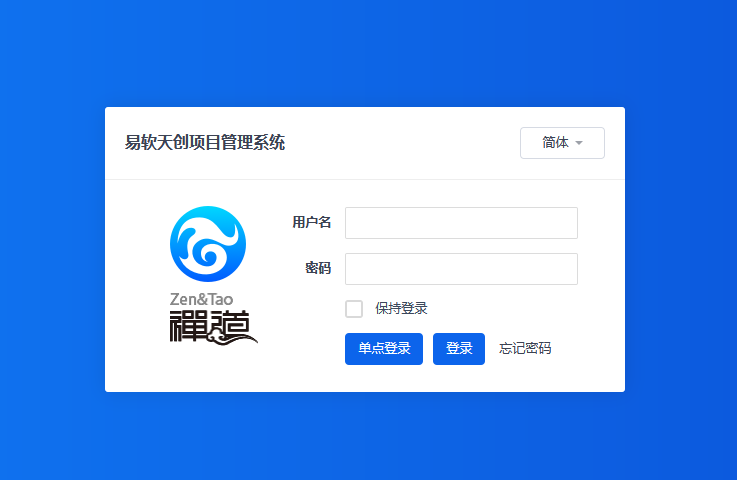
10After configuration is complete, a single sign-on button will appear on the ZenTao login interface.
# IDaaS Configuration
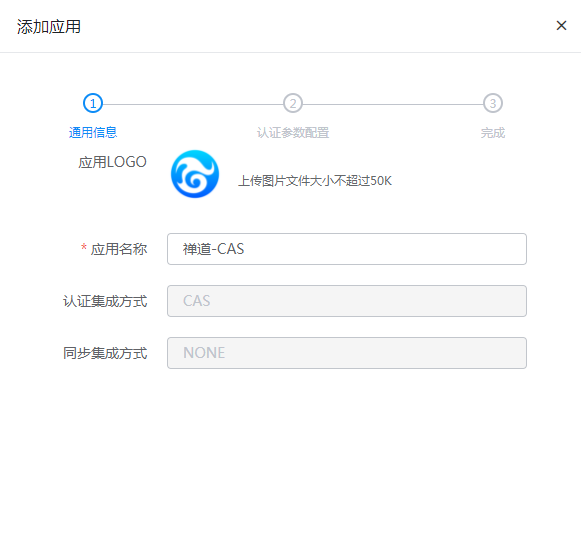
Administrator logs into the IDaaS Enterprise Center, navigates to Resources - Applications - Add Pre-integrated Application, and selects ZenTao - CAS.
Fill in the application callback address with the CAS login callback address from the
cas.phpfile in the steps above.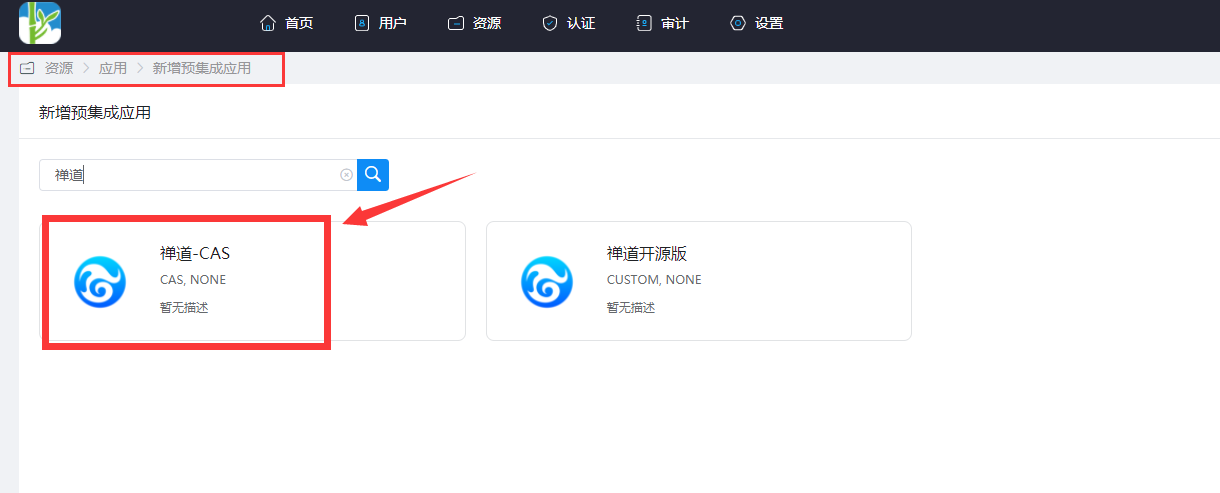

Mapping Configuration: Navigate to the application you just added, go to Application Information -> Authentication Configuration -> Mapping Configuration, and add mapping attributes.
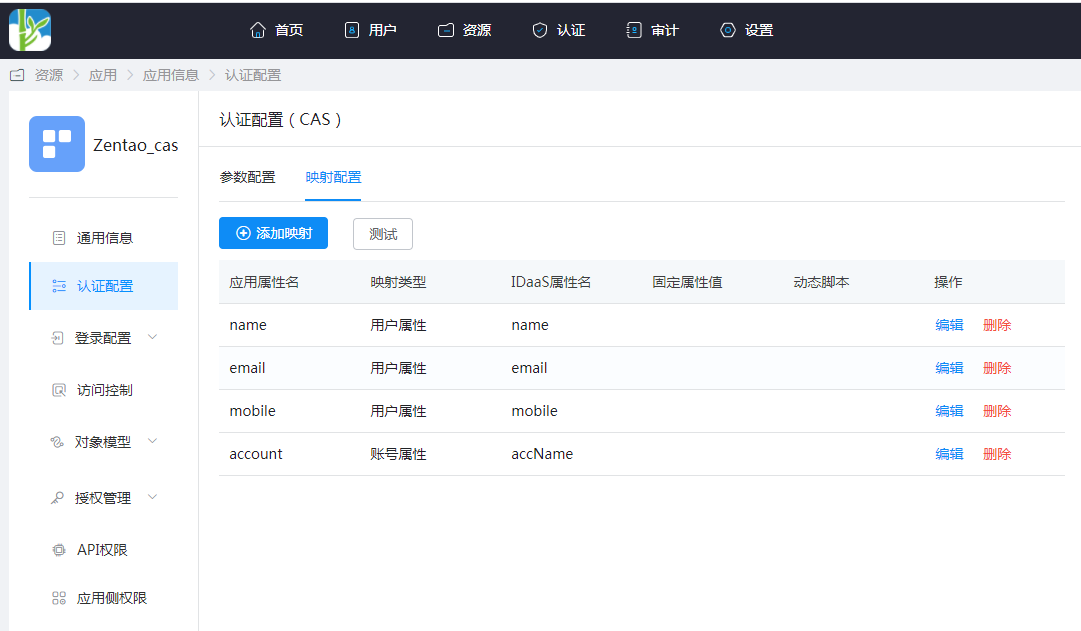
| Application Attribute Name | Mapping Type | IDaaS Attribute Name |
|---|---|---|
| name | User Attribute | name |
| User Attribute | ||
| mobile | User Attribute | mobile |
| account | Account Attribute | accName |
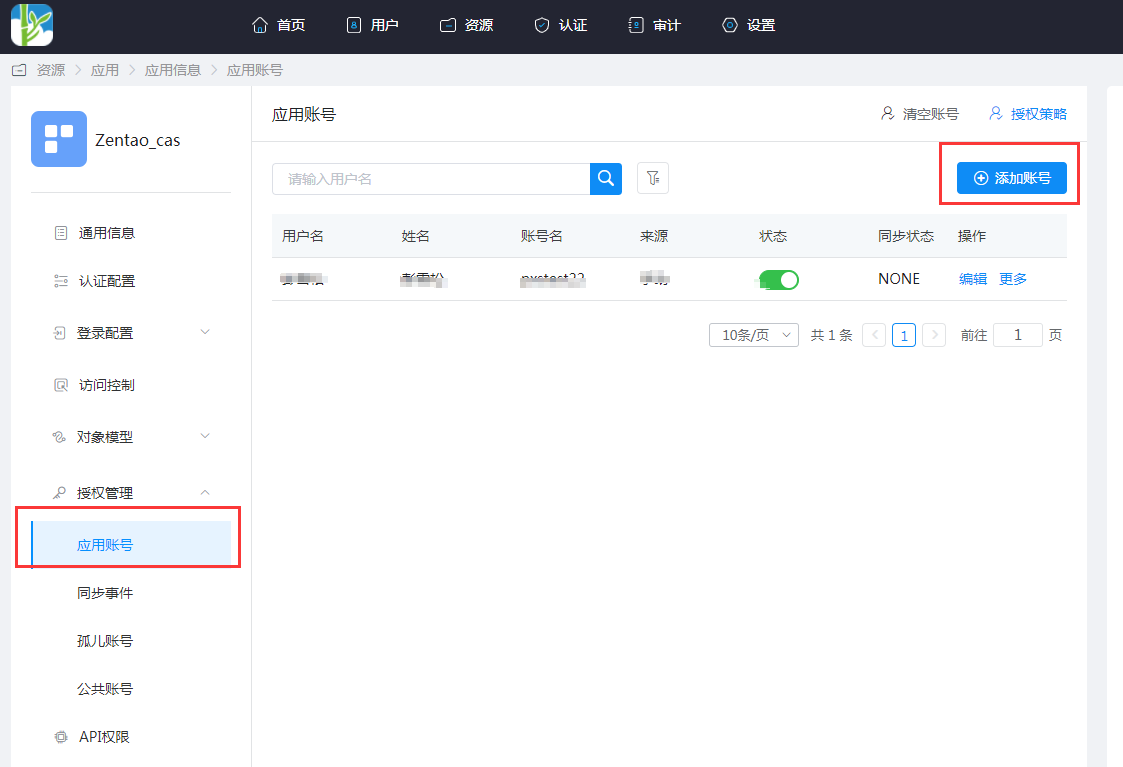
- Application Information -> Authorization Management -> Application Accounts -> Add Account. The account name corresponds to the username in ZenTao. If the user does not exist in ZenTao, it will be automatically created.
# Login Verification
There are two login methods as follows:
Users access the IDaaS User Center and click on the ZenTao application logo to directly single sign-on into ZenTao.
On the ZenTao login page, click the single sign-on button to jump to the IDaaS authentication page. After successful authentication, enter ZenTao.
# Common Issues
New users may encounter the error message shown in the figure below after logging in. This is because the default permission is "Other." The ZenTao administrator needs to reset the account's permissions in "Organization" -> "Permissions."
