Zabbix Single Sign-On
# Description
This document describes the Single Sign-On configuration process between Zabbix 5.0+ and IDaaS based on the SAML protocol.
# Authentication Configuration
# Zabbix Configuration
For Zabbix configuration, please be sure to configure it in conjunction with the SAML authentication section of the Zabbix official configuration documentation (opens new window).
Copy the IDaaS IDP certificate, save it as an idp.crt file, and store it under ui/conf/certs/ (if the SP certificate is not generated, you can ignore the configuration of the SP certificate private key and certificate).
To download the IDaaS IDP metadata, visit https://{your_domain}/api/v1/saml2/idp/metadata.
Line breaks in the IDP certificate must be removed; otherwise, Zabbix may report an error about not finding the idp certificate during SAML authentication.
Configure SAML parameters in Zabbix.
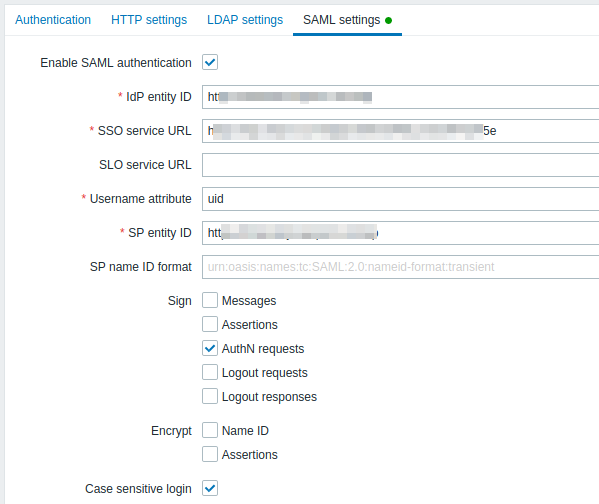
Parameter Description Enable SAML authentication Enable SAML authentication IDP entity ID IDaaS IDP EntityId SLO service URL Optional IDaaS IDP Logout URL Username attribute username SP entity ID Zabbix address SP name ID format Default Sign Assertion Signing (Do not check) Encrypt Assertion Encryption (Do not check) Case sensitive login Case-sensitive If you have upgraded from an older version to Zabbix 5.0, you also need to manually add the following lines to the Zabbix .conf.php file (located in the ui/conf/ directory). After completion, restart Zabbix.
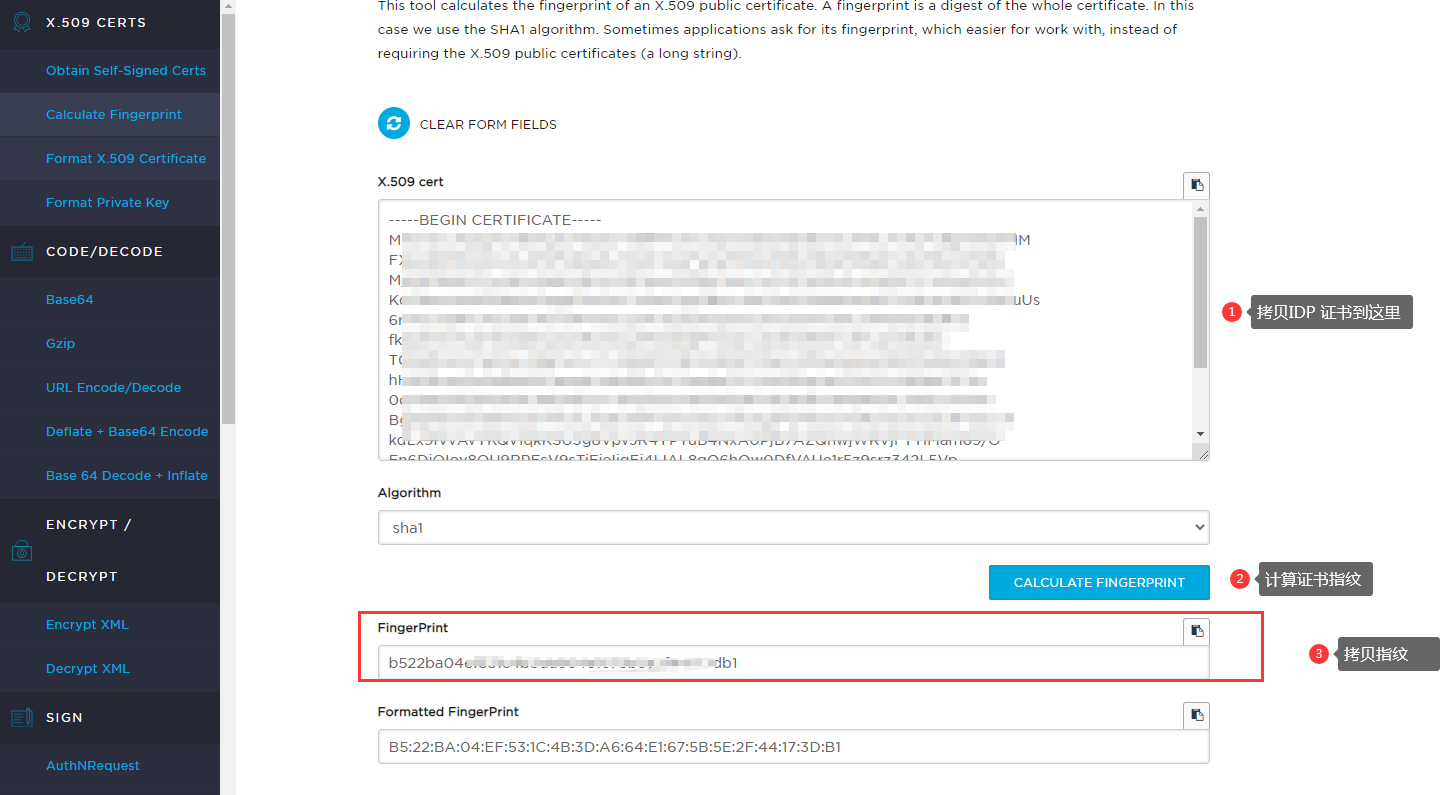
// Used for SAML authentication.
//$SSO['SP_KEY'] = 'conf/certs/sp.key'; // Path to your private key.
//$SSO['SP_CERT'] = 'conf/certs/sp.crt'; // Path to your public key.
$SSO['IDP_CERT'] = 'conf/certs/idp.crt'; // Path to IdP public key.
$SSO['SETTINGS'] = [
    'idp' => [
        'certFingerprint' => '55551ecf41bee0a977b3bd1db1e9ae62f4f9df66',//IDP Certificate Fingerprint


    ],

];
1
2
3
4
5
6
7
8
9
10
11
12Online Certificate Fingerprint Calculation Address (opens new window)
# IDaaS Configuration
Add the pre-integrated application Zabbix.

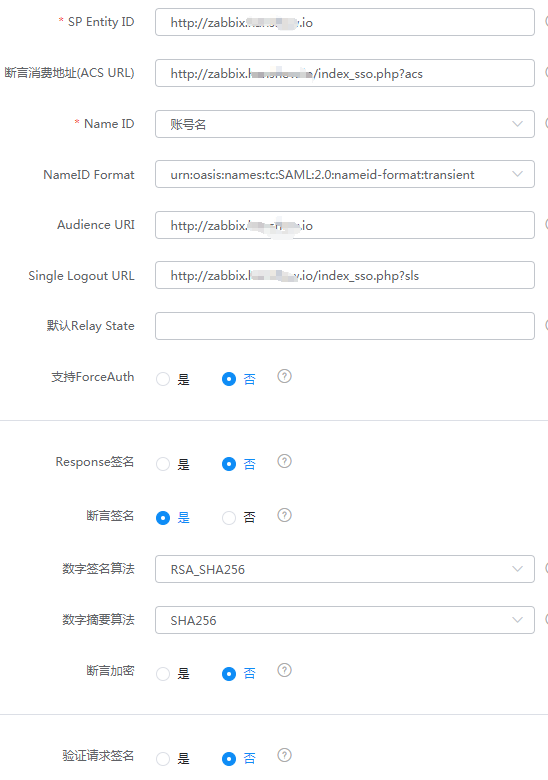
Configure authentication parameters.
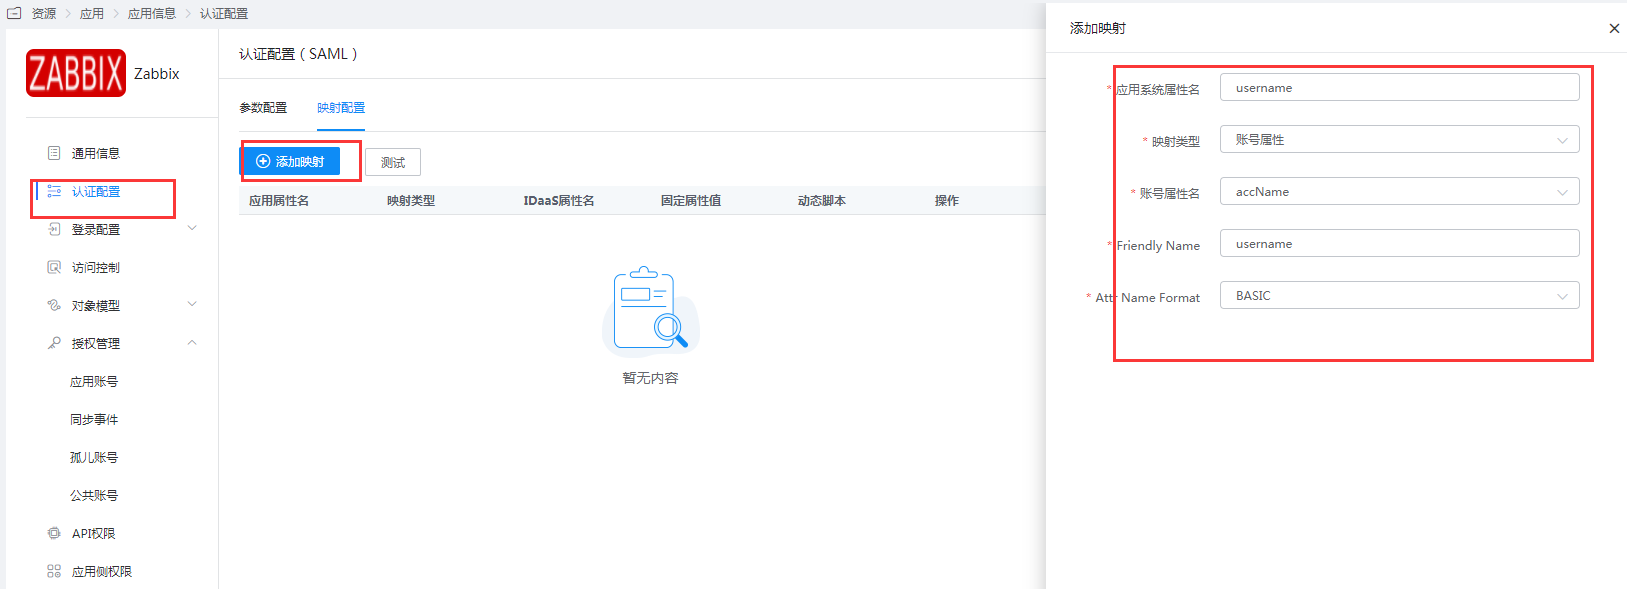
Mapping Configuration - Add Mapping.
Go to Application Details - Authorization Management - Application Accounts, click the Add Account button, and select the authorized user.
The account name must match the username (Alias) in Zabbix.
# Login Verification
Access Zabbix, click "Sign in with Single Sign-On (SAML)", and you will be redirected to the IDaaS authentication page. Enter your username and password to log in to Zabbix.
