SalesForce Single Sign-On
# Description
This article describes how to configure Zhuyun IDaaS single sign-on for SalesForce.
# Authentication Configuration
# SalesForce Configuration
The administrator logs into the SalesForce backend, opens 【Security Settings】-【Single Sign-On】, and adds single sign-on.

Configure authentication parameters, save, and download the SalesForce SP metadata. To download the IDaaS IDP metadata, please visit https://{your_domain}/api/v1/saml2/idp/metadata.
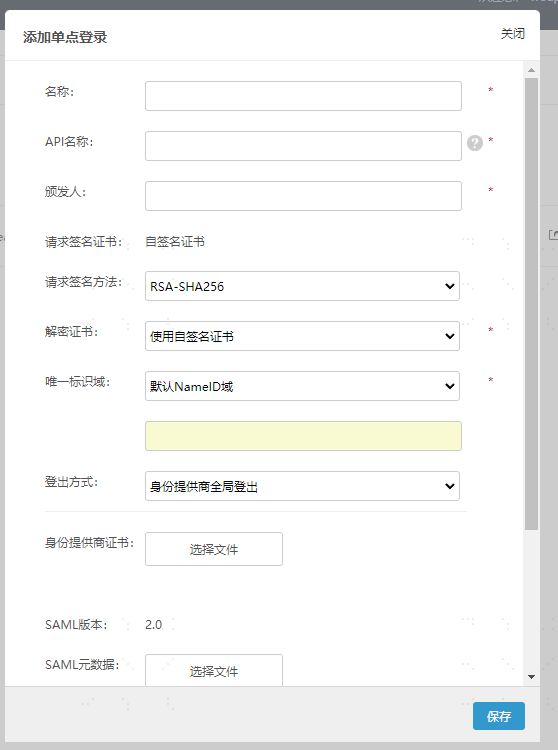
Parameter Description Name Custom API Name Custom Issuer Custom Request Signature Method RSA-SHA256 Decryption Certificate Use Self-Signed Certificate Unique Identifier Domain Default NameID Domain Logout Method Service Provider Provides Local Logout Identity Provider Certificate Upload the copied Zhuyun IDaaS IDP certificate content saved as a .cer file SAML Metadata Upload the IDaaS IDP XML metadata After saving the configuration, click the export button on the Single Sign-On page to download the SalesForce SAML XML metadata file.

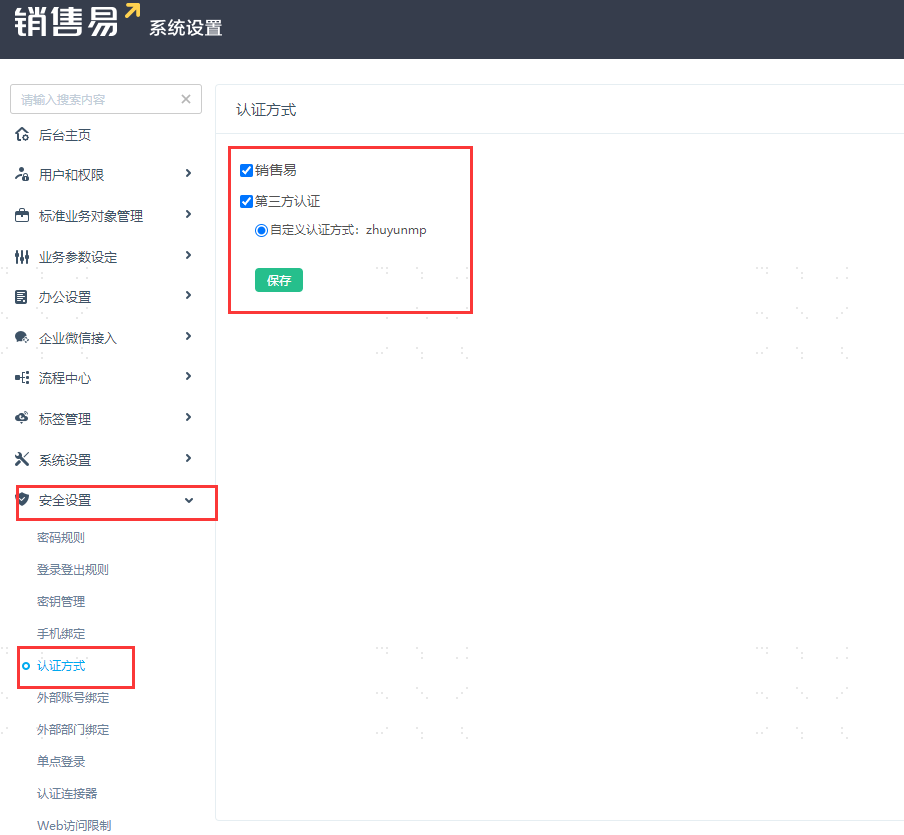
Configure authentication methods. In the left navigation menu, go to 【Security Settings】-【Authentication Methods】.
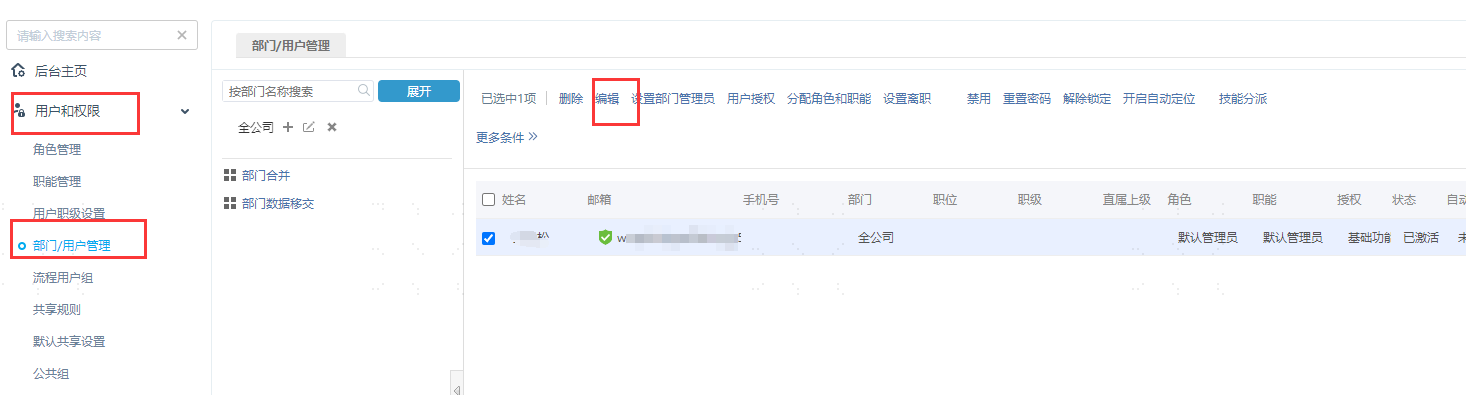
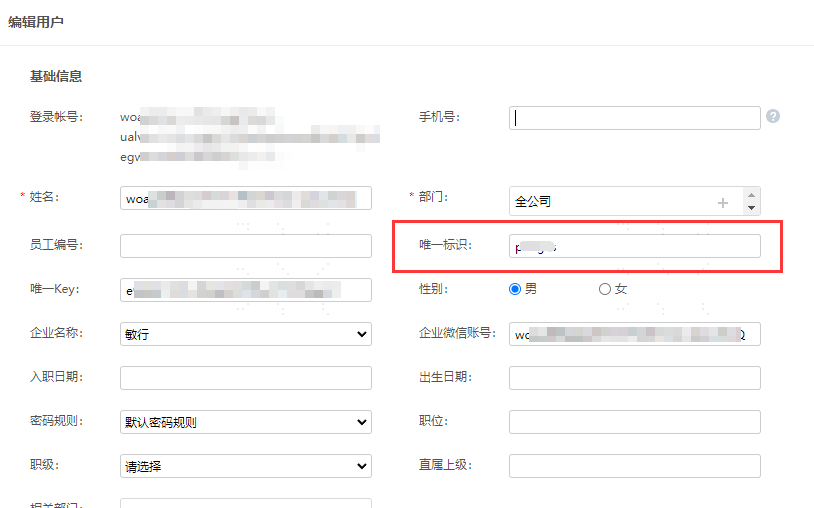
Set up user binding relationships. Go to 【Users and Permissions】-【Department/User Management】, click on Internal Department/User Management on the right, check the SalesForce users that need to be bound, then click Edit at the top to set the unique identifier.
# IDaaS Configuration
Add the pre-integrated application SalesForce, import the SP application metadata, upload the SalesForce metadata file, and save.

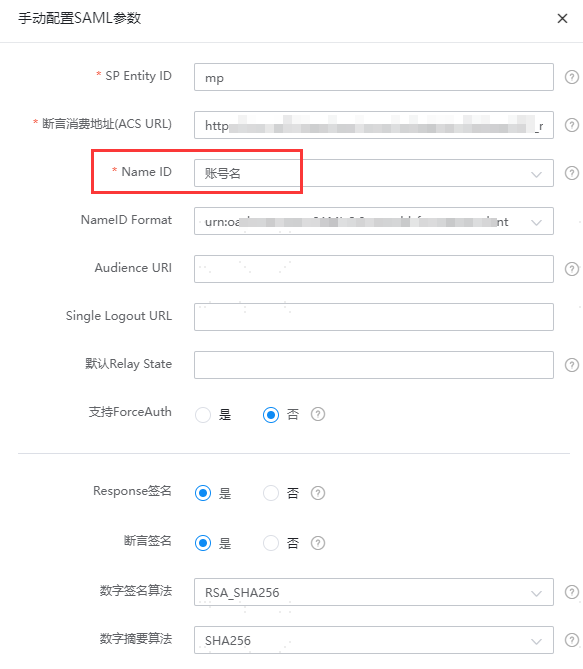
Enter the application details and edit the authentication parameters.
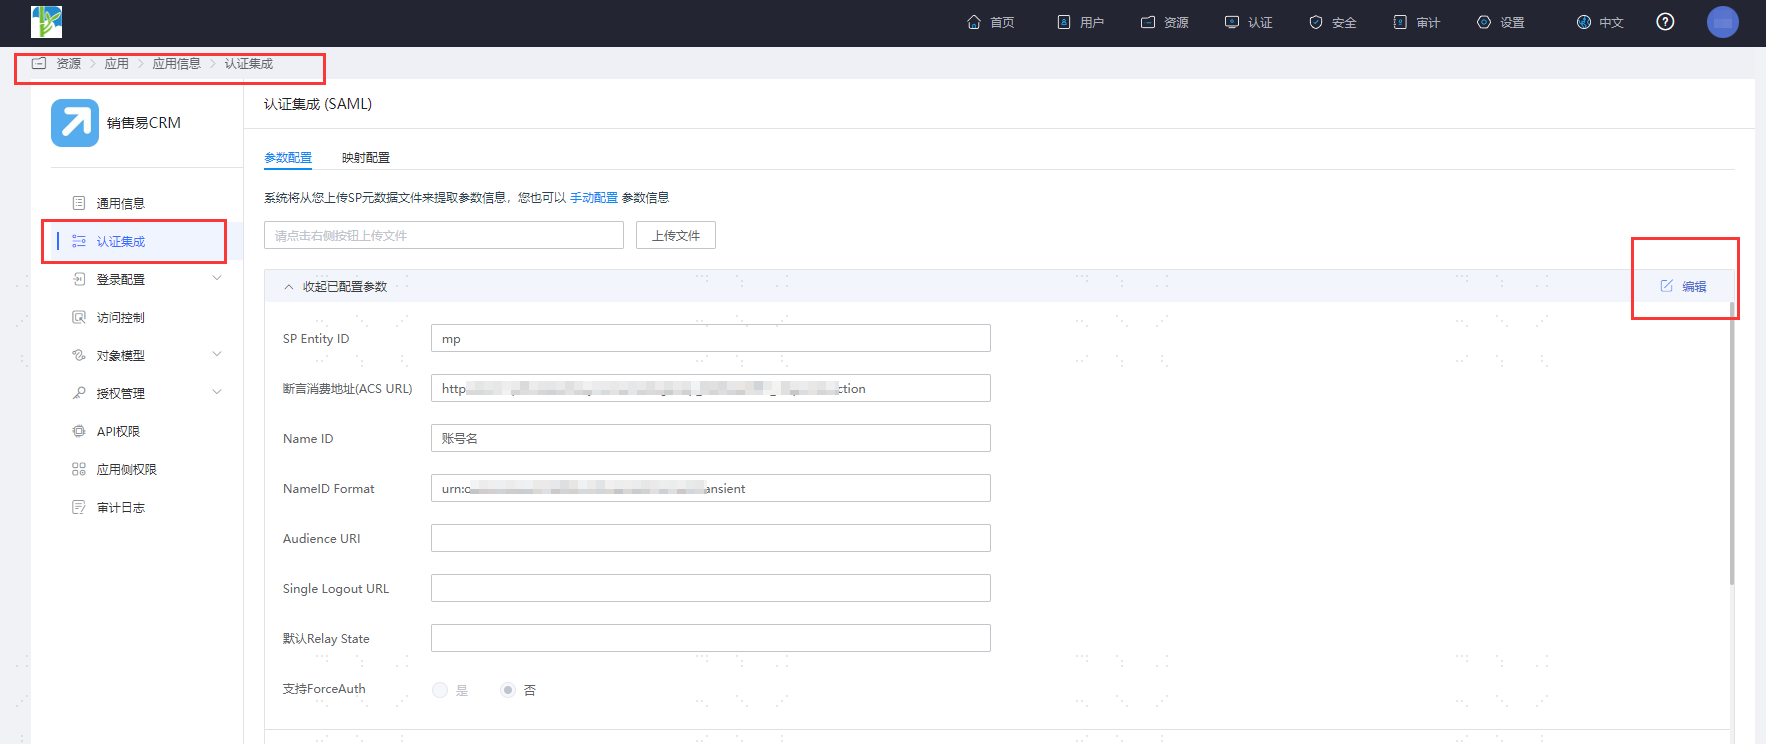
Select Account Name for the Name ID.
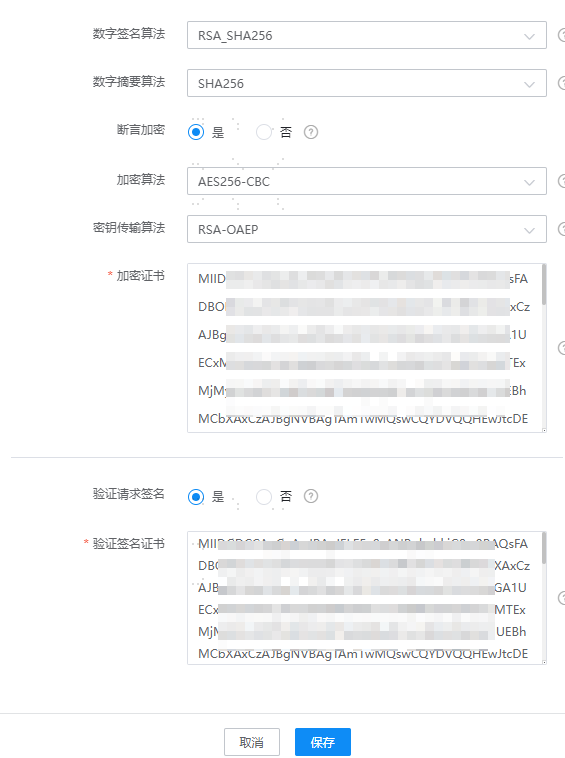
Enable assertion encryption. Select AES256-CBC for the encryption algorithm, RSA-OAEP for the key transport algorithm, and copy the signature verification certificate below for the encryption certificate.
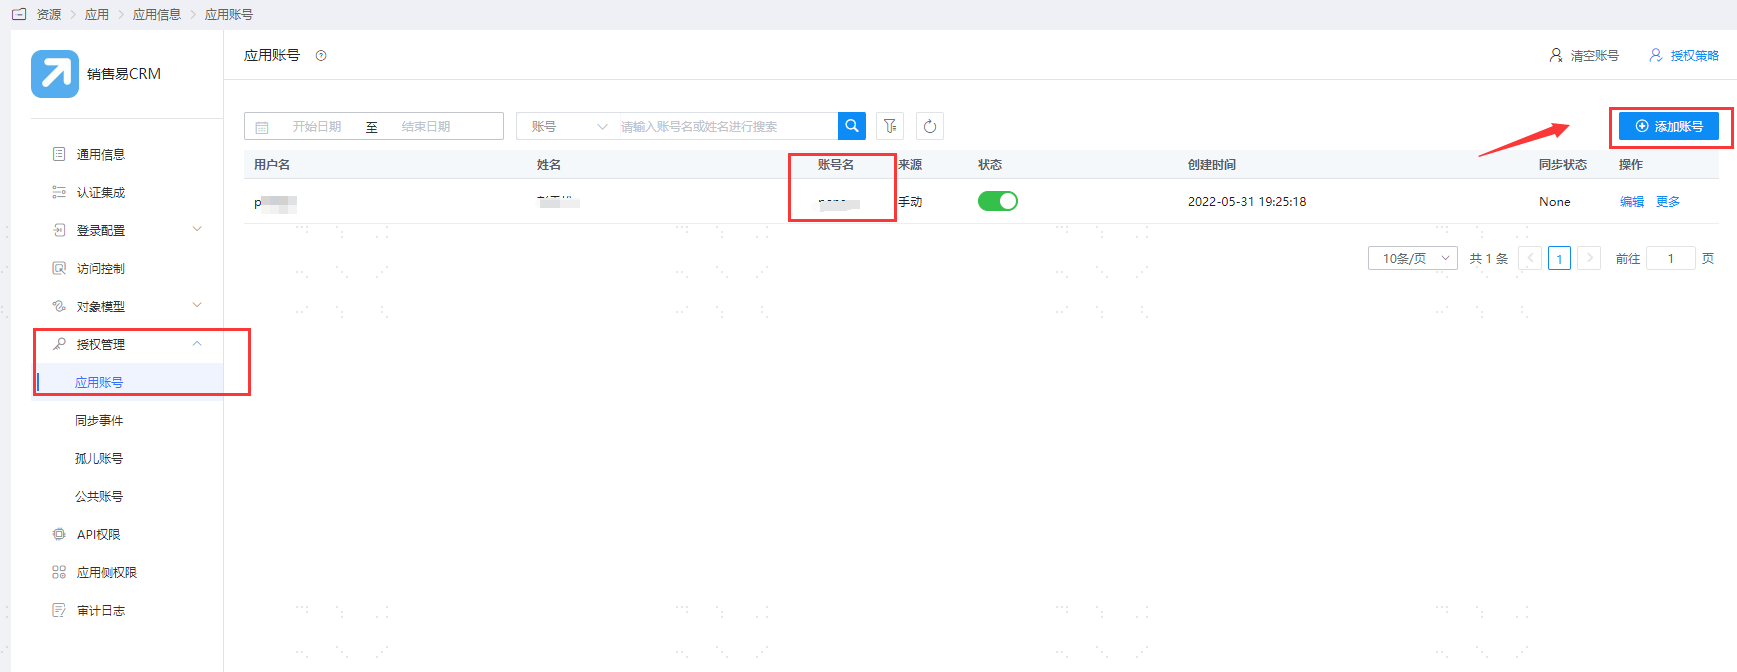
Go to Application Details - Authorization Management - Application Accounts, click the Add Account button, and select the authorized user.
Change the account name to the user's unique identifier in SalesForce.
# Login Verification
There are two login methods as follows:
- On the SalesForce login page, click the third-party button to initiate login authentication, redirect to the IDaaS authentication page, and enter the authorized user credentials to enter SalesForce.
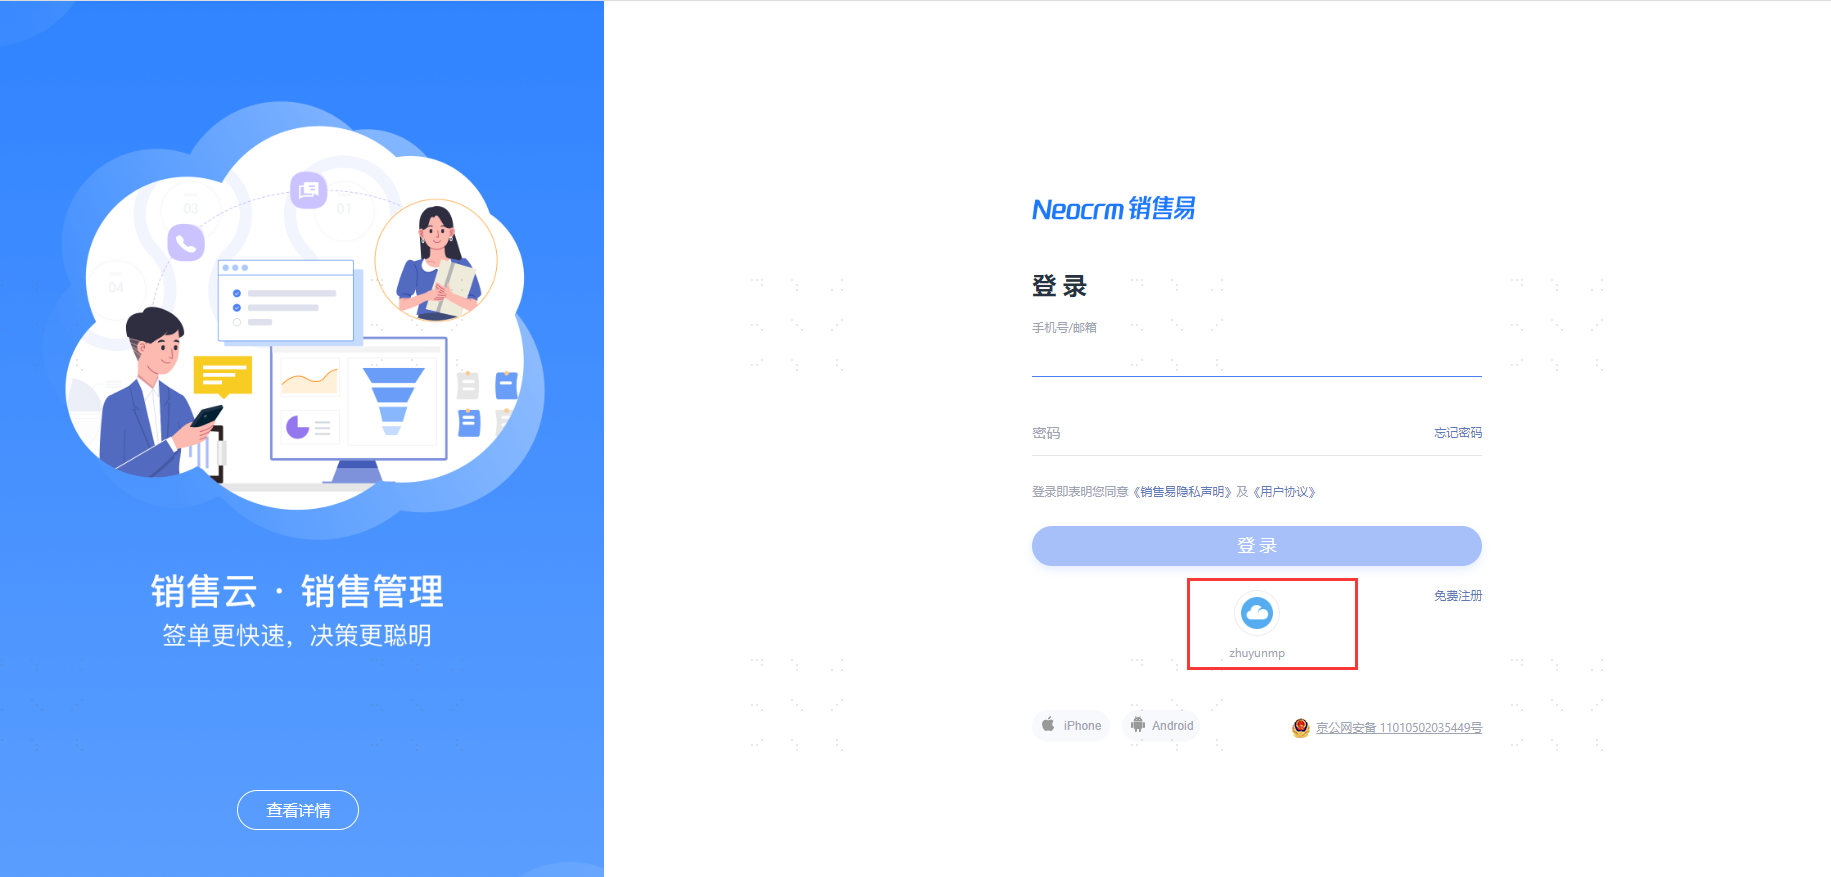
- Log in to the IDaaS User Center, click on the SalesYi logo to single sign-on to SalesYi.