Veeva CRM Data Synchronization
Identity Synchronization
# Description
This article explains how to synchronize personnel data from IDaaS to Veeva CRM, enabling data flow from IDaaS to Veeva CRM.
# Prerequisites
Possess administrator permissions for the IDaaS Enterprise Center platform.
# Synchronization Configuration
# IDaaS Configuration
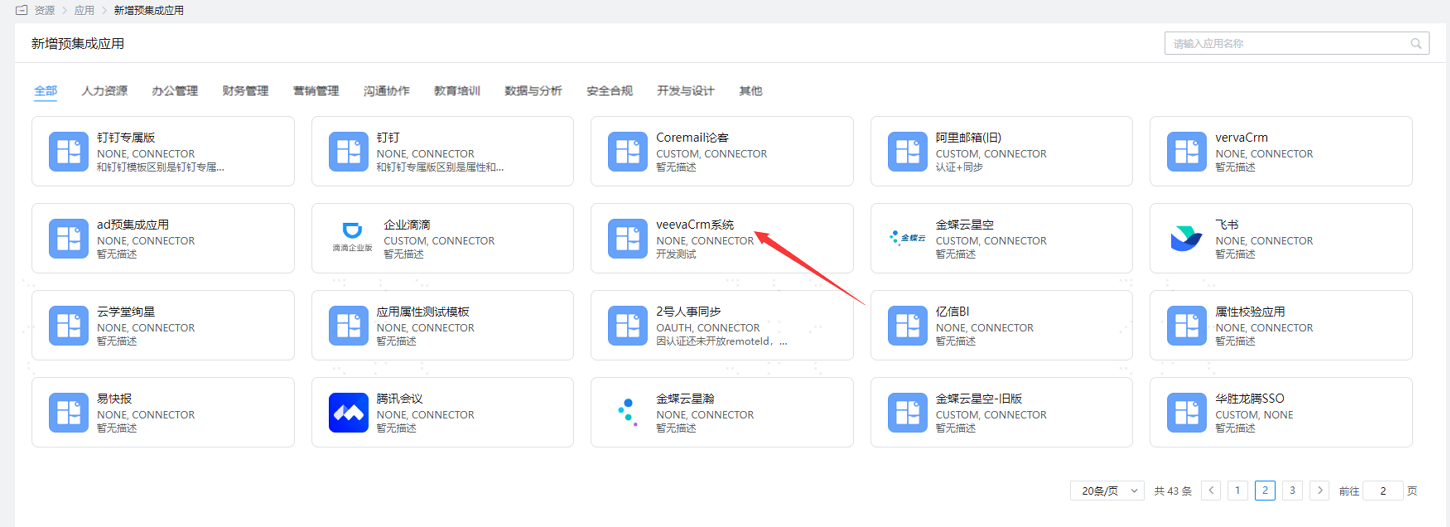
- Log in to the IDaaS Enterprise Center platform, select "Resources > Applications", and add the pre-integrated application Veeva CRM system.
- Configure the application parameters. Key parameters are as follows.
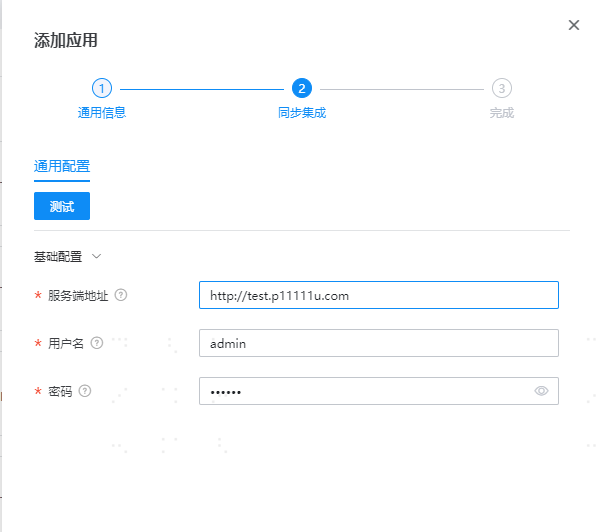
| Parameter | Description |
|---|---|
| Server Address | Server access address |
| Username | Administrator account |
| Password | Administrator password |
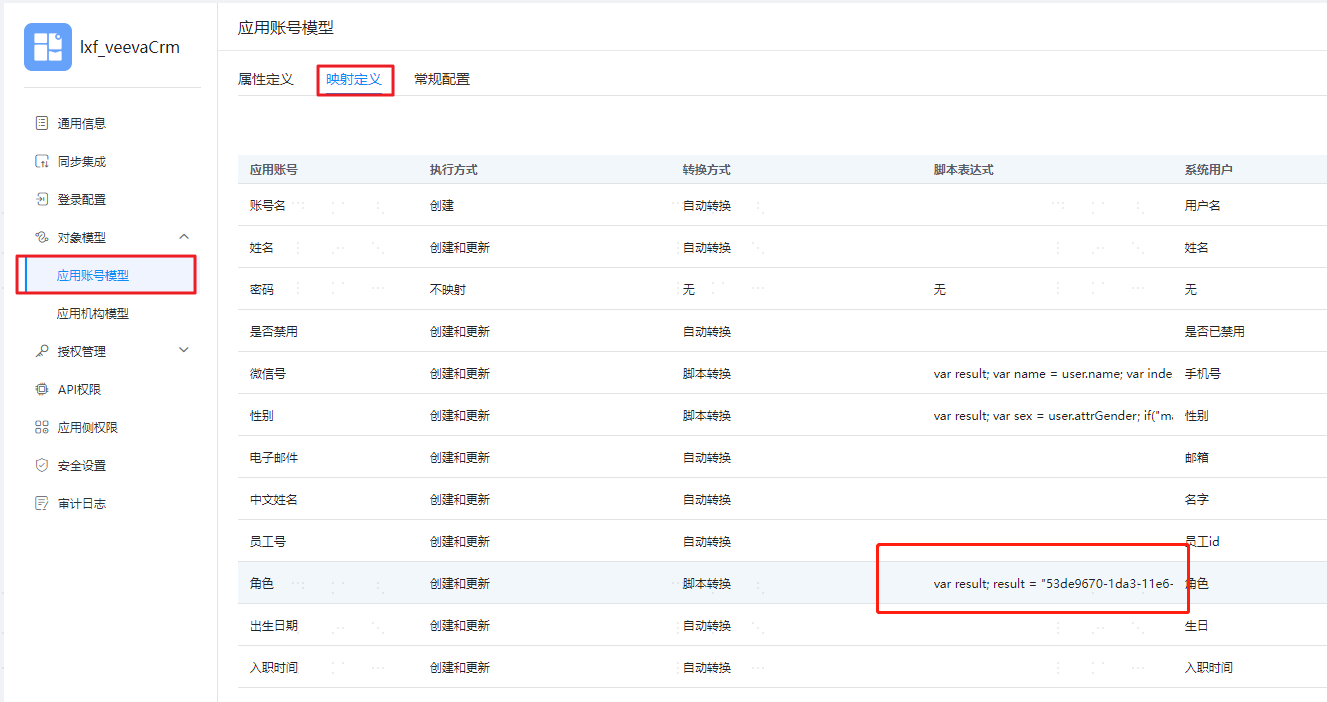
- After configuration is complete, enter the application details, switch to the "Object Model > Application Account Model" page, select mapping definitions, and configure the default value for "Role" according to the customer's actual requirements, as shown below.
- Switch to the "Authorization Management > Application Accounts" page, click "Authorization Policy" to enable automatic user authorization, select the user scope, click the save button, and then click Execute Addition.

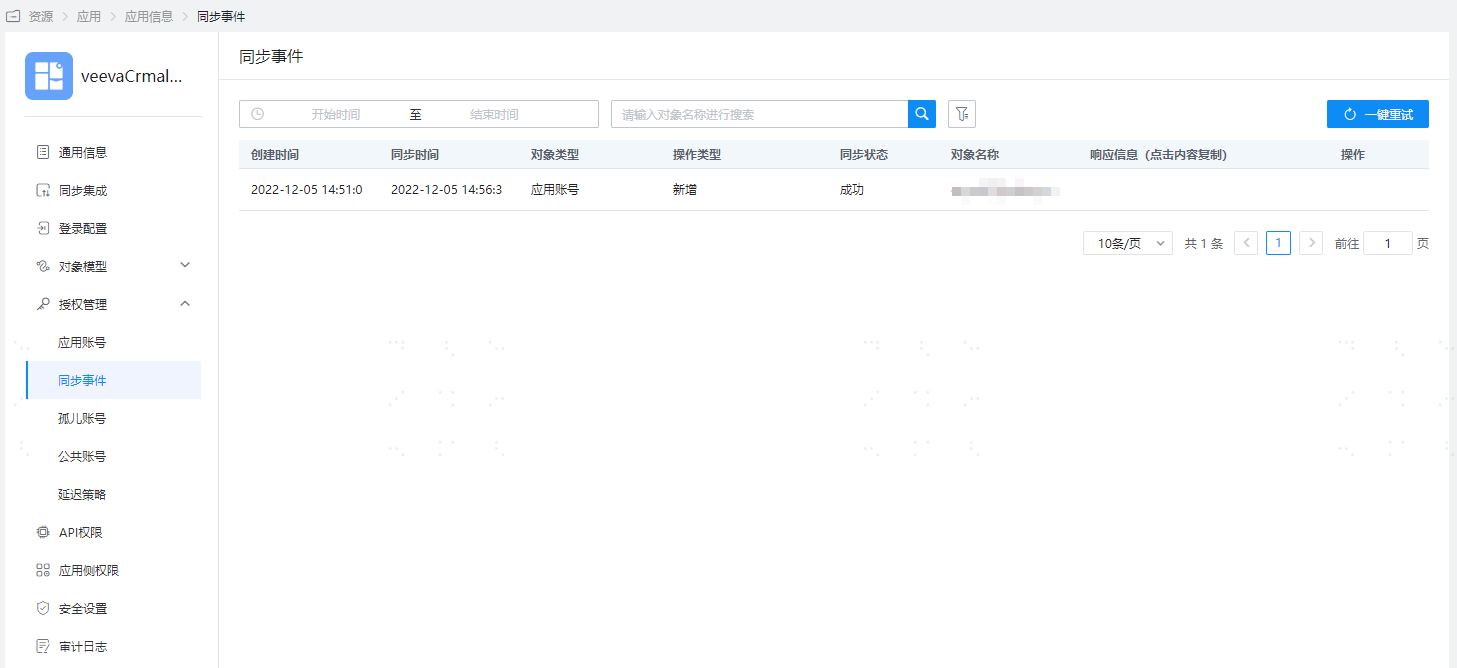
- After successful execution, switch to the "Authorization Management > Synchronization Events" page to view the corresponding synchronization event results.
- Synchronization of application organizations is not supported.
- User deletion synchronization is not supported, and password synchronization for users is also not supported.
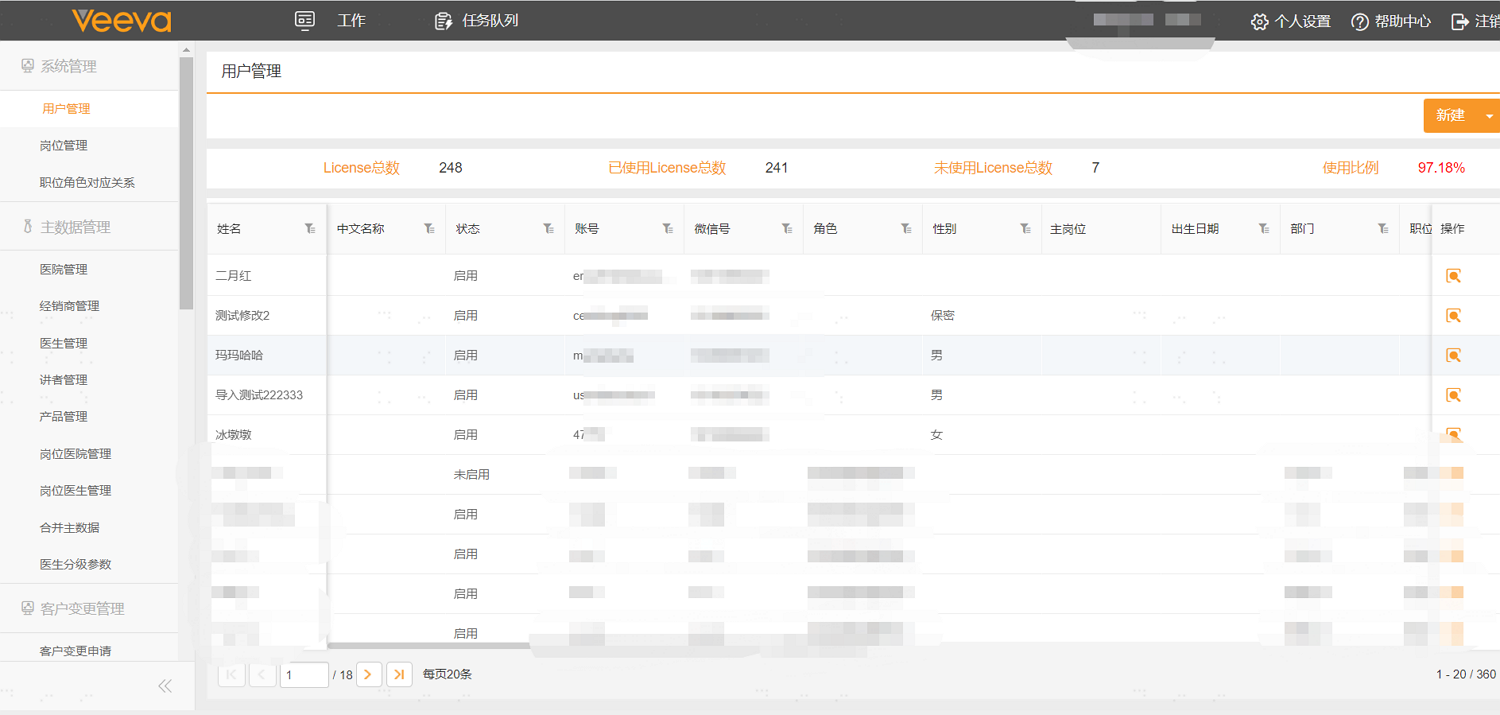
# View Synchronization Results
Log in to the Veeva CRM management backend to view the synchronized user information.