Salesforce Single Sign-On
# Description
This article describes the single sign-on configuration process between Salesforce and IDaaS based on the SAML protocol.
# Authentication Configuration
# Salesforce Configuration
Go to the Salesforce homepage and select Settings.

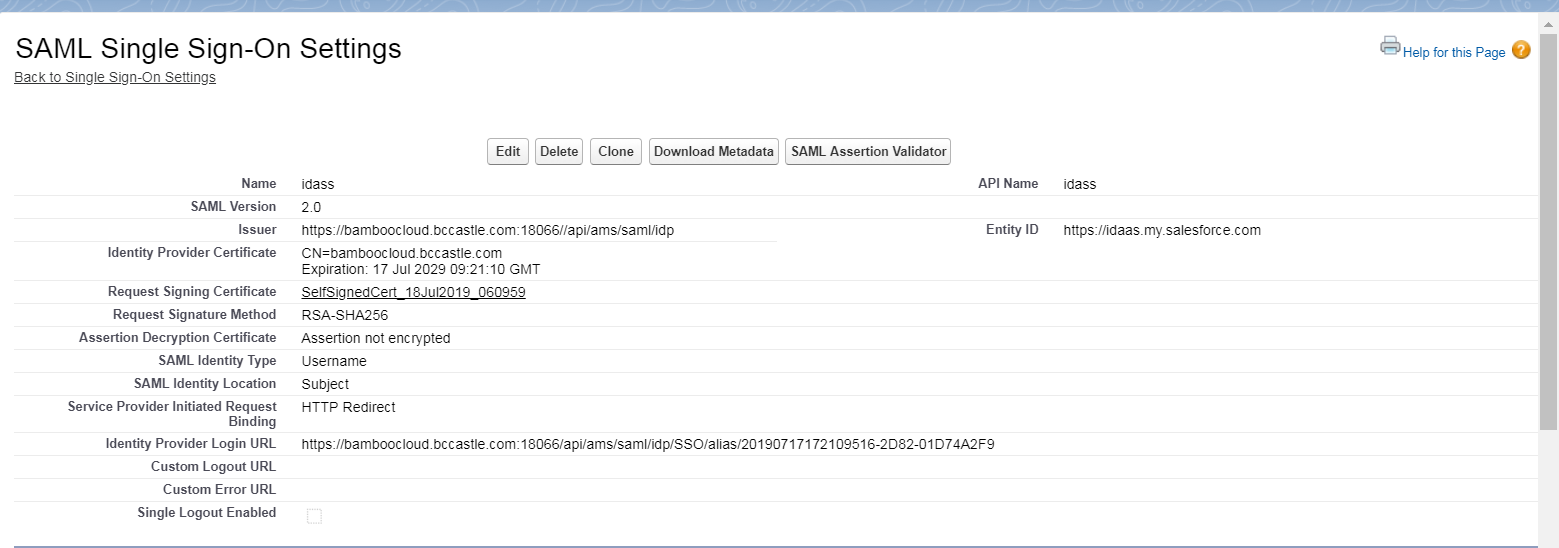
Identity - Single Sign-On Settings - Edit, enable SAML.
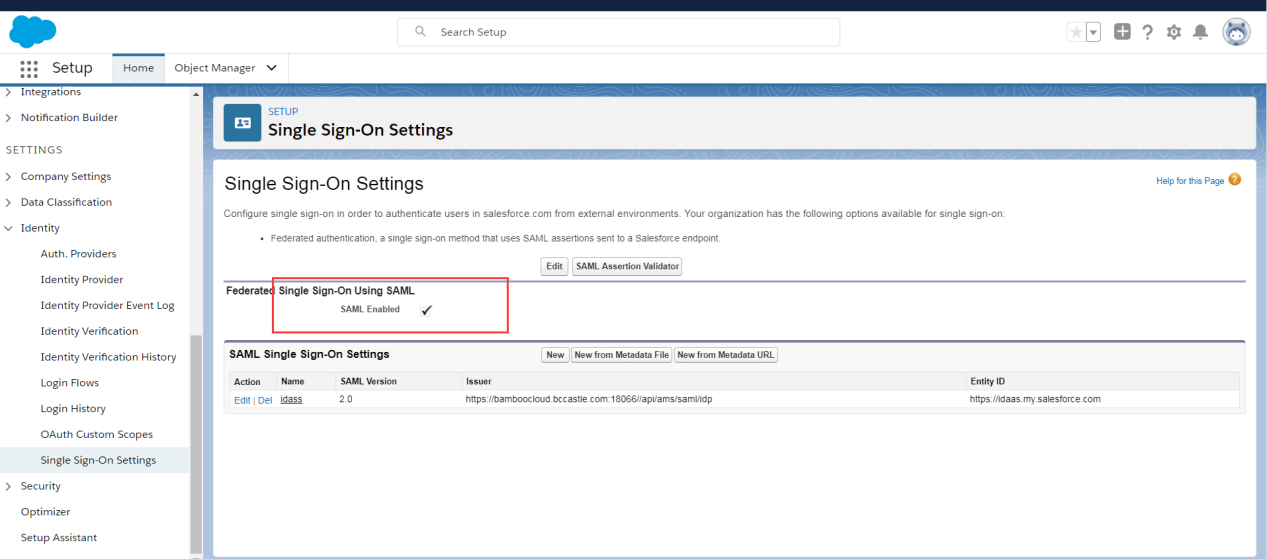
Identity - Single Sign-On Settings - New.
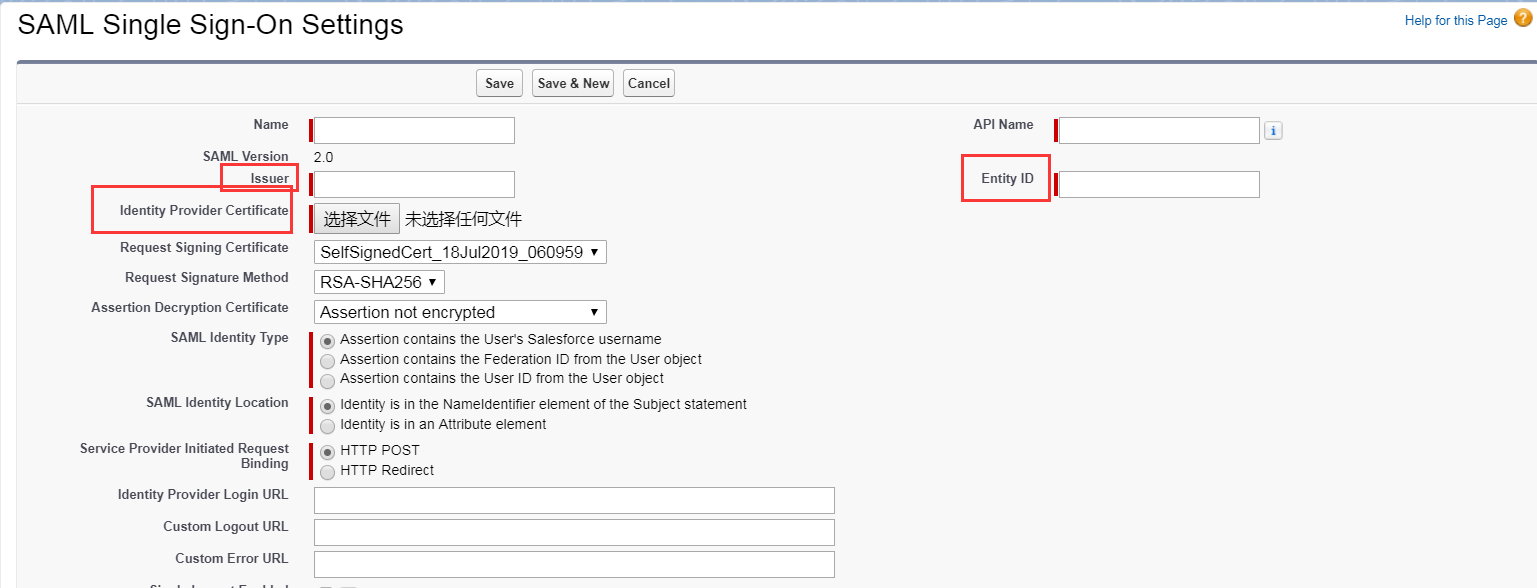
Issuer: EntityId from the IDP metadata
Identity Provider Certificate: The .cer format file saved from the certificate content in the IDP metadata
EntityID: Domain name, which needs to be set up in Salesforce in advance
Identity Provider Login URL: The Location content of the SingleSignOnService tag in the IDP metadata
To download the IDaaS IDP metadata, visit https://{your_domain}/api/v1/saml2/idp/metadata.
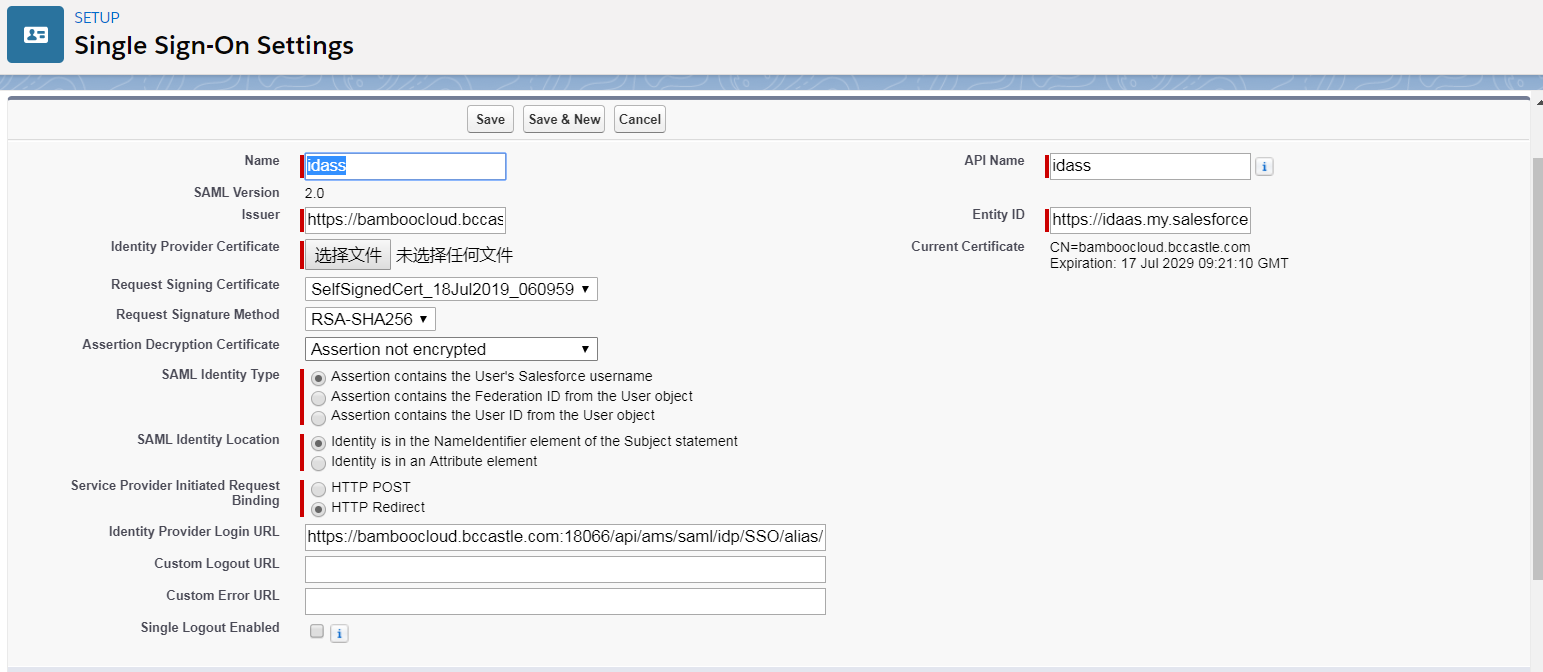
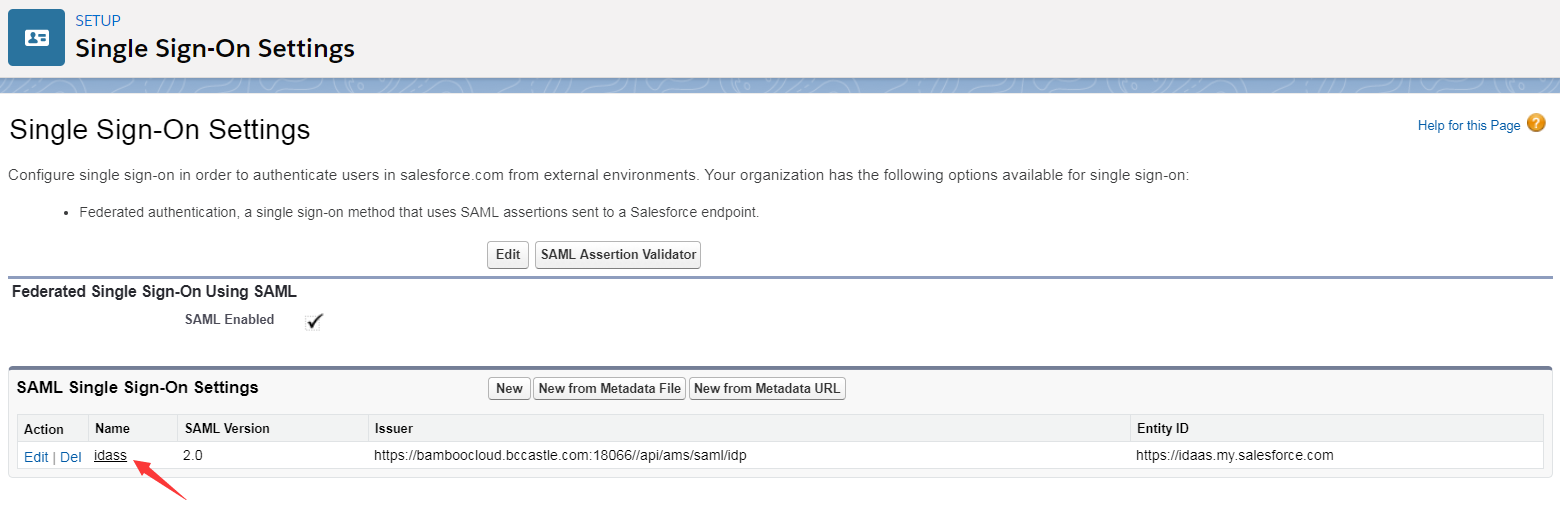
View the newly created single sign-on settings.
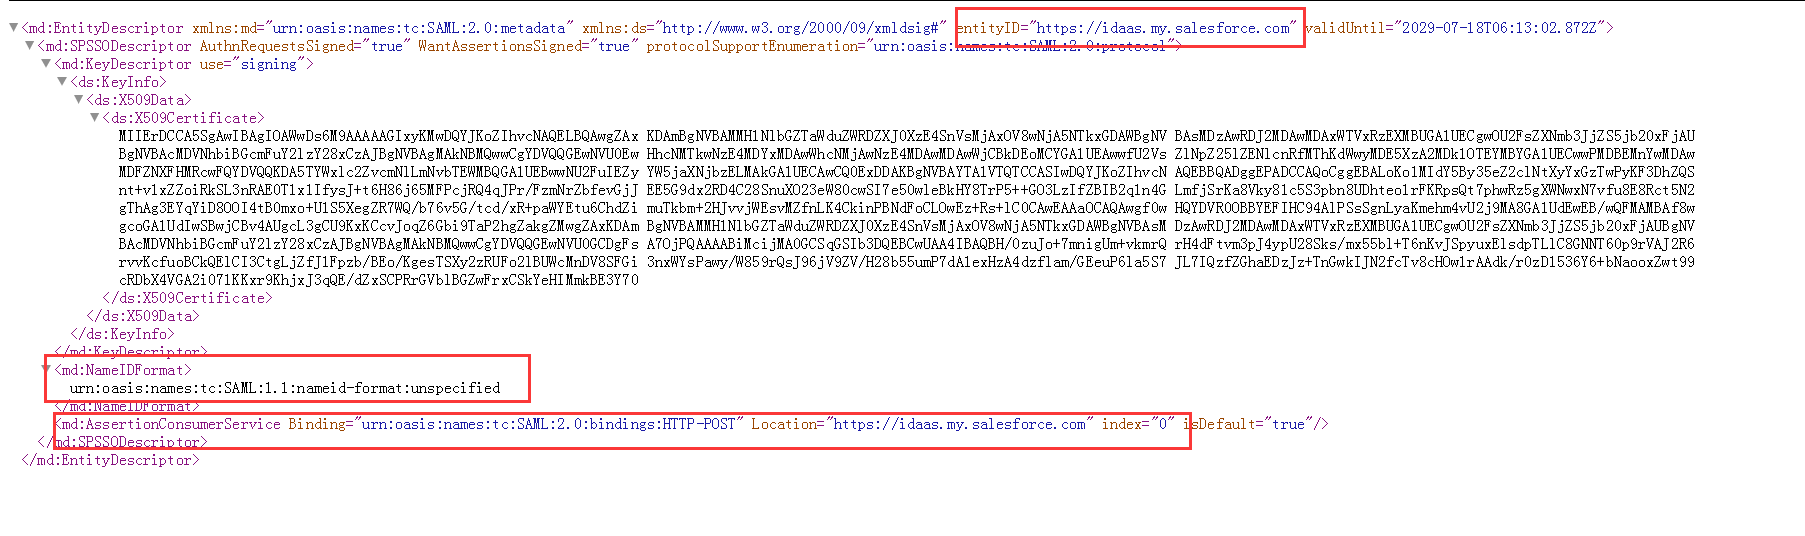
Download and view the metadata. The content marked in red will be used in the next step.

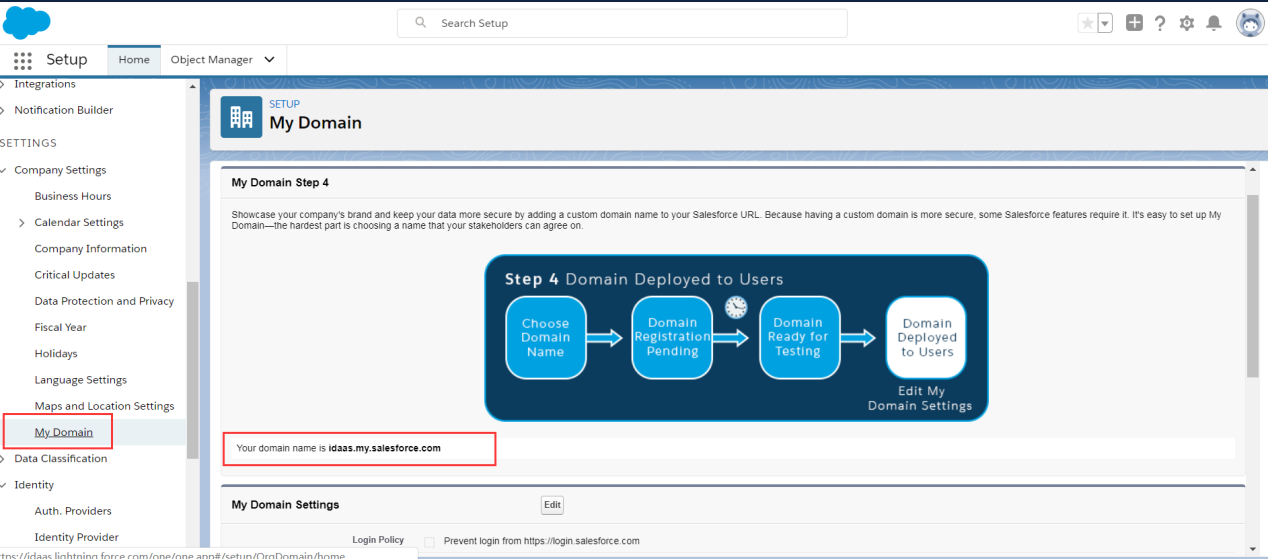
Set the Salesforce domain name.
# IDaaS Configuration
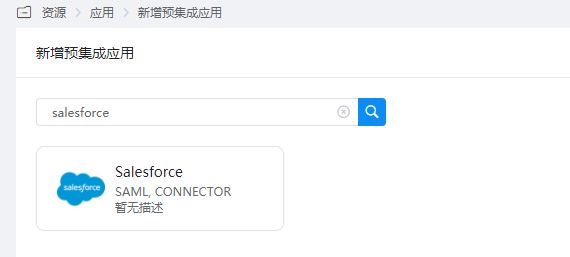
Add the pre-integrated application Salesforce.
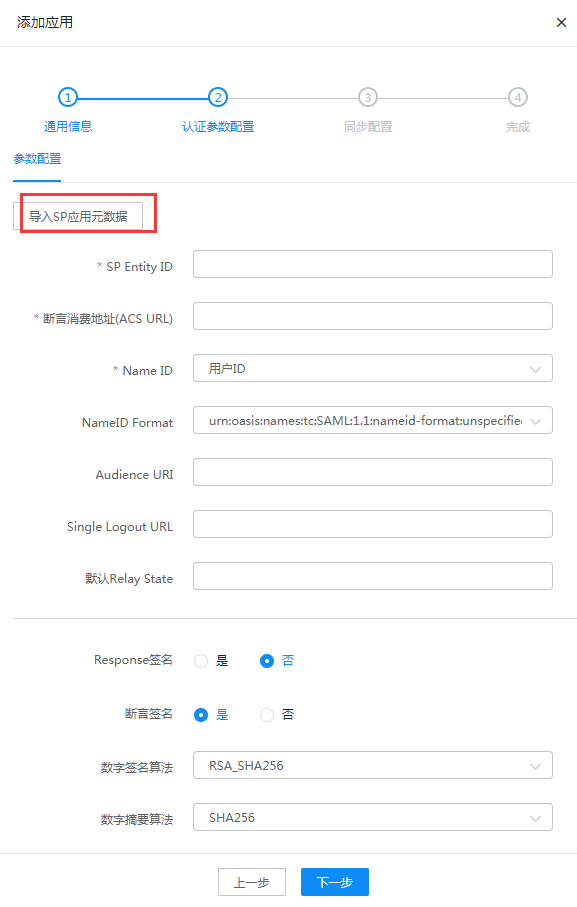
Configure authentication parameters by importing Salesforce metadata.
SP EntityID or Issuer: Fill in the entityID from the XML file in step 3
AudienceURI: Same as above
ACS URL: Fill in the Location content from the AssertionConsumerService tag in the SP XML file
NameID: Select Email
NameID Format: Select the content corresponding to NameID Format in the XML file from step 3
Go to Application Details - Authorization Management - Application Accounts, click the Add Account button, and select authorized users.
Modify the account name to the user's email address in Salesforce.
# Login Verification
Log in to the IDaaS User Center, click the Salesforce logo to enter Salesforce.