Kibana Single Sign-On
# Description
Elasticsearch supports single sign-on to Kibana via the SAML protocol. This document describes how to configure IDaaS to set up SAML-based single sign-on for Kibana with a locally deployed Elasticsearch.
Official Elastic Configuration Documentation (opens new window)
# Prerequisites for Integration
To implement SAML authentication, the Elastic Stack product must have the xpack plugin installed. This plugin is a paid product for versions after 5.0.
Enable xpack.security.enabled: true in the Elasticsearch.yml configuration file of Elasticsearch.
# Authentication Configuration
# IDaaS Configuration
Add the pre-integrated application Kibana.
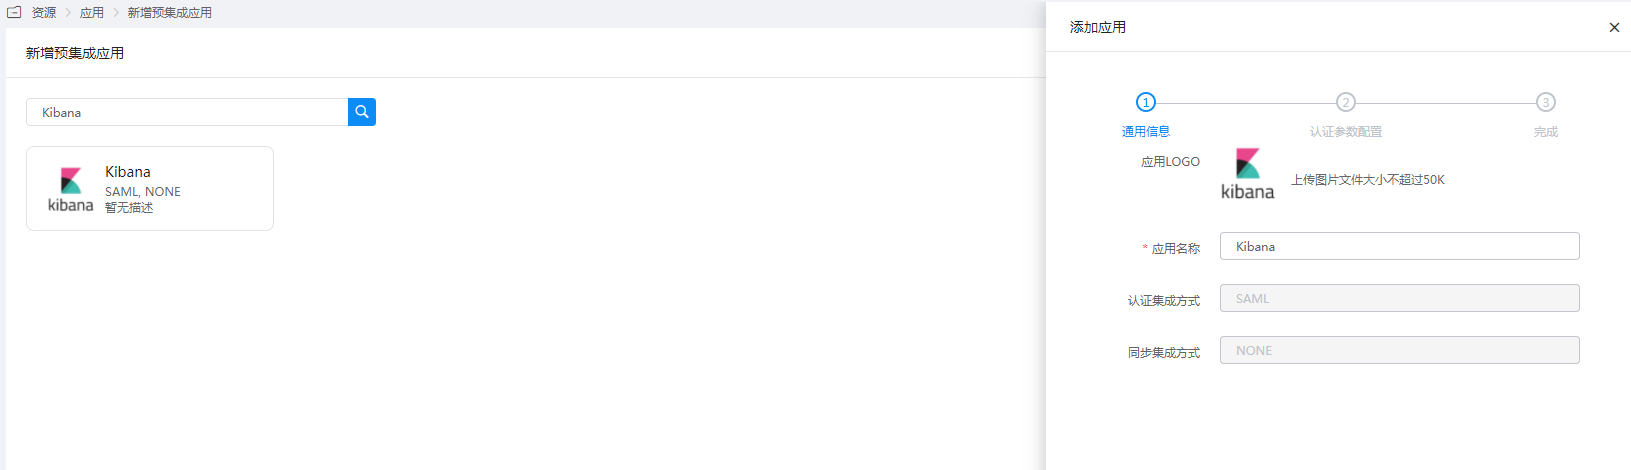
Configure authentication parameters.
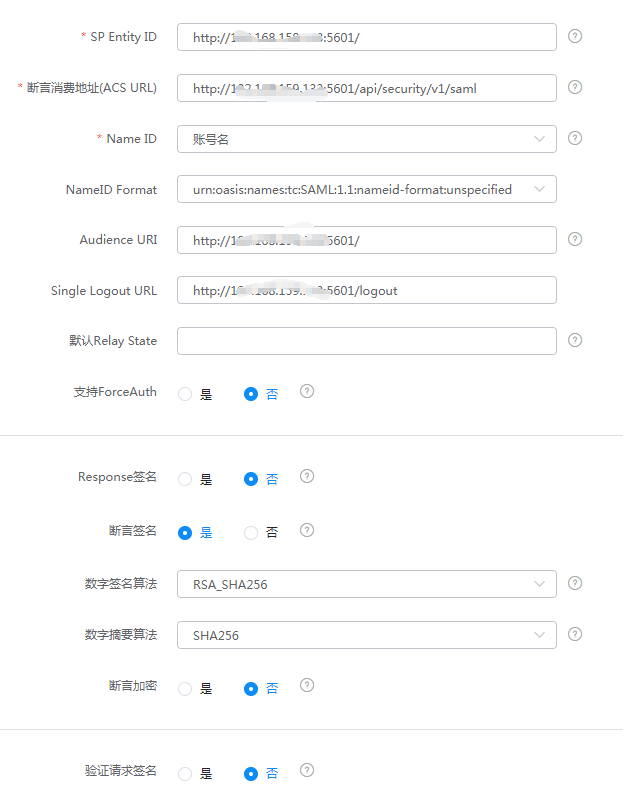
Parameter Description SP Entity ID The unique identifier for the Kibana instance. The base URL of the Kibana instance is used as the Entity ID. Assertion Consumer Service URL Used to receive authentication messages from the IdP. This ACS endpoint only supports the SAML HTTP-POST binding, typically configured as {kibana-url}/api/security/v1/saml, where{kibana-url}is the Kibana base URL.NameID Account Name NameID Format Default Audience URI Same as SP Entity ID Single Logout URL {kibana-url}/logoutRegarding the Assertion Consumer Service URL: When using
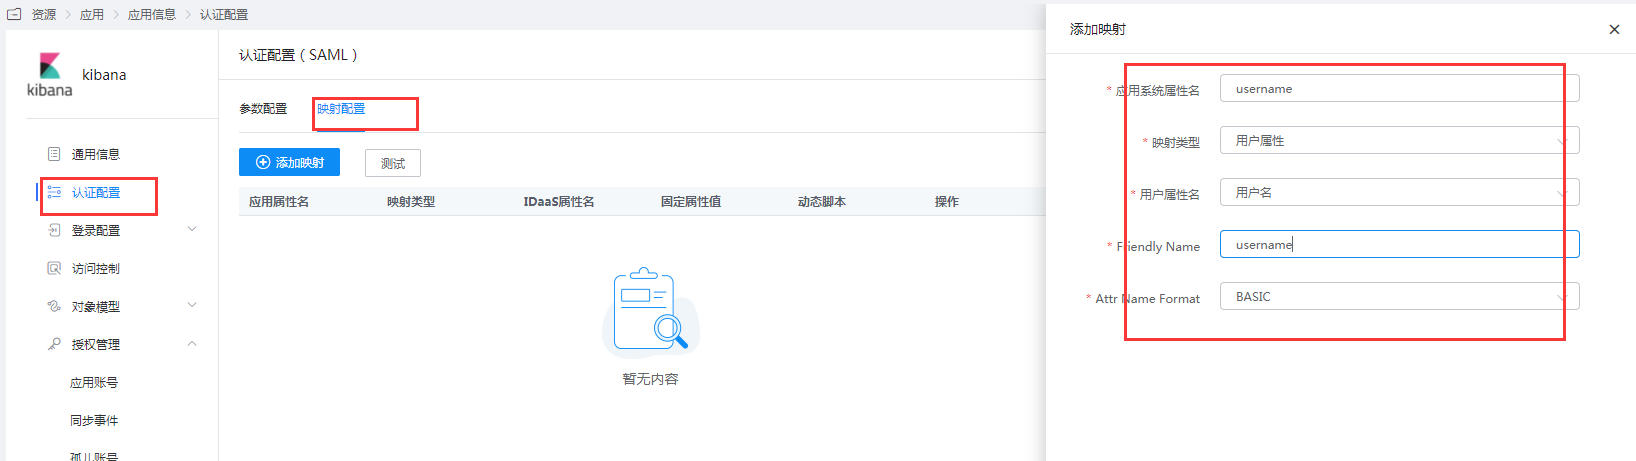
/api/security/v1/samlin Elasticsearch version 7.10, a warning log will be generated in Kibana: "The "/api/security/v1/saml" URL is deprecated and will stop working in the next major version, please use "/api/security/saml/callback" URL instead." This indicates that lower versions are gradually deprecating/api/security/v1/saml, and version 8.0 will no longer support it. It is recommended to use/api/security/saml/callbackinstead.Mapping Configuration - Add mapping.
Go to Application Details - Authorization Management - Application Accounts, click the Add Account button, and select the authorized user.
# Kibana and Elasticsearch Configuration
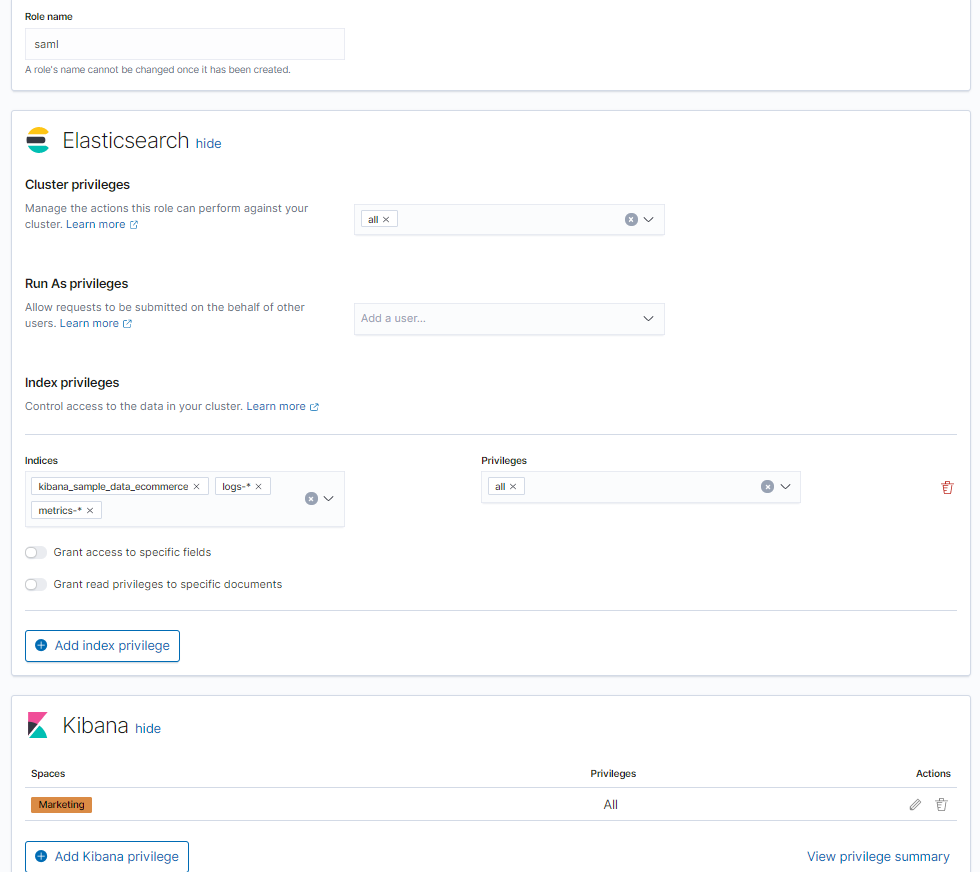
Log in to the Kibana console, select Management - Stack Management. On the Stack Management page, select Security - Roles, create a role. The role name can be customized, such as
saml. Add Elasticsearch and Kibana privileges.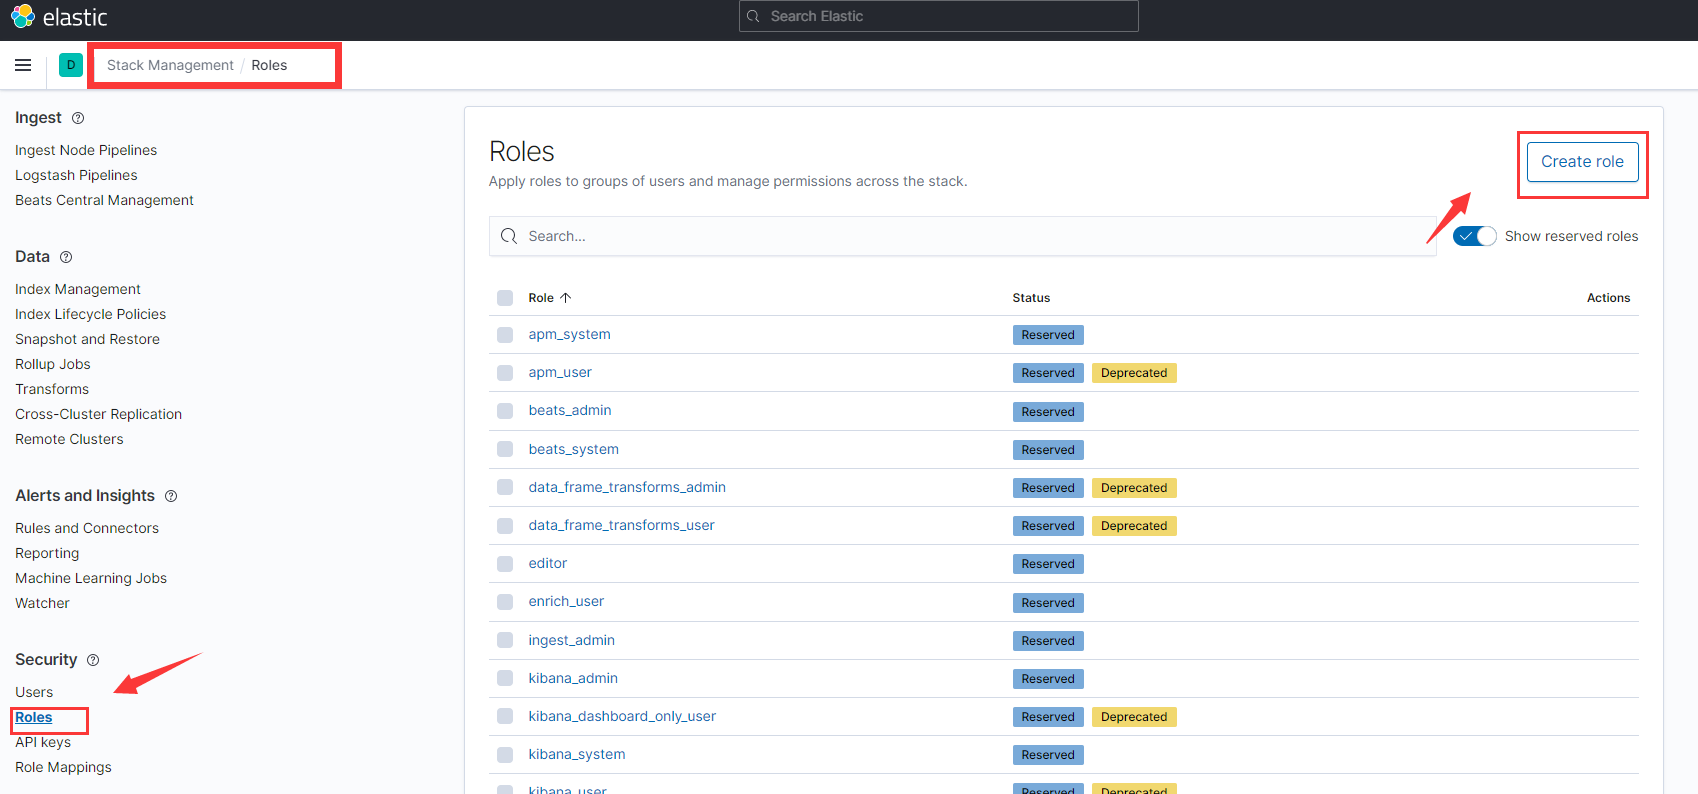
Map the created custom role with IDaaS SAML. Select Management -> Dev Tools, and execute the following sample code in the Console tab.

PUT /_security/role_mapping/zhuyunidaas
{
  "roles": [ "saml" ],
  "enabled": true,
  "rules": {
    "field": { "realm.name": "saml1" }
  }
}
1
2
3
4
5
6
7
8For other advanced configurations, please refer to the official documentation Configuring role mappings (opens new window).
Configure the YML configuration files for Elasticsearch and Kibana. Download the IDaaS IDP metadata file IDPMetadata.xml and upload it to the
config/samlpath of Elasticsearch. To download the IDP metadata from IDaaS, visit https://{your_domain}/api/v1/saml2/idp/metadata.Example Elasticsearch.yml configuration:
xpack.security.authc.token.enabled: true
xpack.security.authc.realms.saml.saml1:
  order: 2
  idp.metadata.path: saml/IDPMetadata.xml
  idp.entity_id: "https://Zhuyun IDaaS Domain Name.bccastle.com/api/ams/saml/idp"
  sp.entity_id:  "{kibana-url}"

  ## For version 8.0, it is recommended to use {kibana-url}/api/security/saml/callback instead

  sp.acs: "{kibana-url}/api/security/v1/saml"
  sp.logout: "{kibana-url}/logout"
  attributes.principal: "nameid"
  attributes.groups: "roles"
1
2
3
4
5
6
7
8
9
10
11
12
13Example Kibana.yml configuration. For more configuration information, please see Configuring Kibana (opens new window):
xpack.security.authc.selector.enabled: true ## Login help URL xpack.security.loginHelp: "**Help** info with a [link](...)" xpack.security.authc.providers: basic.basic1: order: 0 icon: "logoElasticsearch" hint: "Typically for administrators" saml.saml1: order: 1 realm: saml1 description: "Log in with SSO" ## Logo URL icon: "https://my-company.xyz/saml-logo.svg"1
2
3
4
5
6
7
8
9
10
11
12
13
14
15
16
17
18After modifying the configurations, restart ElasticSearch and Kibana.
# Login Verification
- Access the Kibana console and click "Log in with SSO".
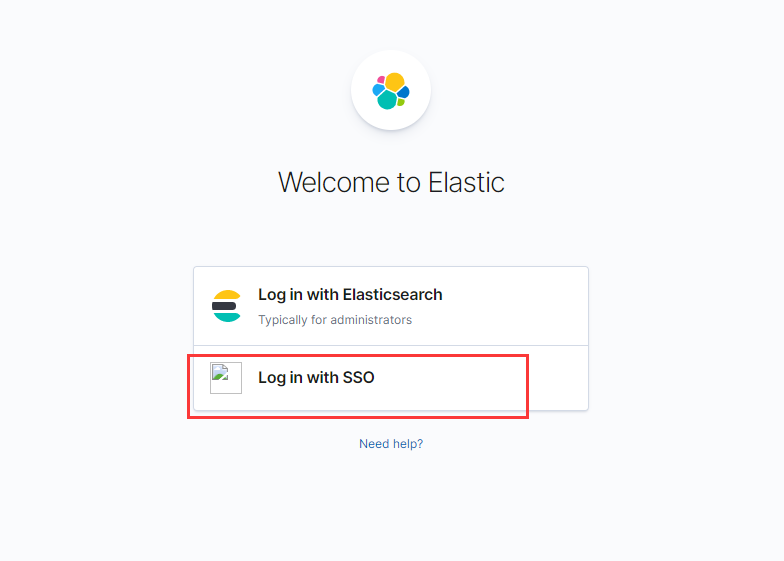
Redirect to the IDaaS authentication page.

After entering the username and password, access the Kibana console.