Feishu Data Synchronization
# Description
This document describes the synchronization configuration between Feishu and IDaaS, enabling the synchronization of IDaaS organization and user data to Feishu.
# Synchronization Configuration
# Feishu Configuration
Log in to the Feishu Open Platform -> Developer Console.
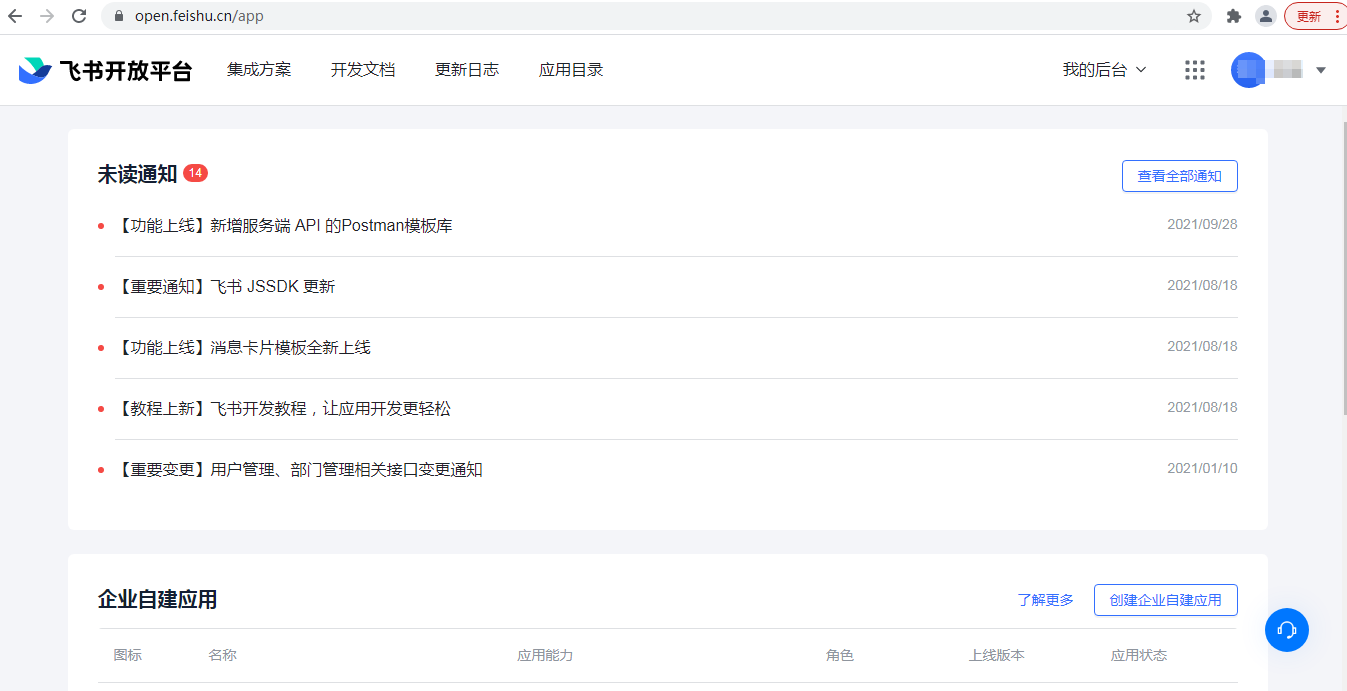
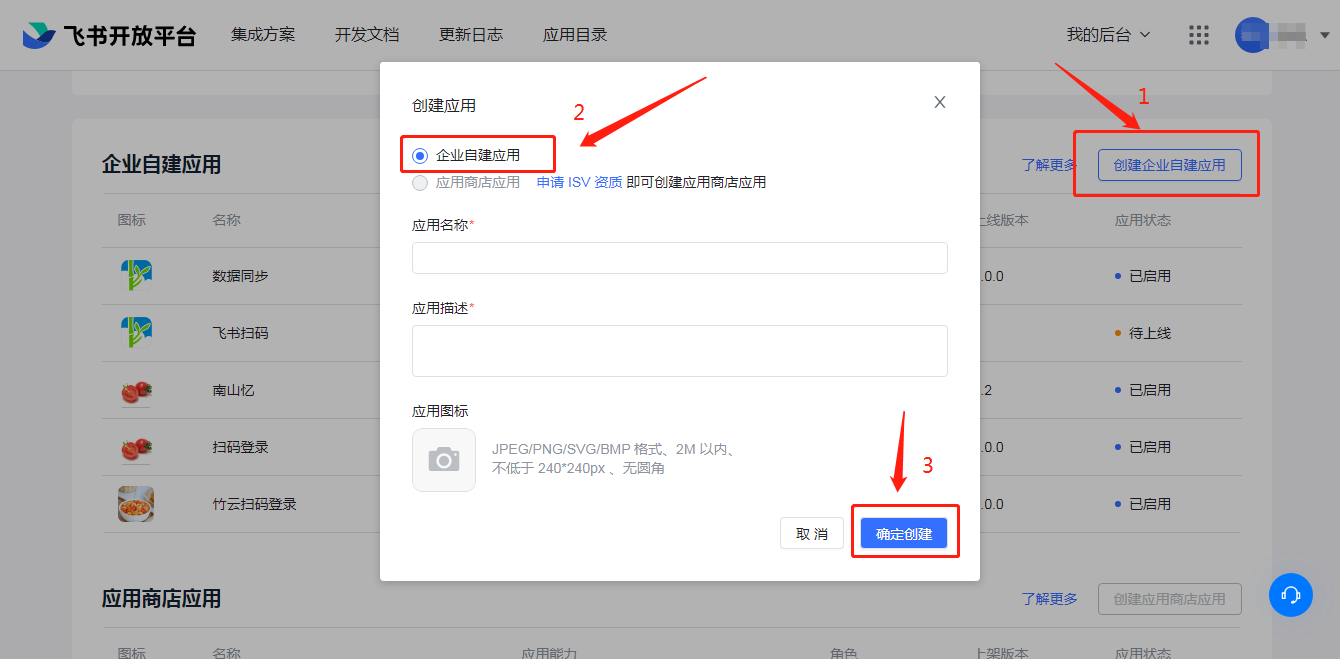
Create an enterprise self-built application.
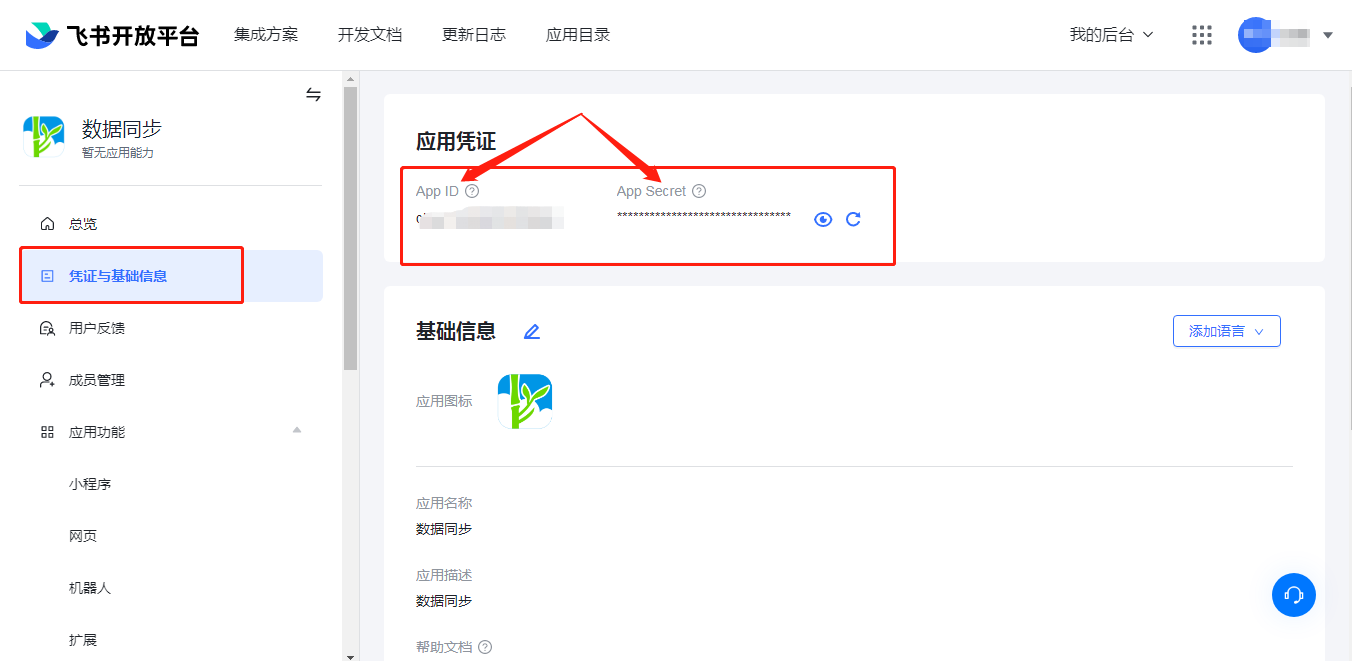
Obtain the application APP ID and APP Secret.
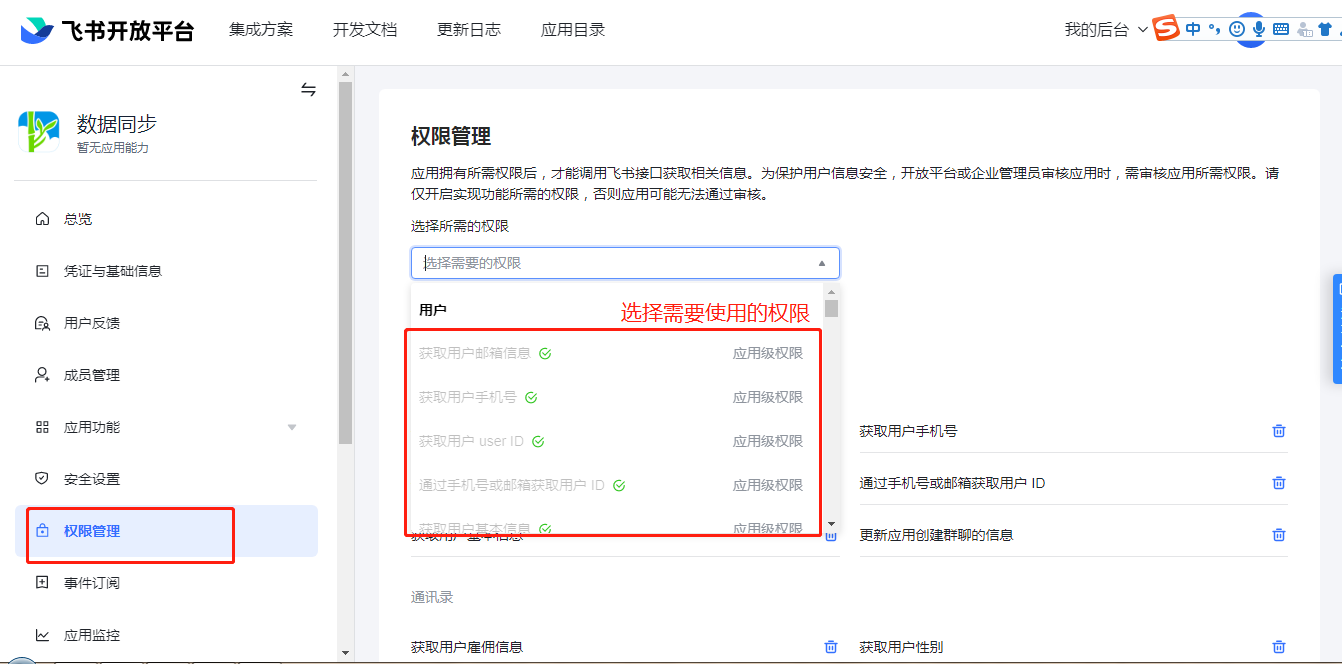
Apply for API permissions.
# Feishu Configuration for Extended Attributes
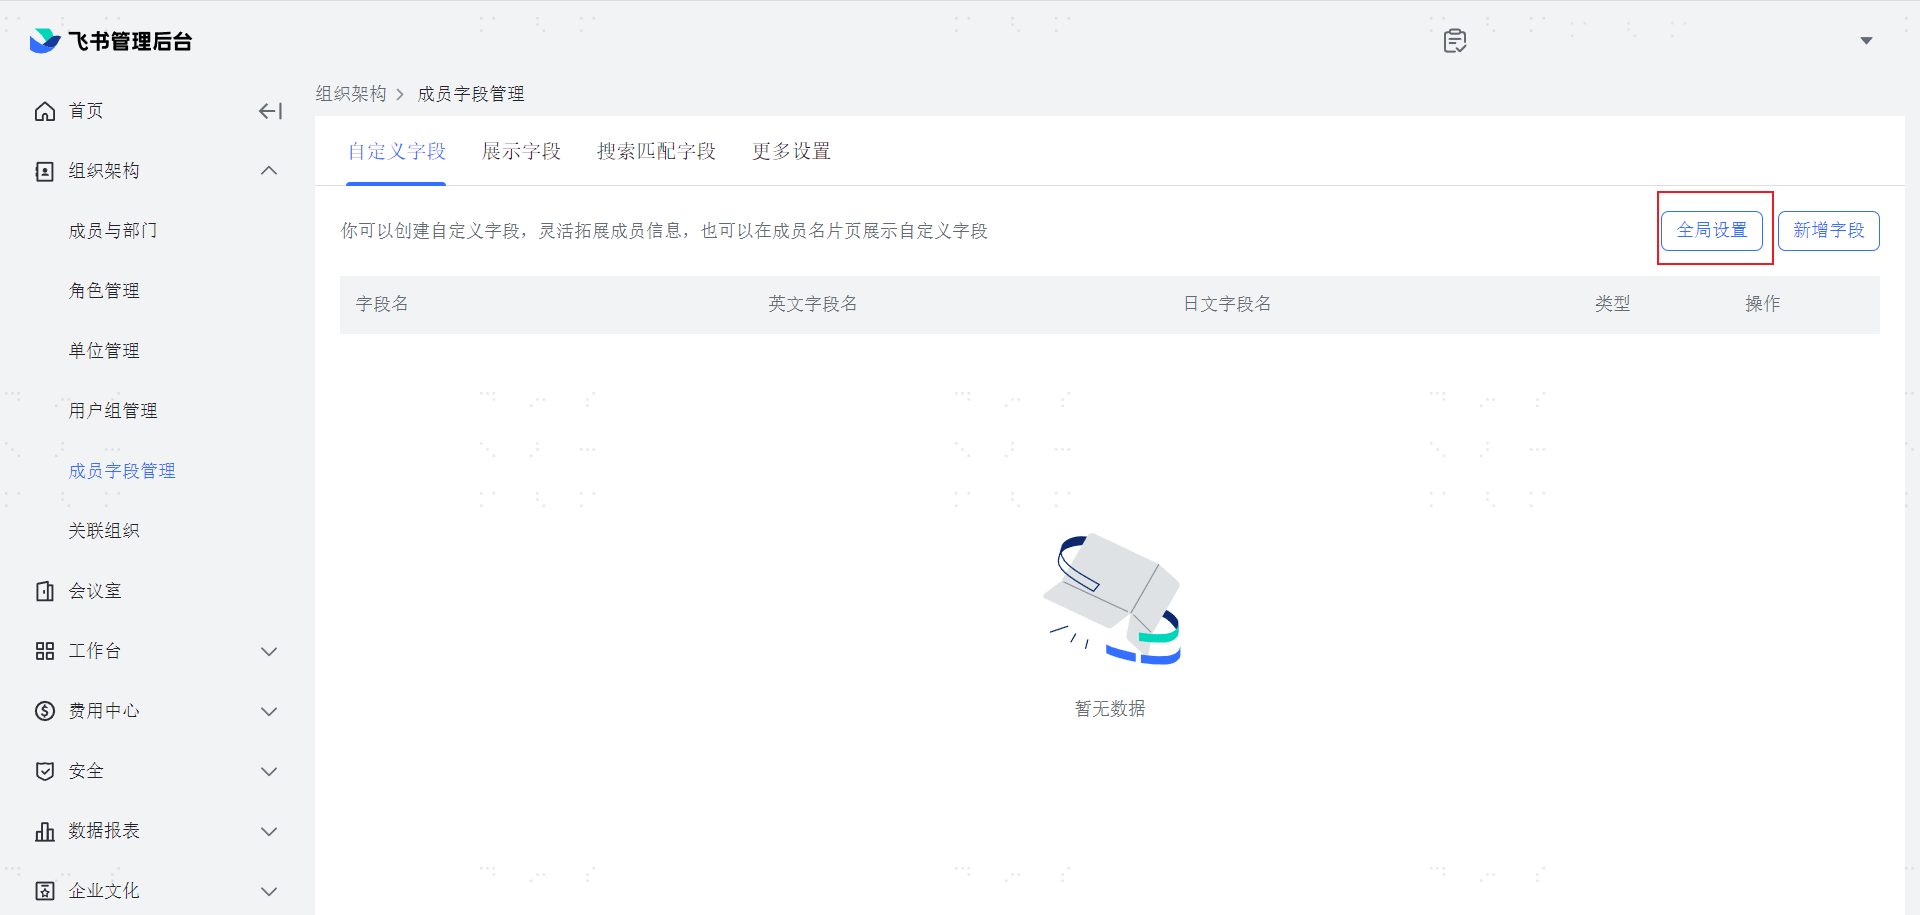
Log in to the Feishu Management Console (opens new window). Go to Organizational Structure -> Member Field Management.

Click on Global Settings.
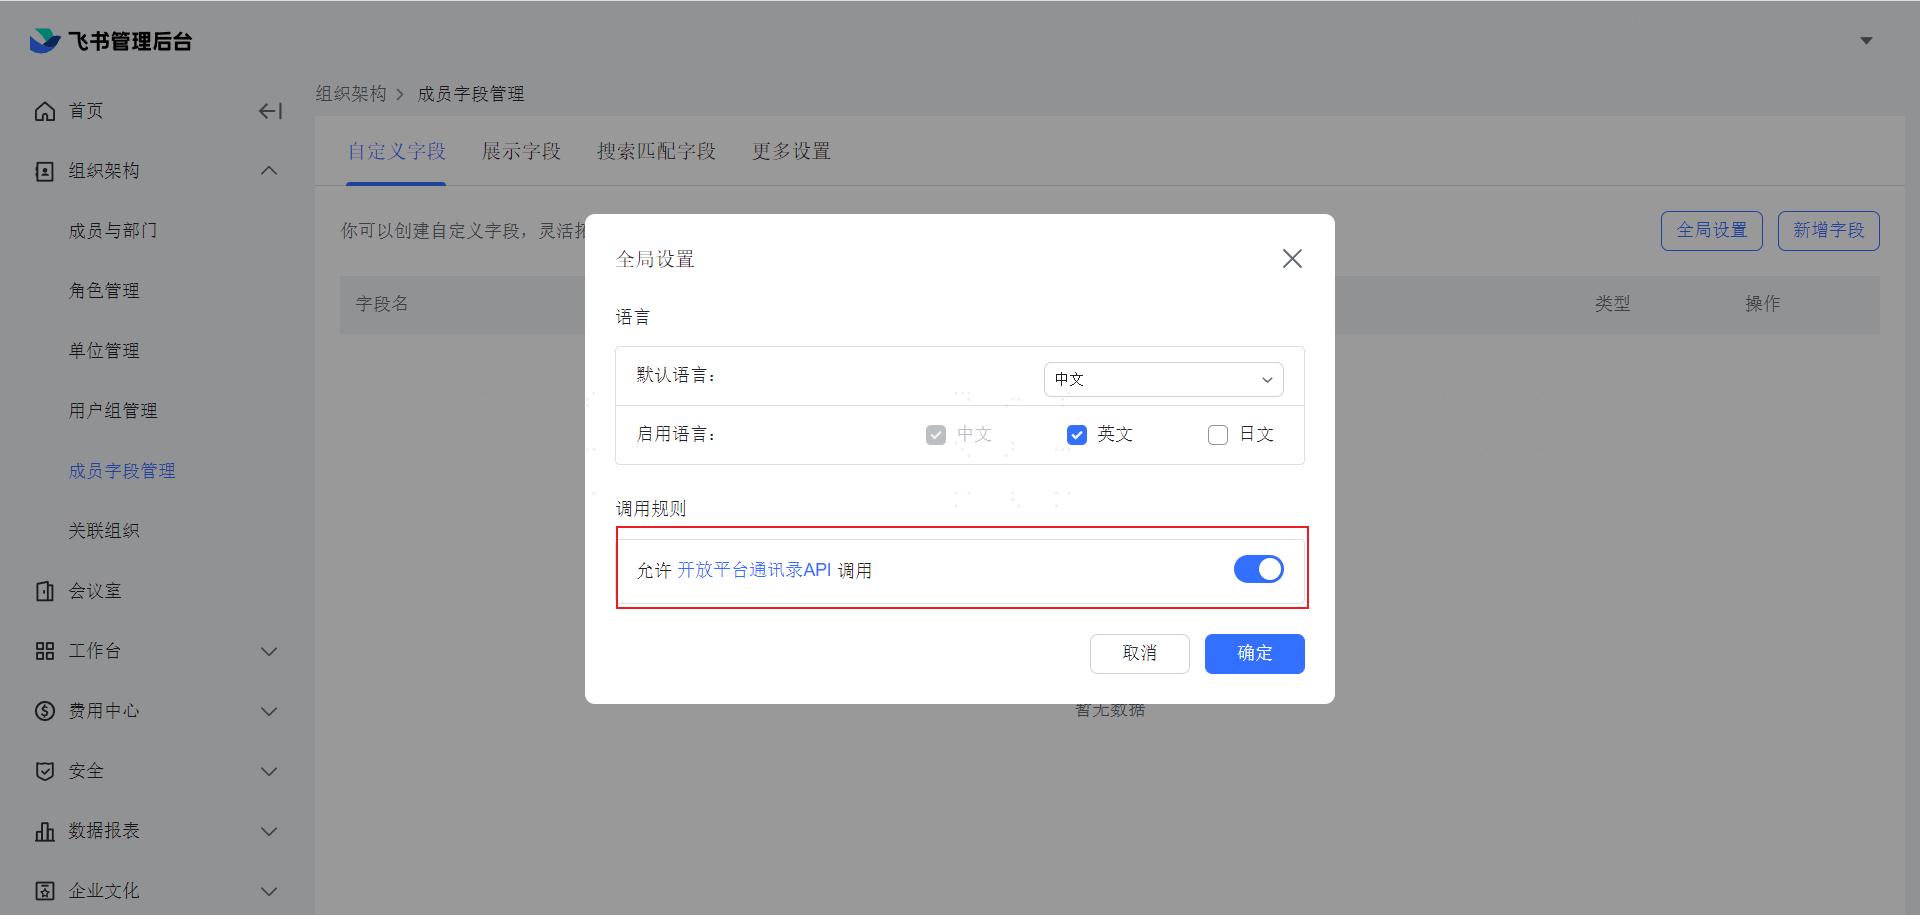
In the pop-up window, enable "Allow Open Platform Address Book API Calls" and click OK.
Click on Add Field.

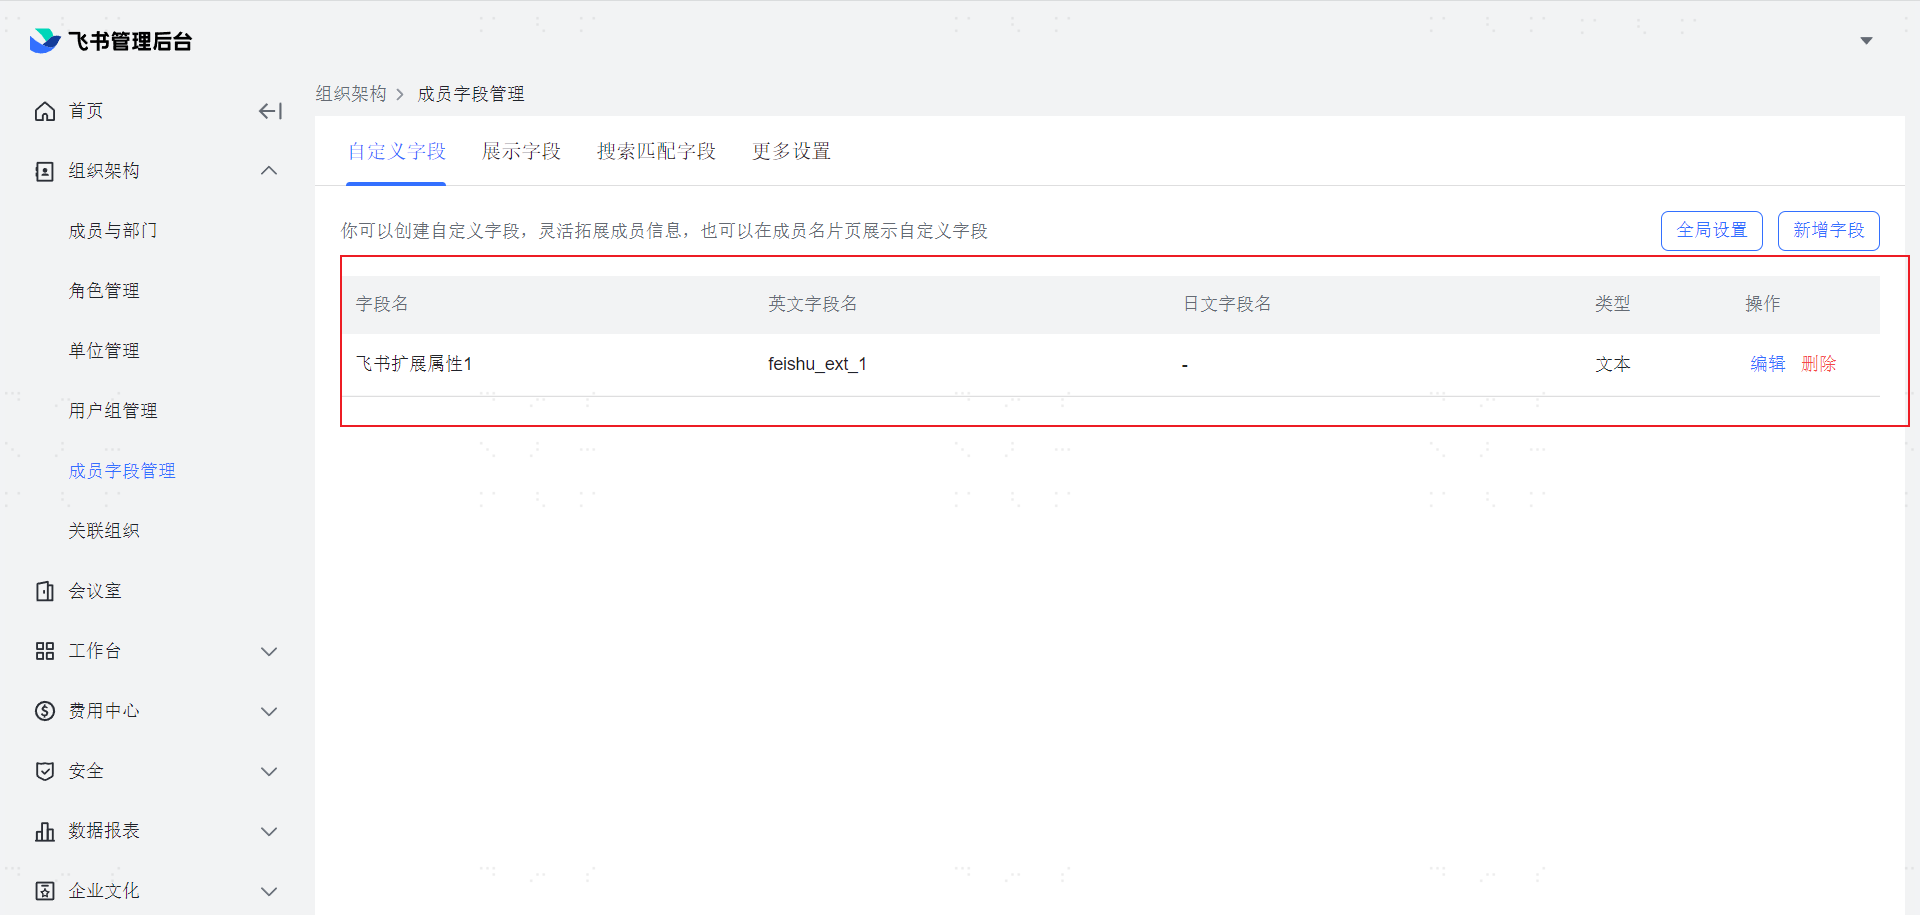
In the pop-up window, enter the Chinese field name and English field name, select the field type as Text, and click OK.
Note: The Chinese field name corresponds to the display label of the IDaaS application account model attribute. The English field name can be left blank. Currently, IDaaS only supports extended fields of the text type.
At this point, you can see the newly created extended attribute on the page.
# IDaaS Configuration for Extended Attributes
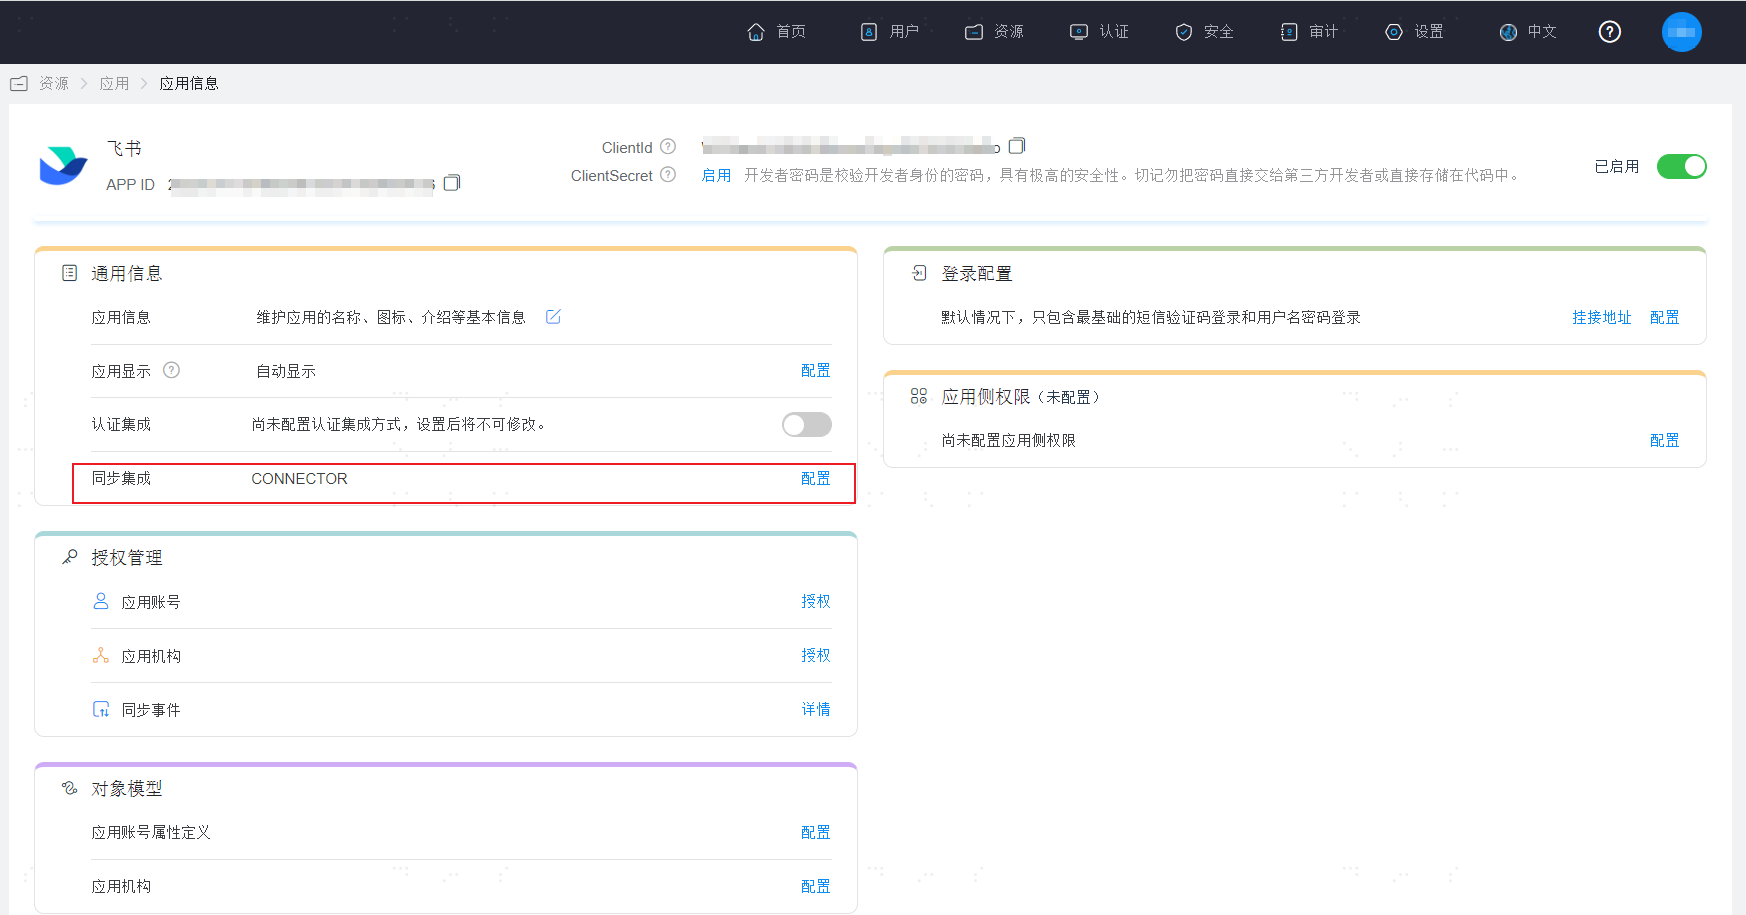
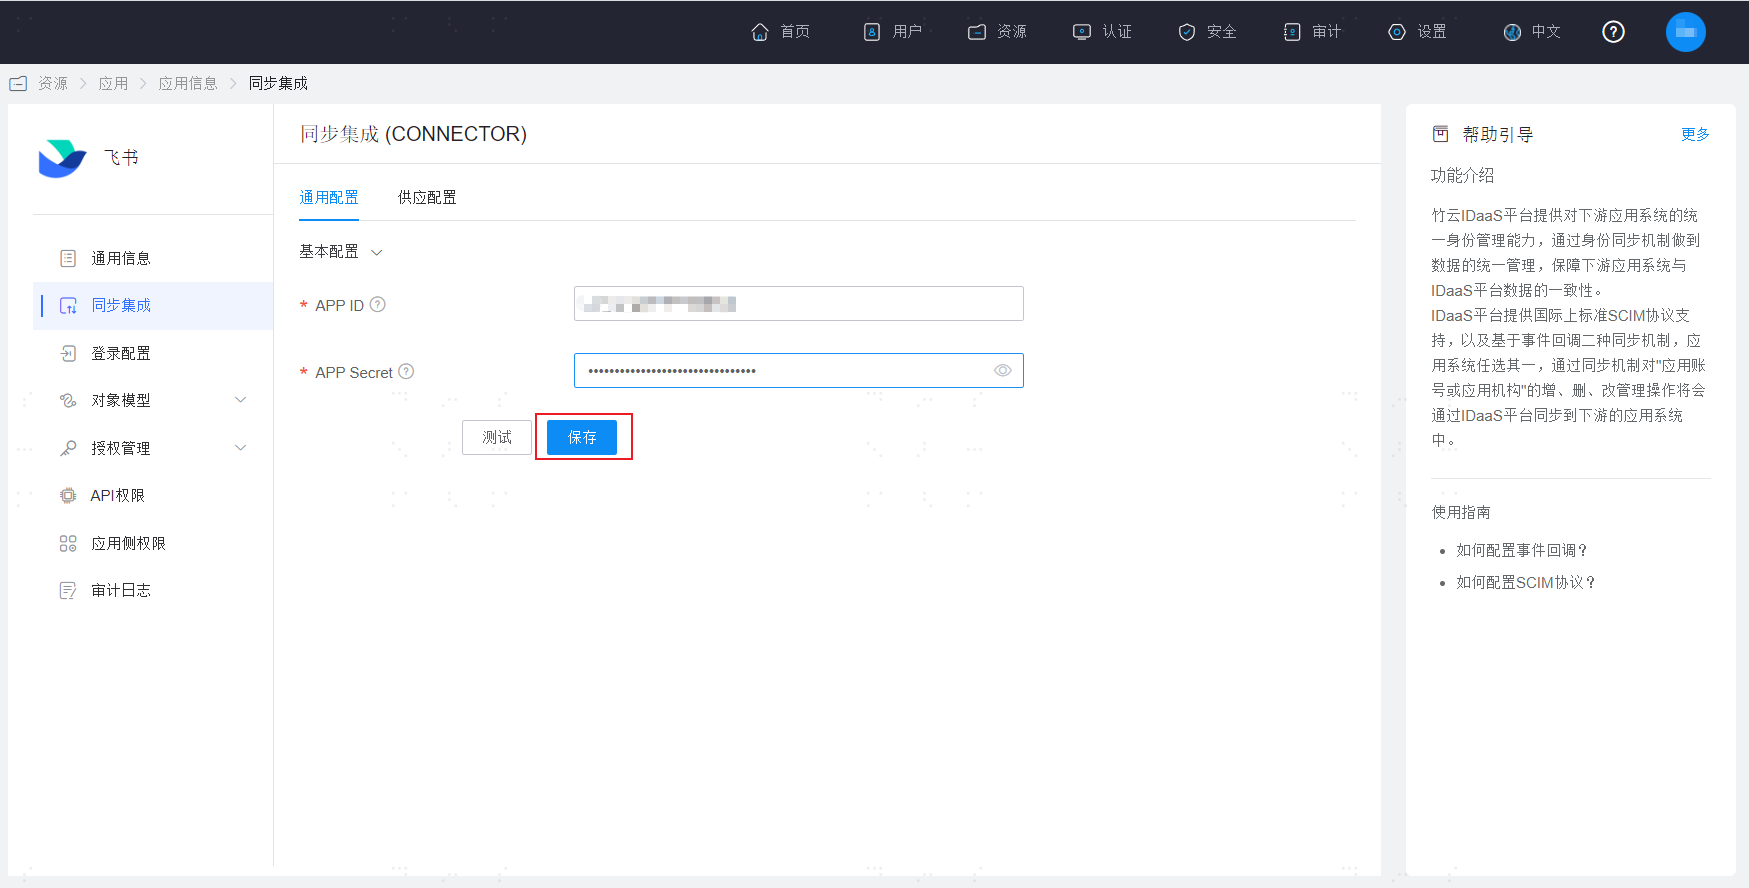
After logging into the IDaaS Enterprise Center. Go to the Feishu application homepage -> Click on Synchronization Integration -> Configuration.
After entering the Feishu synchronization configuration page, click Save and ensure it saves successfully.
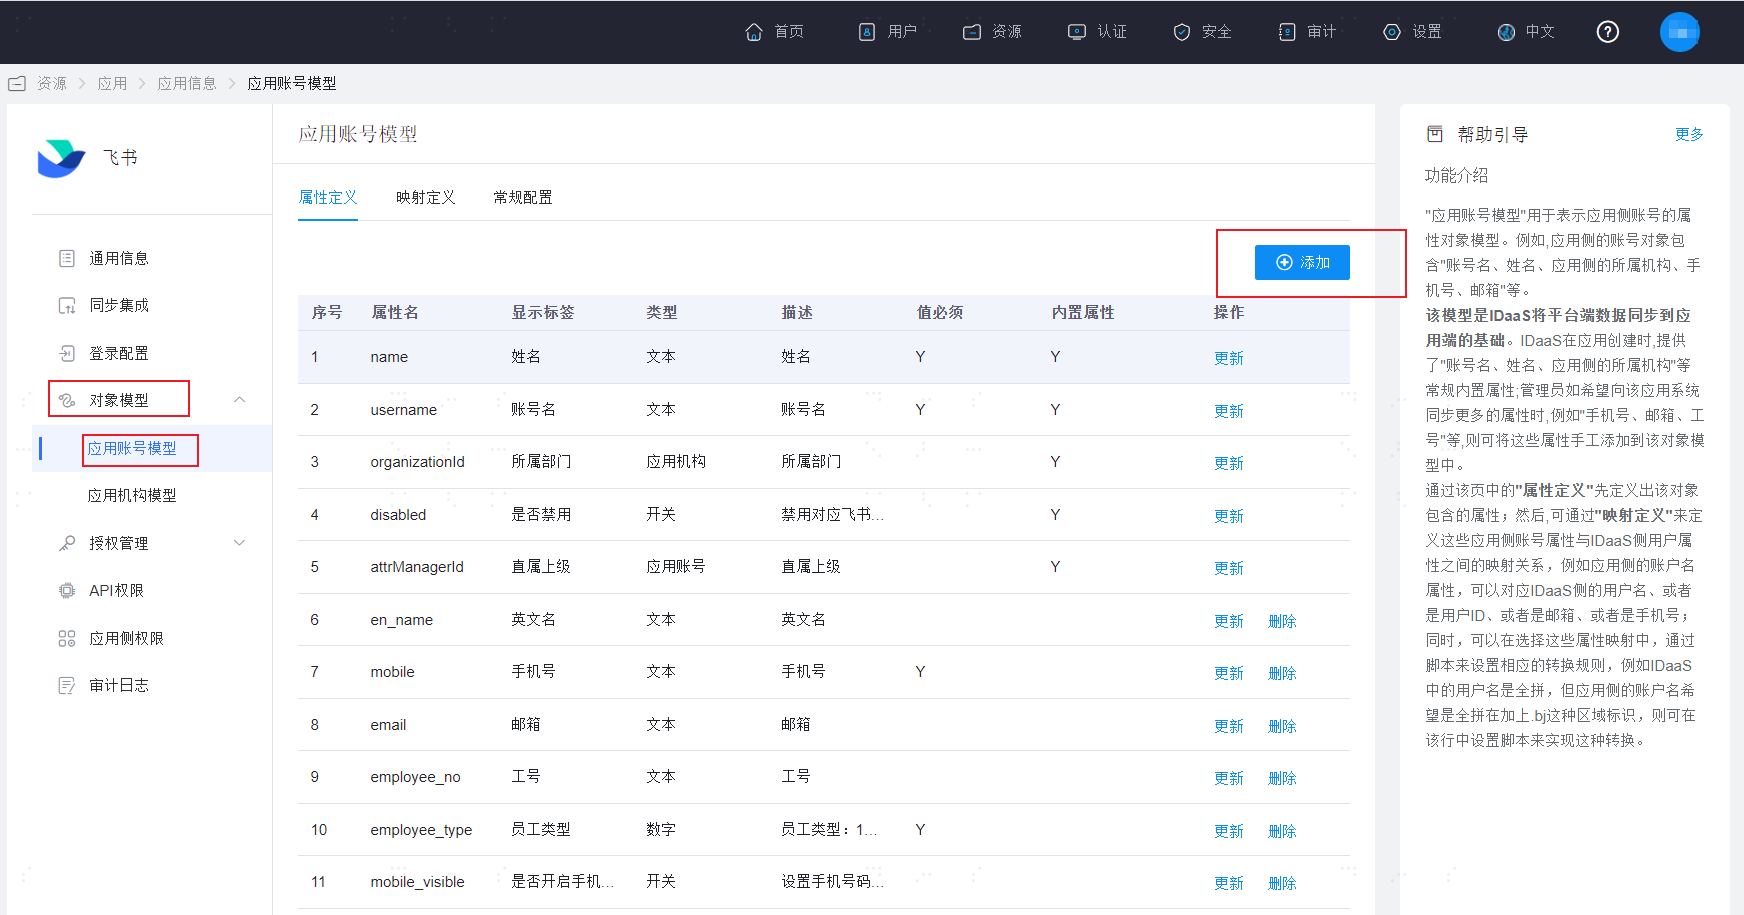
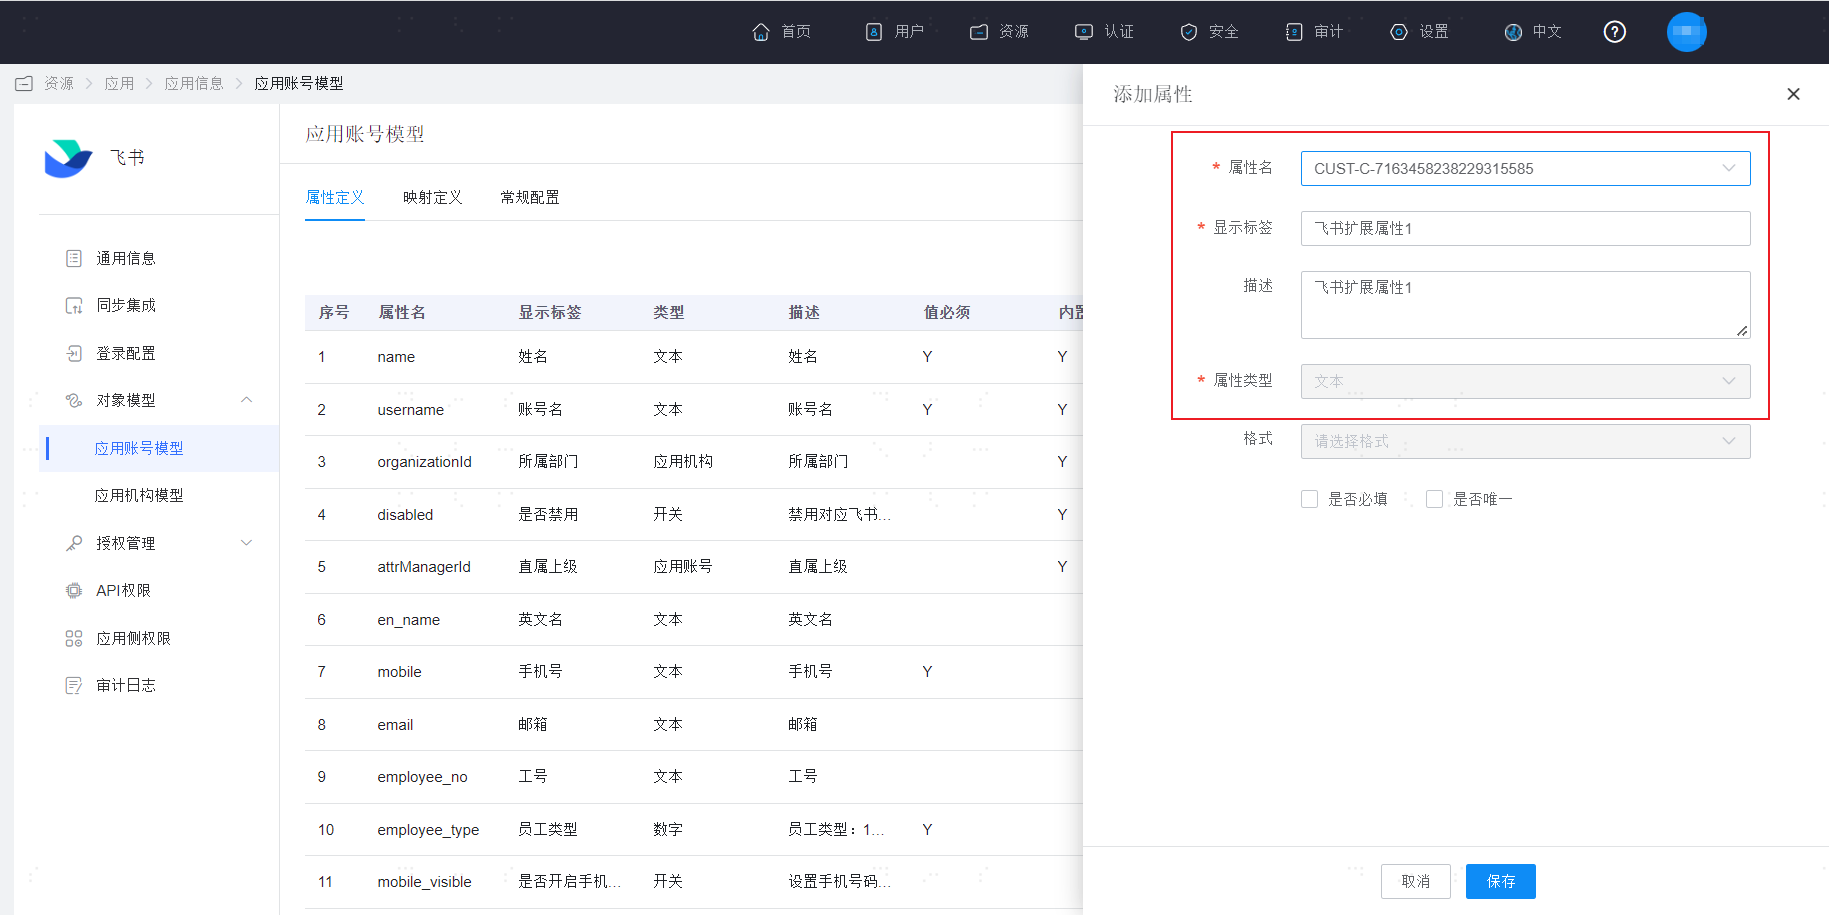
Click on Object Model -> Application Account Model -> Add on the right side.
In the pop-up window on the right, you can find the extended attributes configured in Feishu in the Attribute Name dropdown box.
Note: The extended attribute name format here is a fixed prefix "CUST-" + the internal ID corresponding to the Feishu platform's extended attribute.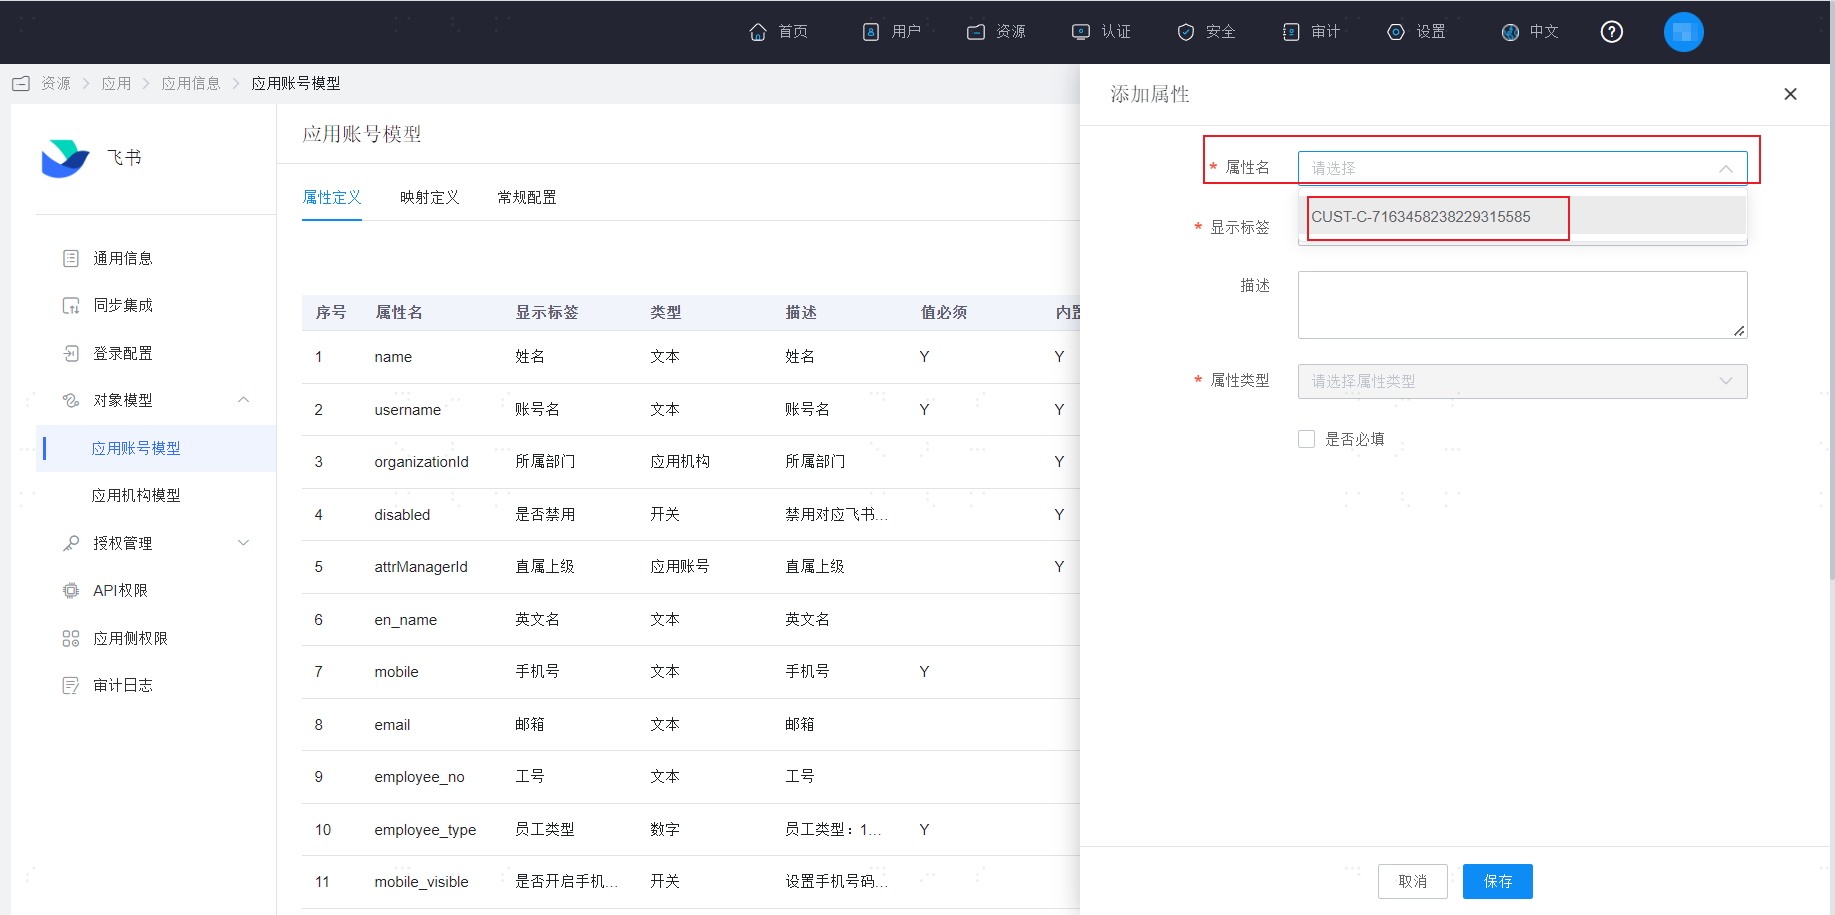
Select this extended attribute to see its detailed information, and click Save.
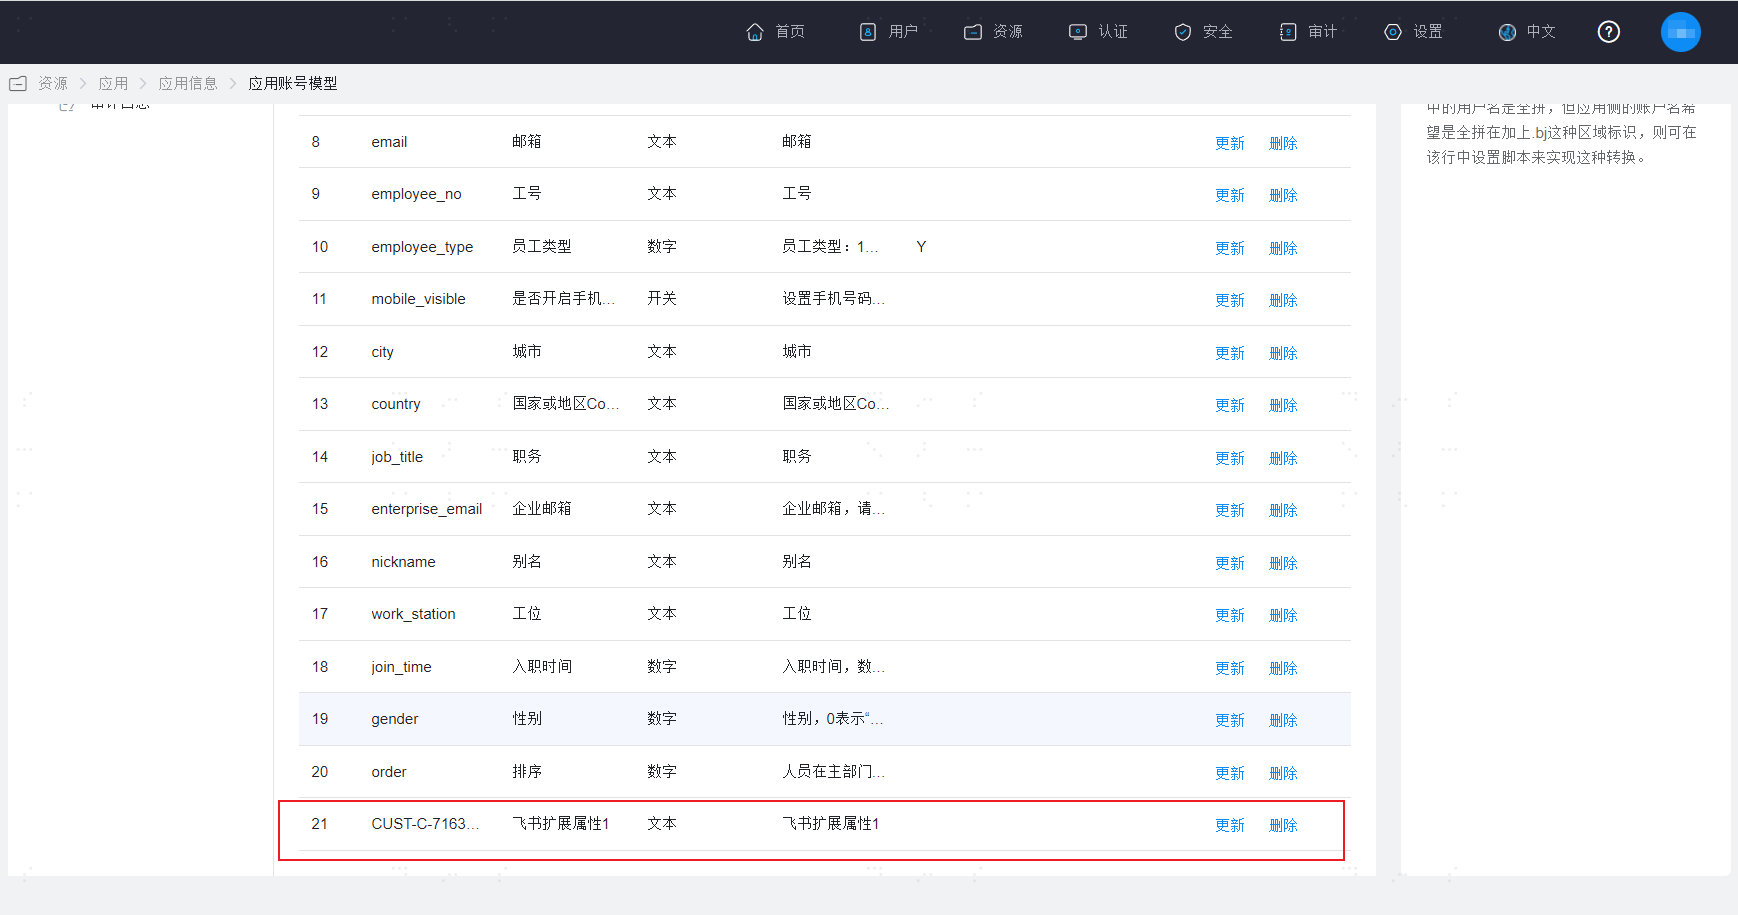
At this point, you can see the newly saved extended attribute at the end of the Attribute Definition page. If you need to establish a mapping relationship with system user attributes, please configure it in the Mapping Definition.
# IDaaS Configuration
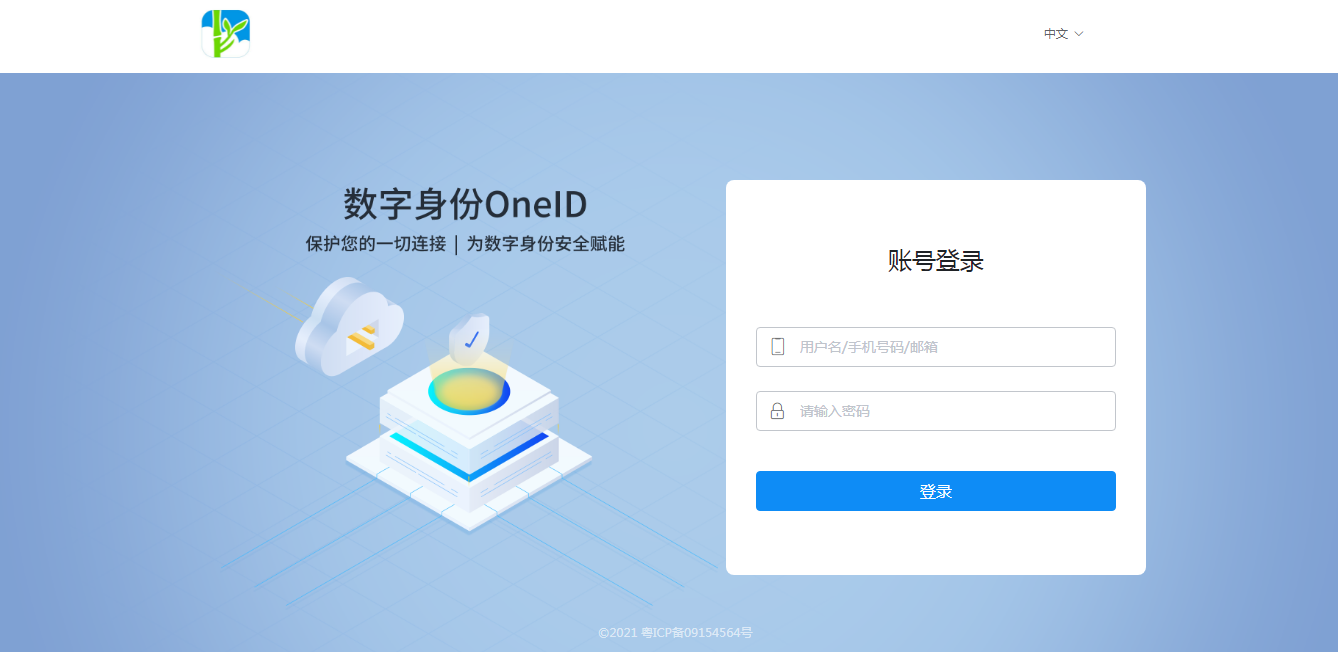
Log in to the IDaaS Enterprise Center.
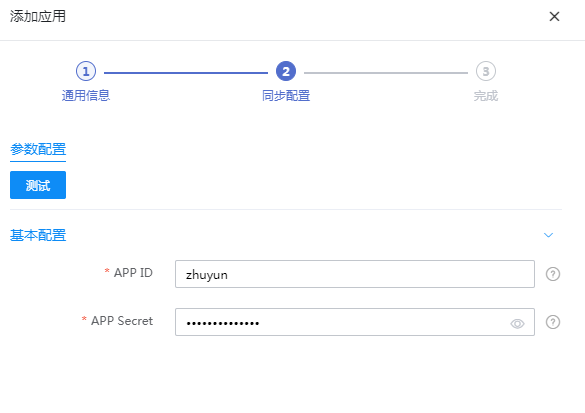
Add the pre-integrated application "Feishu Identity Synchronization".

Configure application parameters.
- Application ID: APP ID
- Application Secret: APP Secret
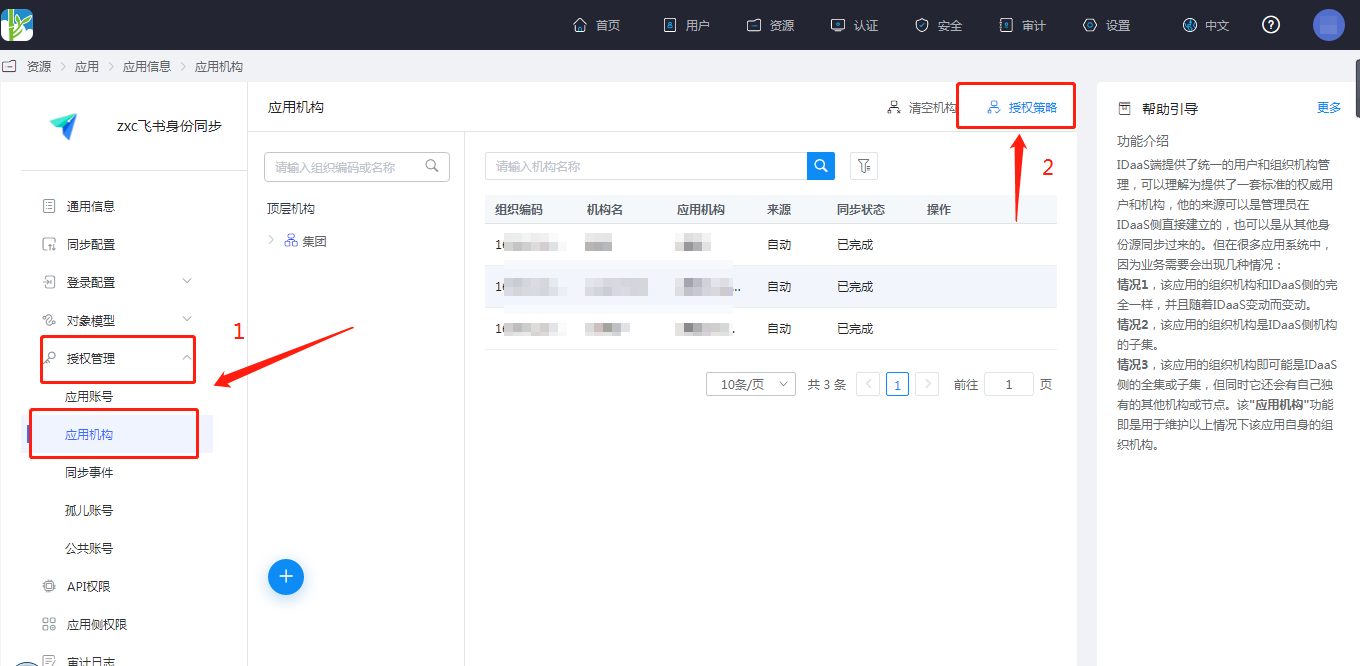
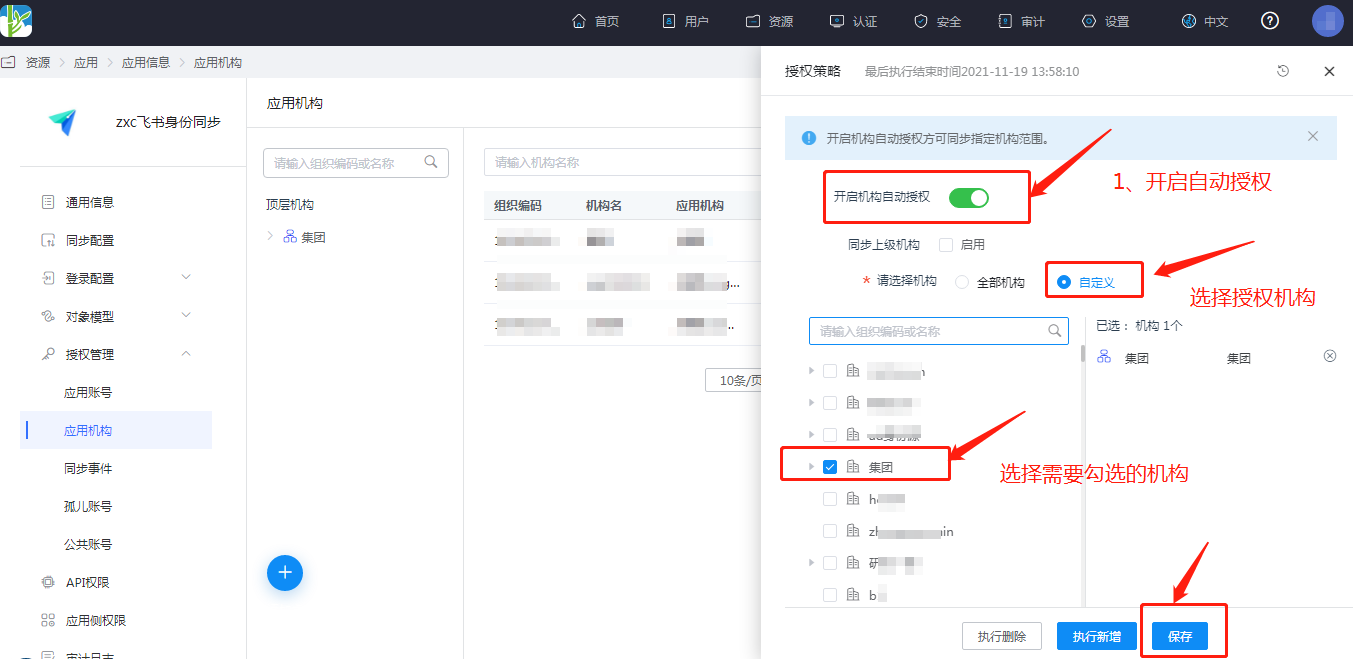
Authorize application organizations. Go to Application Details -> Application Organizations -> Authorization Policy, enable automatic organization authorization, select the organization scope, click the Save button, and then click Execute Addition.
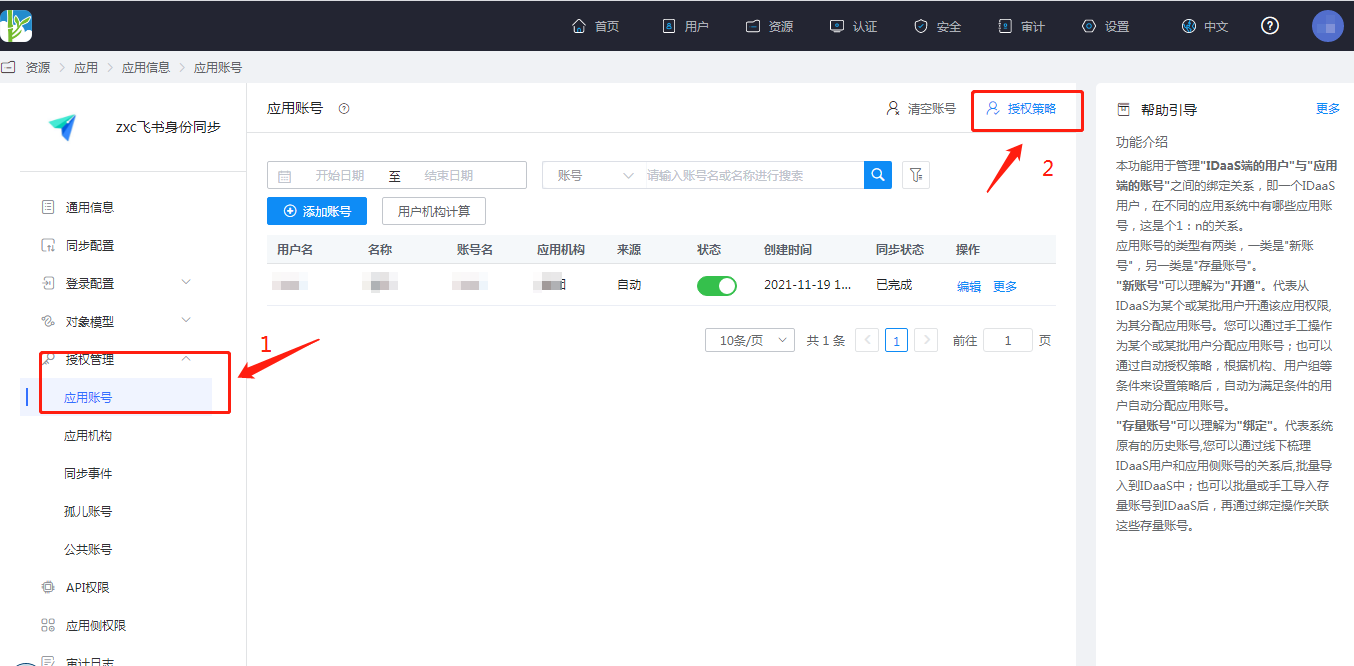
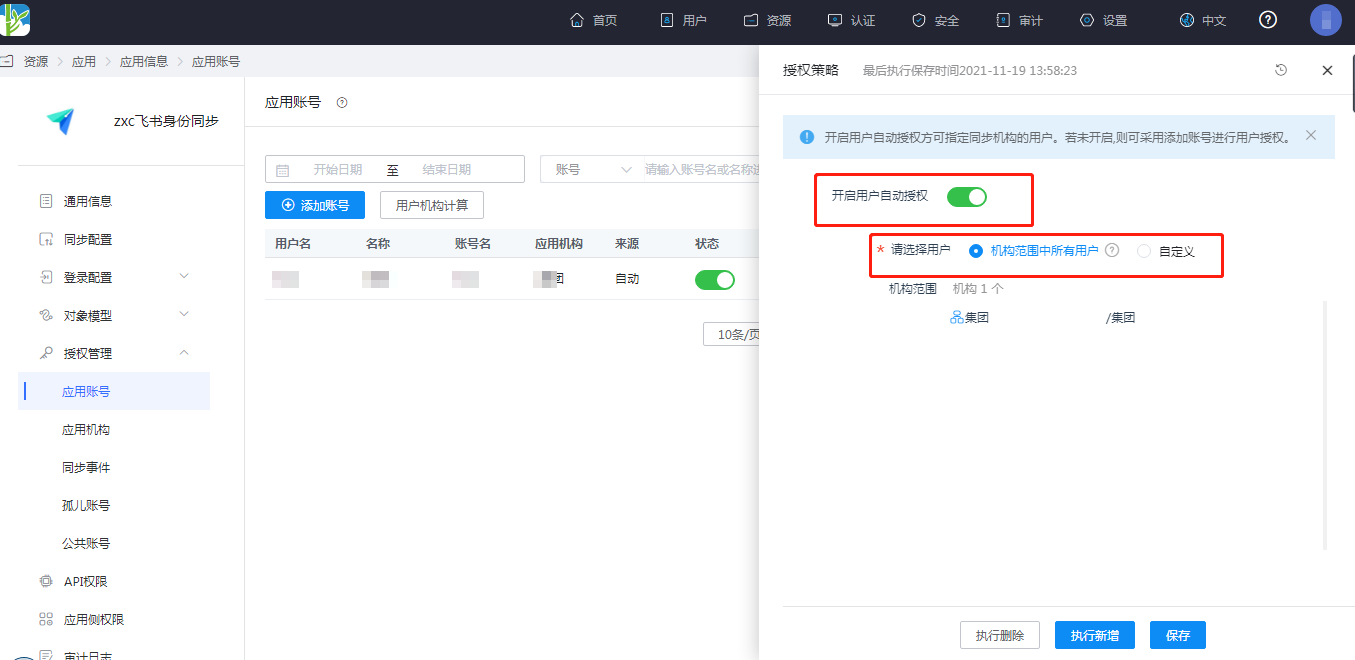
Authorize the application account. Navigate to Application Details -> Application Account Structure -> Authorization Policy. Enable automatic organization authorization, select the user scope, click the Save button, and then click Execute New.
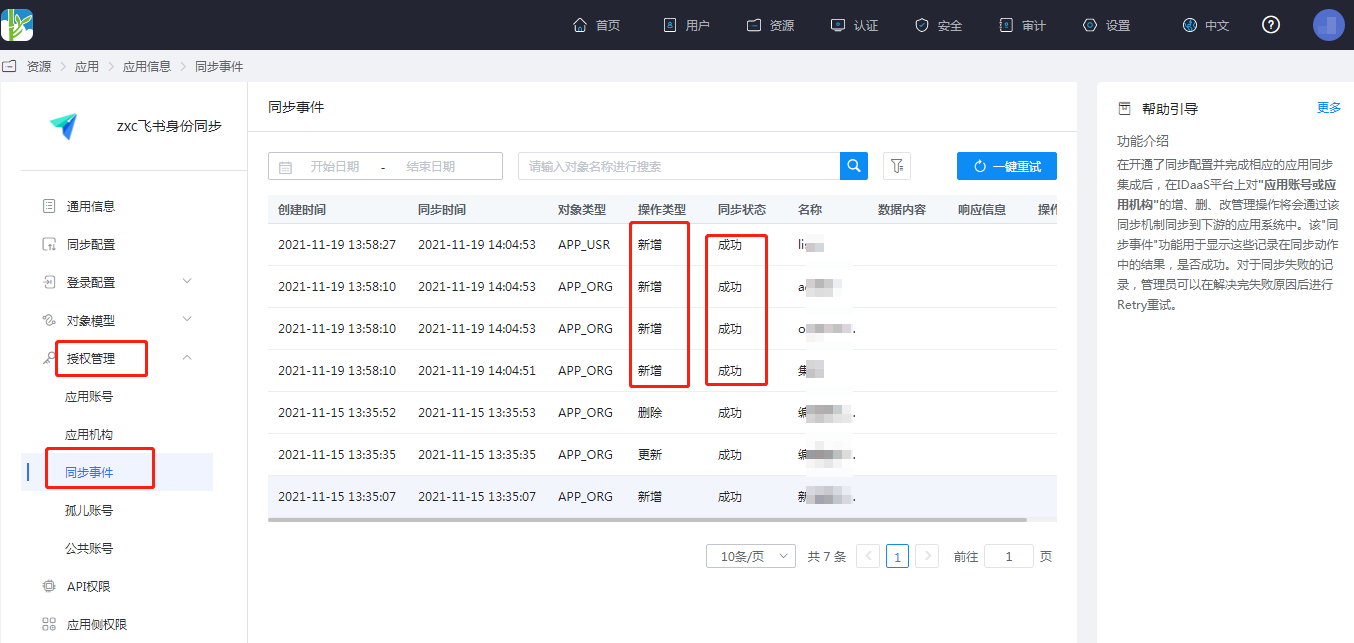
- Go to Application Details -> Synchronization Events to view the synchronization events.
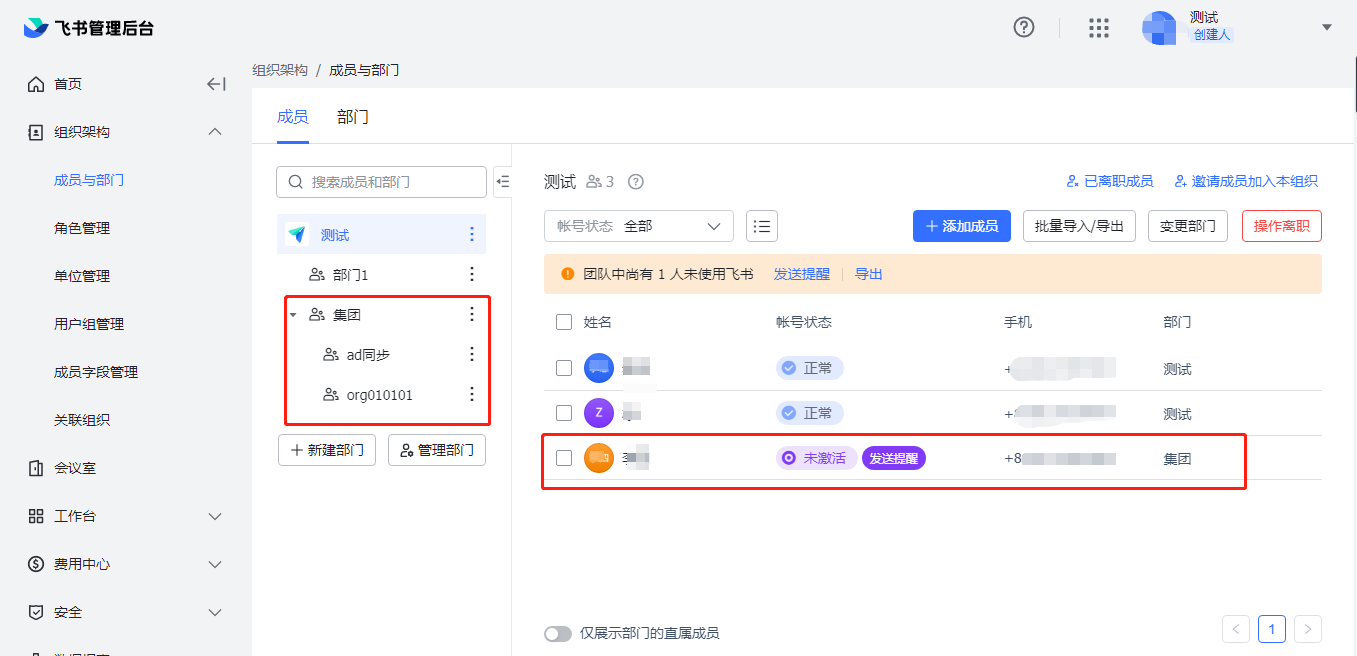
# View Synchronization Results
Log in to the Feishu management backend, navigate to the address book, and view the synchronized organizations and users.