SAML Plugin Authentication for JIRA & Confluence
# Description
This document serves as a plugin configuration guide. For JIRA and Confluence versions 7.0 and above, which come with built-in SSO 2.0 configuration, please refer to JIRA & Confluence Single Sign-On Configuration.
# Authentication Configuration
# Confluence or Jira Configuration
# Adding the Plugin
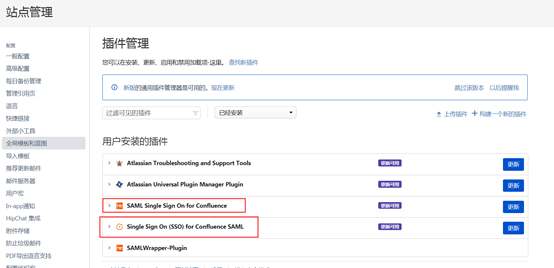
Log in to Confluence, find the Plugin Management in the administration console, search for and add either the "SAML Single Sign On for Confluence" plugin or the "Single Sign On (SSO) for Confluence SAML" plugin. Choose one.
Plugin activation requires a License.
# Plugin Configuration
To download the IDP metadata from IDaaS, please visit https://{your_domain}/api/v1/saml2/idp/metadata.
# Configuration for the "SAML Single Sign On for Confluence" Plugin:
The IDP configuration parameters are as follows. Other parameters can be left at their defaults:
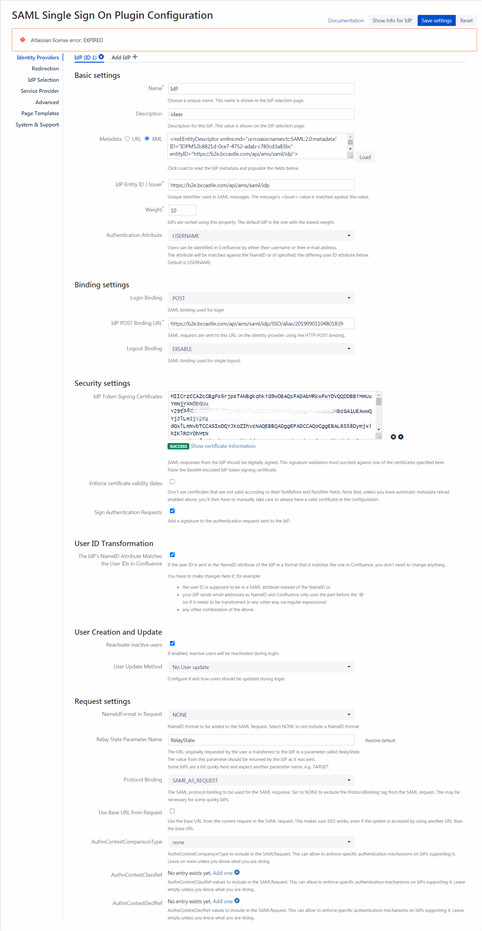
Parameter Description Name Custom Metadata IDP metadata, can be a URL address or XML file content IdP Entity ID / Issuer IDP EntityId Login Binding POST IdP POST Binding URL IDP's SSO URL IdP Token Signing Certificates IDP Certificate Click "show info for IdP" to auto-generate. These parameters will be used later when configuring the IDaaS application parameters:
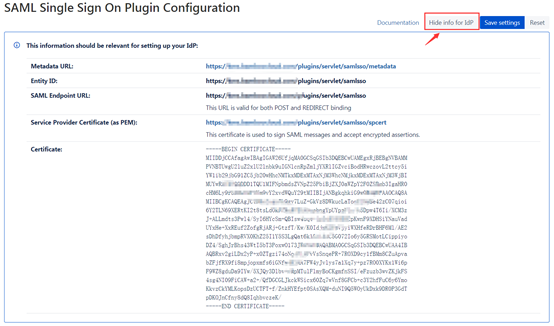
Parameter Description Entity ID SP Entity ID SAML Endpoint URL Assertion Consumer Service (ACS) URL Service Provider Certificate (as PEM) Download certificate in PEM format Certificate Signature verification certificate
# Configuration for the "miniOrange SAML Single Sign-On Configuration" Plugin:
Click the "Service Provider Info" tab to auto-generate. These parameters will be used later when configuring the IDaaS application parameters:
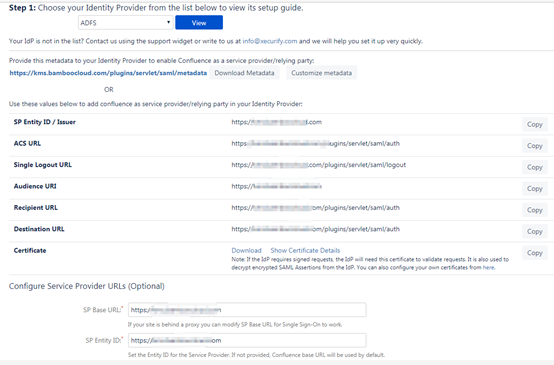
Parameter Description SP Entity ID / Issuer SP Entity ID ACS URL Assertion Consumer Service (ACS) URL Audience URI Audience URI Certificate Signature verification certificate Click the Configure IDP tab to edit the IDP information.
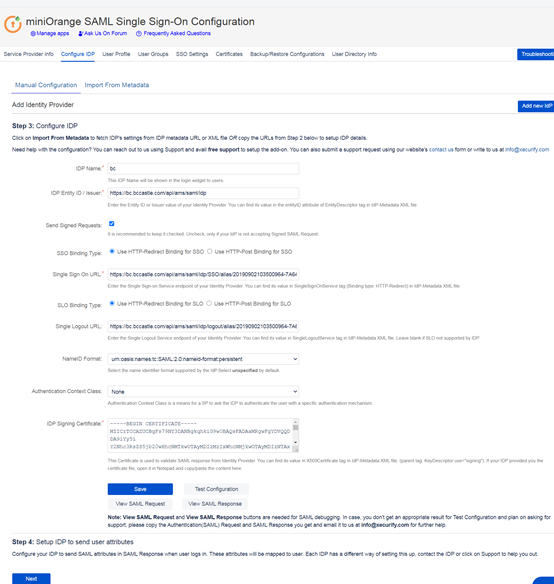
Parameter Description IDP Name Custom IDP Entity ID/Issuer IDP EntityId Send Signed Requests Request Signature, check SSO Binding Type Select Use HTTP-Redirect Binding for SSO Single Sign On URL IDP's SSO URL NameID Format Select SAML:2.0 nameid-format persistent; (Must be consistent with IDaaS application configuration) IDP Signing Certificate IDP: Certificate
# IDaaS Configuration {/idaas-configuration/}
Log in to the IDaaS Enterprise Center, select "Resources > Applications > Pre-integrated Applications", and add the built-in application Confluence or Jira.
Configure the authentication parameters.
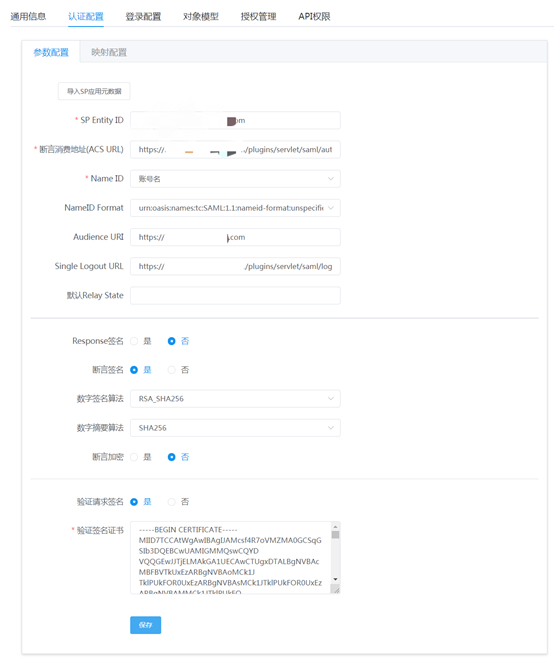
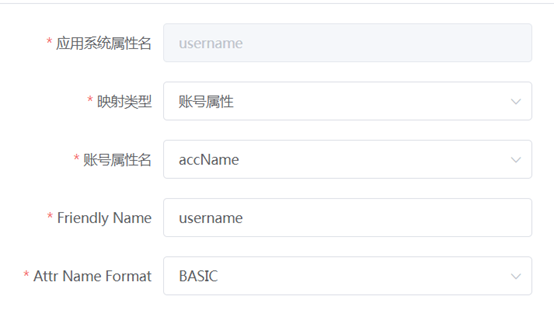
Parameter Description SP Entity ID SP Entity ID / Issuer from the Confluence configuration Assertion Consumer Service URL (ACS URL) ACSURL NameID Select Account Name NameID Format Select Audience URI Audience URI Verify Request Signature Yes Verify Signature Certificate Certificate from Confluence or Jira Configure mapping parameters (add the username attribute).
After configuration is complete, switch to the "Authorization Management > Application Accounts" tab to add an account. The application account name here should match the account name in Confluence or Jira.
# Login Verification {/login-verification/}
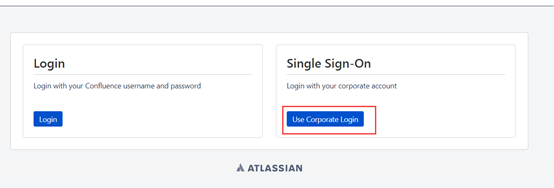
# Application-Initiated Login {/application-initiated-login/}
Click the Use Corporate Login button, and it will automatically redirect to the IDaaS authentication center for login.
# IDaaS-Initiated Login {/idaas-initiated-login/}
Log in to the IDaaS User Center, click on the application logo to single sign-on into the application system.
