CloudCC CRM Single Sign-On
# Description
This document describes how to implement IDaaS login for CloudCC CRM.
# Process Flow

# Authentication Configuration
# CloudCC Configuration
Log in to the IDaaS Enterprise Center, navigate to Settings > Service Configuration > IDP Configuration to view the IDP configuration information.
Copy the IDP certificate content and save it as an idp.cer file.

Log in to the CloudCC admin console, navigate to Login Configuration > Single Sign-On Settings, and add new configuration information.
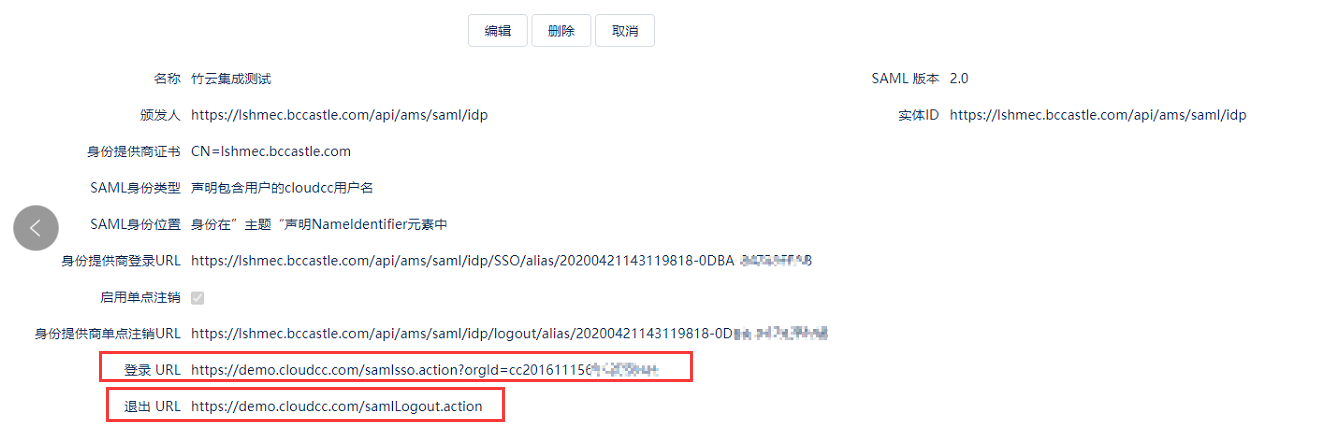
Parameter Description Name: Custom Issuer: Enter the IDP EntityId from IDaaS Entity ID: Enter the IDP EntityId from IDaaS Identity Provider Certificate: Import the idp.cer file SAML Identity Type: Assertion contains the user's CloudCC username SAML Identity Location: Identity is in the NameIdentifier element of the "Subject" assertion Identity Provider Login URL: Enter the SSO URL from IDaaS Identity Provider Single Logout URL: Enter the IDP Logout URL from IDaaS
The Login URL and Logout URL automatically generated by CloudCC will be used in the next step when configuring the application parameters in IDaaS.
# IDaaS Configuration
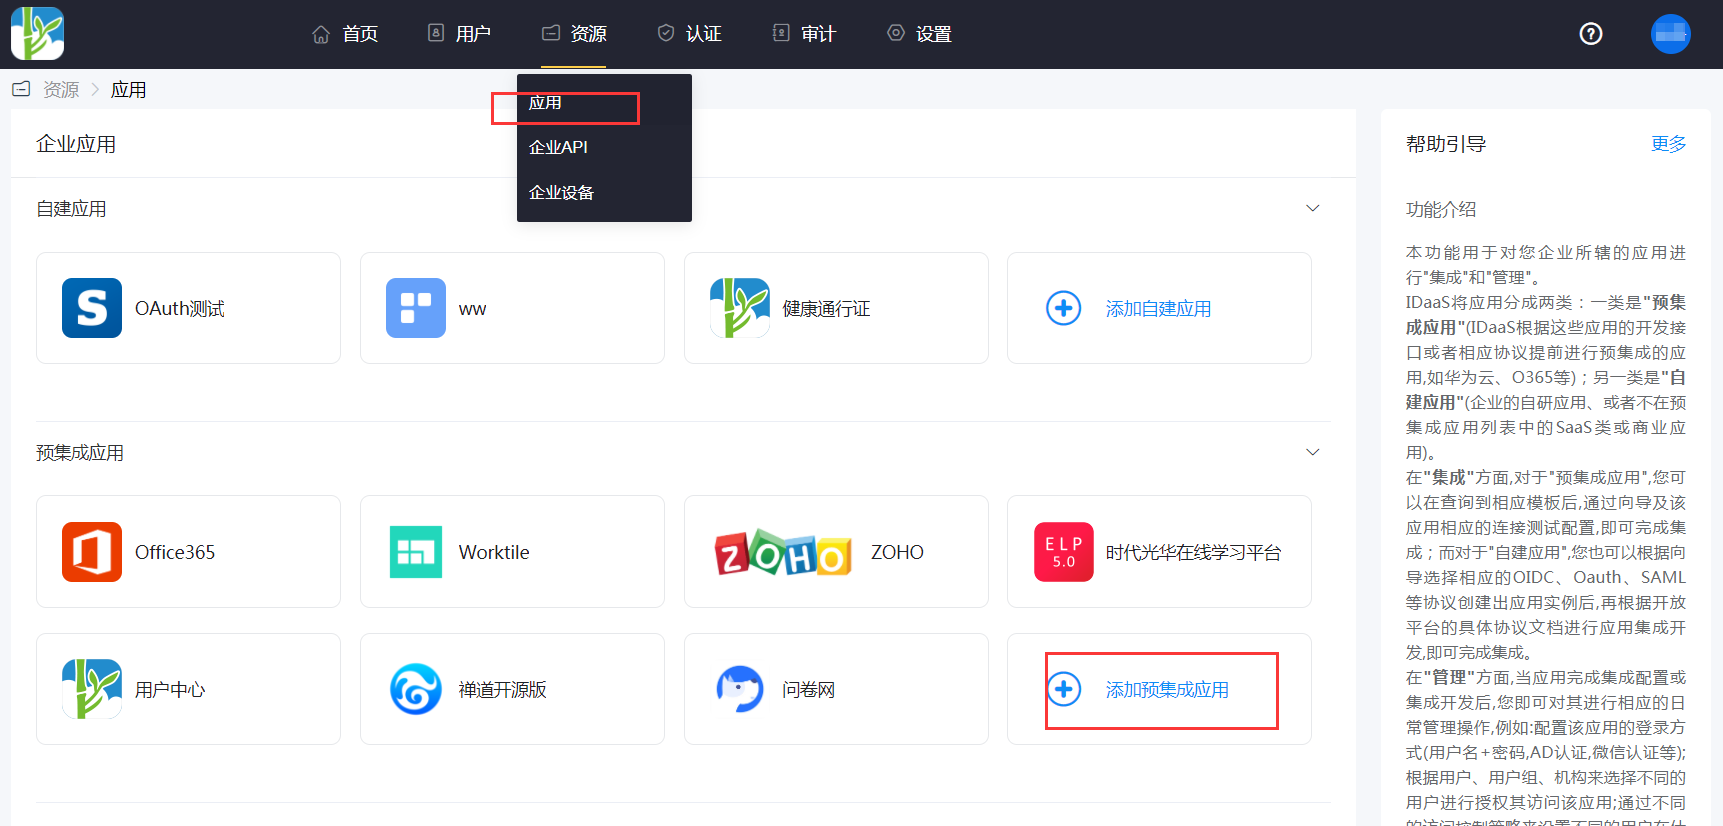
Log in to the IDaaS Enterprise Center, navigate to Resources > Applications, click Add Pre-integrated Application, and search for CloudCC.
Configure the application parameters.
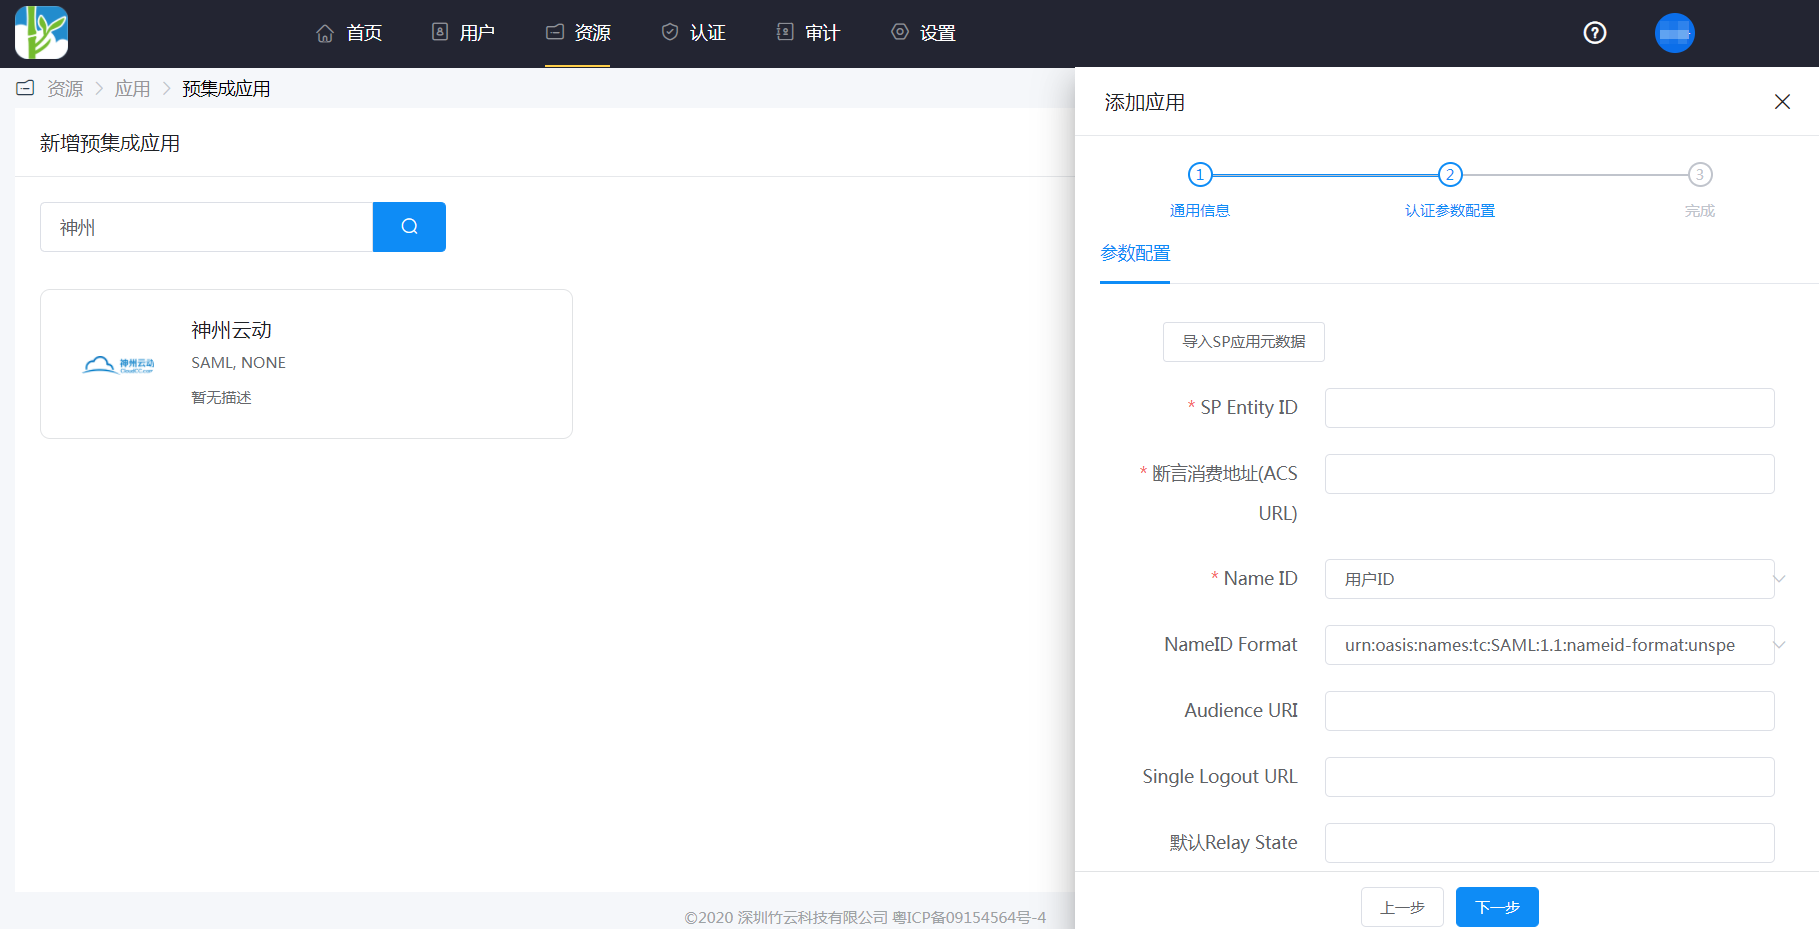
Parameter Description SP Entity ID: Enter the Login URL from CloudCC Assertion Consumer Service URL: Enter the Login URL from CloudCC NameID: Application Account NameID Format: Default Audience URI: Enter the Login URL from CloudCC Single Logout URL: Enter the Logout URL from CloudCC Response Signature: No Assertion Signature: Yes Signature Algorithm: RSA_SHA256 Digest Algorithm: SHA256 Assertion Encryption: No Validate Request Signature: No Go to Application Details > Authorization Management > Application Accounts, click the Add Account button, select the authorized user, and enter the CloudCC username in the Application Account field.
# Login Verification
Authorized users log in to the IDaaS User Center, click on the CloudCC application logo, and can then enter the CloudCC application system.